Barley Salad with Lemon

This barley salad is irresistibly fresh and tasty! Pair the whole grain with crunchy veggies and cover in a lemon and olive oil dressing.

Barley Salad

Here’s a unique grain salad that you won’t be able to resist: try Barley Salad! To be fair, barley isn’t often the star in a salad; typically trendier grains like quinoa and farro rein supreme. But this whole grain is absolutely ideal: its chewy texture and nutty flavor are the perfect contrast to crunchy veggies, garlic, herbs, and lemon olive oil dressing. On first bite, we were both smitten…and a bit surprised, honestly: it’s weirdly delicious! It’s our new favorite for cookouts, picnics, and make-ahead lunches.

Ingredients for barley salad

This barley salad is a Mediterranean-style salad featuring crunchy veggies, herbs, feta cheese, lemon and olive oil. It’s quick and simple to put together, with the formula: make the grain, chop the veggies, and add the dressing. You’ll need about 30 minutes and these ingredients to put it together:

  • Pearl barley: see below for more about types of barley
  • Garlic
  • Shallot
  • Cherry tomatoes
  • Bell pepper
  • Fresh herbs: we used parsley and basil
  • Feta cheese crumbles
  • Lemon juice and lemon zest
  • Olive oil
  • Salt and pepper

Types of barley

There are two types of barley you can use for this barley salad: hulled and pearl. The difference is similar to white rice vs brown rice: like brown rice, hulled barley has less of the grain removed. We like using pearl here because it cooks faster, but some people prefer the nutritional profile of hulled. However, the nutritional differences between the two aren’t very significant! Pearl barley is still a great source of protein and fiber.

  • Hulled barley has just the outer husk of the grain removed, so it has more fiber than the pearl variety. It’s darker in color and takes about 1 hour to cook.
  • Pearled or pearl barley is the more common form that has the outer husk and bran layers removed. It takes less time to cook, about 30 minutes. It’s still very nutritious.

How to make barley salad: a few tips

This barley salad is quick and easy to mix up! There are just a few things to know:

  • Spread the cooked barley onto a baking sheet to cool. Spreading out the grains in a single layer makes them cool faster. To speed up the process, you can pop the sheet in the freezer for a few minutes to get the grains to come to room temperature.
  • You can also cook the barley in advance. Simply refrigerate 1 to 2 days until you’re ready to make the salad.
  • Use fresh herbs like parsley, basil or other. The easiest is to use all parsley: but you can also use a mix! We used parsley and basil. Other good options are dill or mint.

Storage info

This barley salad keeps well, so it’s perfect for make-ahead lunches or picnics! Store it refrigerated for up to 5 days. The flavor is best right away but tastes great after refrigeration; you may need to revive the flavors with a pinch or two of salt.

More grain salad recipes

Love a good grain salad? Here are a few more ways to make a tasty salad with whole grains:

This barley salad recipe is…

Vegetarian, vegan, plant-based, and dairy-free.

Print
Barley Salad

Barley Salad with Lemon


  • Author: Sonja Overhiser
  • Prep Time: 15 minutes
  • Cook Time: 30 minutes
  • Total Time: 45 minutes
  • Yield: 6 side dish servings

Description

This barley salad is irresistibly fresh and tasty! Pair the whole grain with crunchy veggies and cover in a lemon and olive oil dressing.


Ingredients

  • 1 cup pearl barley
  • ¾ teaspoon kosher salt, divided
  • 1 large garlic clove, minced
  • 1 shallot, sliced
  • 1 cup cherry tomatoes, sliced into quarters
  • 1 bell pepper, diced (or 1/2 yellow and 1/2 red)
  • ¼ cup chopped fresh parsley or mix of herbs (we used parsley and basil)
  • ½ cup feta cheese crumbles (omit for vegan and add more salt to taste)
  • 2 tablespoons lemon juice, plus zest of ½ lemon
  • 1 tablespoon olive oil
  • Fresh ground black pepper

Instructions

  1. Place the barley in a saucepan or pot with 3 cups water and ¼ teaspoon kosher salt. Bring to a boil, then reduce the heat and simmer 25 to 30 minutes (or 45 to 1 hour if using hulled barley; you can add more water if the pan becomes dry).
  2. Drain any excess water. Place the barley in a single layer on a baking sheet and allow to cool for a few minutes (pop it in the freezer for 2 minutes to speed up the process and get the grains to room temperature).
  3. Meanwhile, mince the garlic and slice the shallot. Slice the cherry tomatoes in quarters. Dice the bell pepper. Chop the dill and mint.
  4. When the barley is done resting, place it in a large bowl with the chopped vegetables and herbs. Add the feta cheese crumbles, lemon juice and zest, the remaining 1 tablespoon olive oil, ½ teaspoon kosher salt, and a few grinds of black pepper. Mix gently to combine.
  5. Serve immediately or refrigerate for up to 5 days (flavor is best right away but tastes great after refrigeration; you may need to revive the flavors with a pinch or two of salt).
  • Category: Salad
  • Method: Stovetop
  • Cuisine: American
  • Diet: Vegetarian

Keywords: Barley salad

A Couple Cooks - Recipes worth repeating.


from A Couple Cooks https://ift.tt/p69ledC

Easy Zucchini Boats

This stuffed zucchini boats recipe has a hearty filling topped with gooey cheese. It’s a tasty dinner idea that pleases everyone!

Zucchini Boats

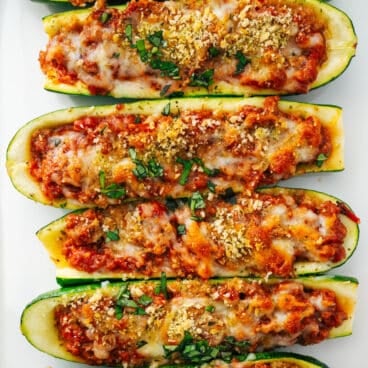
Got zucchini? Let’s make stuffed Zucchini Boats! We’ll be honest: we’re not huge fans of this green vegetable. But this recipe? This one made us true converts. Hollow out zucchini into shells, then stuff it with sausage, tomatoes, garlic, mozzarella and Parmesan cheese. Top with some crispy breadcrumbs, bake until golden brown, and wow! These are packed with intensely savory flavor. This recipe makes a zucchini lover out of anyone! You can use either plant-based sausage or regular, depending on your diet (we used plant-based).

Ingredients for zucchini boats

This stuffed zucchini boats recipe is a fun and easy way to turn zucchini into a main dish. It’s loads easier than Zucchini Lasagna with similar flavors, and works for gluten-free and vegetarian diets. Here we used plant-based sausage, which has come a long way in the last few years. It’s not something we eat often, but it’s a great option here: or you can use a homemade version. More on that below! Here’s what you’ll need for zucchini boats:

  • Zucchini
  • Sausage: plant-based sausage, crumbles, or standard Italian sausage (or substitute Vegan Taco Meat)
  • Garlic
  • Fire roasted tomatoes
  • Dried oregano, fennel seeks, salt and pepper
  • Parmesan cheese
  • Mozzarella cheese (whole milk)
  • Italian panko (or breadcrumbs)
  • Fresh basil or parsley, to garnish
Zucchini Boats

For the sausage: plant-based or regular

The plant-based sausage and crumbles on the market these days are higher quality than in the past. We used to be solidly against the stuff because it felt too processed, but now we eat it occasionally. It’s made of pea protein and has a texture and flavor that’s remarkably similar to meat. Here are a few notes on the sausage component of this recipe:

  • Use any plant-based crumbles or sausage. We like the brands Impossible and Beyond. Sausage is harder to find so you can use any type of crumbles or ground beef. We used Impossible Sausage.
  • Try homemade Vegan Taco Meat. This homemade mixture of mushrooms, walnuts and savory spices remarkably tastes like meat. Omit the cumin and substitute ½ tablespoon dried oregano.
  • Or, go for regular Italian sausage. If you’re a meat eater, regular sausage works beautifully. Make sure to drain any extra fat before adding the sauce ingredients.
Zucchini

Tips for making this stuffed zucchini boats recipe

Making stuffed zucchini boats is pretty straightforward, but we’ve got a few tips to help the process. Here’s what to know:

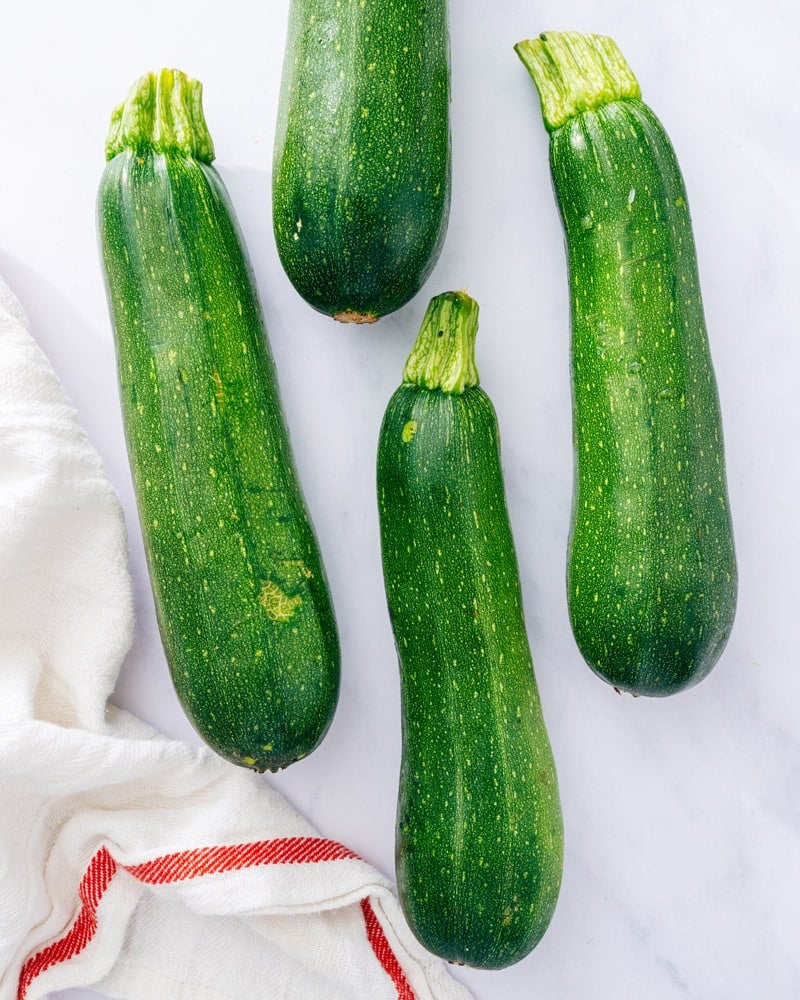
  • Use medium to medium-small zucchini. You don’t want those massive garden zucchini here: they’re much too large.
  • Only cut off the stem end! Don’t cut off both ends or you don’t get the boat shape! I accidentally when on autopilot when preparing this recipe and chopped off both ends. (It still works, it just doesn’t look as nice and filling may drip out then end while baking.)
  • Use fire roasted tomatoes. Fire roasted tomatoes add the best flavor here: they taste sweet and smoky right out of the can. If you can’t find them, substitute best quality tomatoes with 1 teaspoon sugar and ½ teaspoon smoked paprika. Or, use 1 ½ cups best quality marinara sauce.
  • Whole milk mozzarella cheese makes a difference. It melts much better than part skim and has a richer flavor. It also melts better when reheating.

Diet variations

This stuffed zucchini boats recipe fits a few different diets: it’s a perfect gluten-free dinner idea with a minor tweak. Here’s what to know:

  • Gluten free: Omit the breadcrumbs or use gluten-free breadcrumbs or panko. (It tastes just as good without the crunchy topping!)
  • Vegetarian: Use plant based sausage, crumbles, or 2 cups Vegan Taco Meat.
Zucchini Boats

Zucchini boats make-ahead & leftovers info

This zucchini boats recipe takes about 45 minutes to make in total, which can make it tricky for a weeknight meal. Here are a few ideas for advanced prep:

  • Make the entire recipe in advance. Make the entire recipe in advance and refrigerate. The day of serving, top with breadcrumbs and bake at 400 degrees for about 20 minutes until warmed through and the cheese is melted.
  • Make the filling and hollow out the boats in advance: You can make the entire filling and hollow out the boats 1 day in advance and refrigerate. Then just bake following the instructions below.

More zucchini recipes

Love this oblong green veggie? Here are a few more zucchini recipes to enjoy:

This zucchini boats recipe is…

Gluten-free (sans breadcrumbs) and vegetarian.

Print
Zucchini Boats

Zucchini Boats


  • Author: Sonja Overhiser
  • Prep Time: 25 minutes
  • Cook Time: 20 minutes
  • Total Time: 45 minutes
  • Yield: 4 servings

Description

This stuffed zucchini boats recipe has a hearty filling topped with gooey cheese. It’s a tasty dinner idea that pleases everyone!


Ingredients

  • 4 medium zucchini
  • Olive oil, for rubbing
  • ¾ teaspoon kosher salt, divided
  • Fresh ground black pepper
  • 1 teaspoon dried oregano, divided
  • 14 to 16 ounces plant based sausage, crumbles, or standard Italian sausage (or substitute 2 cups Vegan Taco Meat)
  • 2 garlic cloves
  • 15-ounces fire roasted crushed tomatoes**
  • ¼ teaspoon fennel seeds
  • 6 tablespoons grated or shredded Parmesan cheese, divided
  • ½ cup whole milk mozzarella cheese
  • 2 tablespoons Italian seasoned panko (or plain panko; omit or use gluten-free breadcrumbs for gluten-free)
  • 1 tablespoon fresh basil or parsley, chopped

Instructions

  1. Preheat the oven to 425°F.
  2. Cut off the stem ends of the zucchini. Cut them each in half lengthwise and scoop out the insides with a spoon (you’ll want a thin edge around the outside of the boat). Place them on a baking sheet. Rub each boat with a bit of olive oil. Then sprinkle all 8 boats with a heaping ¼ teaspoon salt, ½ teaspoon oregano and fresh ground black pepper, divided between the boats. 
  3. Place the sausage in a medium skillet and cook according to the package instructions, 2 to 3 minutes for plant-based and 6 to 7 for regular sausage (for regular sausage, drain any excess fat after cooking). Add the garlic to the pan with the sausage and cook 30 seconds, then add the tomatoes, fennel seed, ½ teaspoon dried oregano, ½ teaspoon kosher salt, and ¼ cup Parmesan cheese. Heat for 1 minute until warmed through. 
  4. Top with the mozzarella cheese and 2 tablespoons Parmesan cheese. Then sprinkle with the panko. 
  5. Bake for 20 minutes until the cheese is melted and golden brown. Let stand for 2 minutes before serving. Leftovers store up to 3 days refrigerated. 

Notes

*For plant-based crumbles or sausage, we like Impossible or Beyond (we used Impossible sausage here). For a homemade version, try Vegan Taco Meat: omit the cumin and use ½ tablespoon dried oregano.

**Fire roasted tomatoes add the best flavor here: they taste sweet and smoky right out of the can. If you can’t find them, substitute best quality tomatoes with 1 teaspoon sugar and ½ teaspoon smoked paprika. Or, use 1 ½ cups best quality marinara sauce.

  • Category: Main Dish
  • Method: Baked
  • Cuisine: Vegetables
  • Diet: Vegetarian

Keywords: Zucchini boats, stuffed zucchini boats, zucchini boat recipe, zucchini boat, zucchini boats recipe

A Couple Cooks - Recipes worth repeating.


from A Couple Cooks https://ift.tt/q2ALab8

Easy Mango Sorbet

This mango sorbet recipe has an irresistibly creamy texture and sweet fruity flavor! The ultimate quick and easy dessert.

Mango Sorbet

Here’s a dessert that’s fast, easy, massively flavorful and pleases everyone: Mango Sorbet! It’s irresistibly creamy and frosty, with a pure honey-sweet tropical mango essence and a pop of lime on the finish. It’s so refreshing, and there’s almost no one who will turn this down (in our research, at least!). Kids and grownups alike are fans, and it works for almost any diet. Even better: it takes just a few minutes to blend up!

Ingredients for mango sorbet

Mango sorbet is so simple to make at home, so you can skip buying the store-bought stuff. You’ll just need a handful of ingredients and a blender. If you’ve got one, an ice cream maker is handy too: but we’ve got a no-churn option too! Here’s what you’ll need:

  • Frozen mangoes (or fresh; see variation below)
  • Lime juice
  • Sugar
  • Water
Mango Sorbet

No churn versus churn

All you’ve got to do: blend the ingredients together! (Head to the recipe below for the full instructions.) But here’s the great part: you can eat it right after blending if you like! Because of the frozen fruit, it’s already sorbet texture at this point. Here’s what to know:

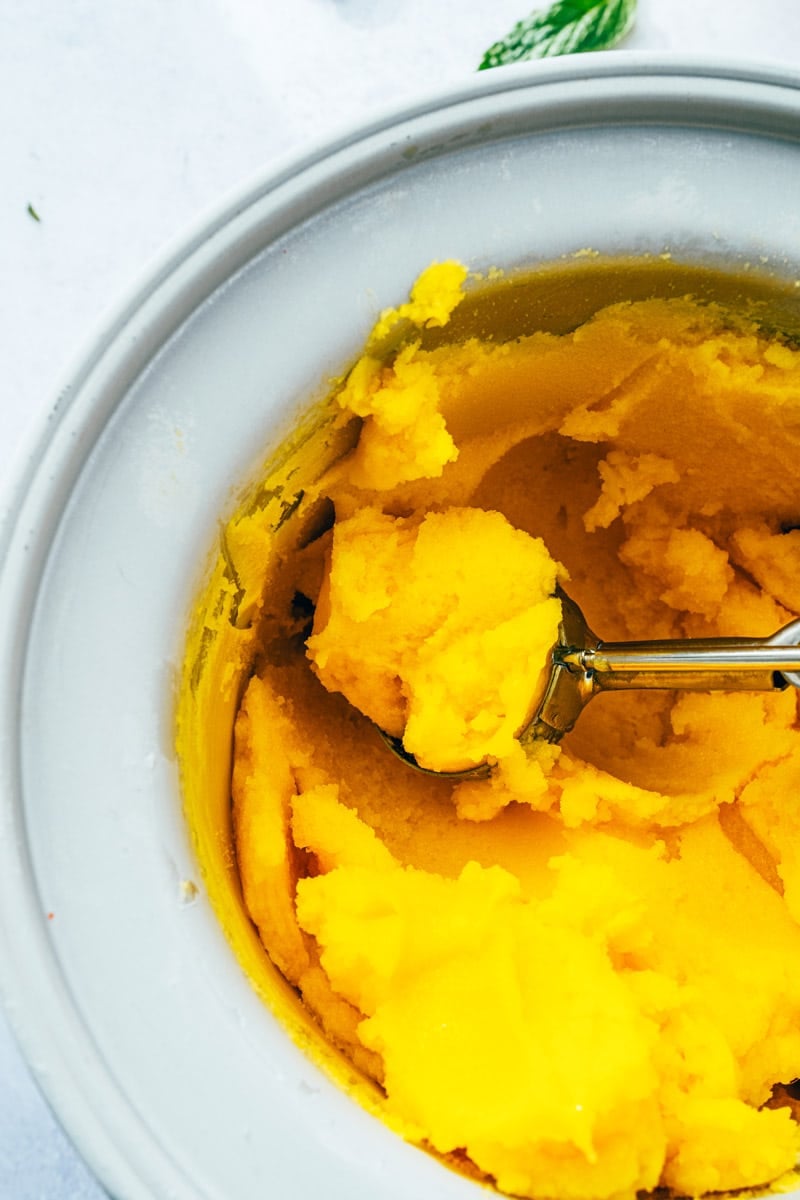
  • No churn sorbet: Eat the sorbet right after blending it. It has a loose texture that melts pretty quickly, but it works! However, it won’t make the lovely scoops like you see in the picture. You’ll need an ice cream maker for that!
  • Churn for 15 minutes: For the best sorbet texture, place the mango sorbet in an ice cream maker and churn for 15 minutes until it’s frosty and creamy.
Mango sorbet

Variation: use fresh mangos

You can also make this mango sorbet using fresh mangos! It does take quite a bit of time to dice enough mangos, but if you have fresh ones on hand it’s worth it! Substitute 3 cups diced mangos for the 1 pound frozen, and use ½ cup ice to blend instead of ¾ cup water. Then freeze in an ice cream maker!

Investing an an ice cream maker

An ice cream maker is the best tool for the job with sorbet! It’s a great investment, and you can use it to make sorbets and ice creams all year round (like Strawberry, Lemon, Lime, Raspberry, Pineapple, Peach, or Watermelon Sorbet). Here’s the 2 quart ice cream maker we use. It’s a great gift idea, too! Use it as a housewarming present or a fun surprise for ice cream lovers. We’ve had ours for years and it holds up well.

Make ahead & storage info for mango sorbet

When it comes to mango sorbet, homemade sorbet is best the day it is made. The texture is ultra creamy and frosty right out of the ice cream maker. When you freeze it overnight, it becomes very solid. Here are a few tricks to working with leftovers:

  • Line the storage container with parchment paper. This helps so the sorbet doesn’t freeze to the edges of the container, and makes it easier to defrost.
  • Make mango sorbet up to 2 hours in advance. It will start to freeze to the edges of the container, so give it a good stir before serving.
  • Leftovers save 1 week, but defrost at room temp 20 to 30 minutes. Leave out the container on the counter until it defrosts a bit. To revive the texture, you can also give it a few pulses in a blender or food processor: but we’ve found the texture holds up pretty well. However: don’t expect it to be like store-bought mango sorbet, which stays softer in the freezer.
Mango sorbet recipe

More mango recipes

Mangos are a sunny fruit that work beautifully in both sweet and savory preparations! Here are a few favorite mango recipes:

This mango sorbet recipe is…

Vegetarian, vegan, plant-based, dairy-free and gluten-free.

Print
Mango Sorbet

Easy Mango Sorbet


  • Author: Sonja Overhiser
  • Prep Time: 25 minutes
  • Cook Time: 0 minutes
  • Total Time: 25 minutes
  • Yield: 1 pint (2 cups)

Description

This mango sorbet recipe has an irresistibly creamy texture and sweet fruity flavor! The ultimate quick and easy dessert.


Ingredients

  • 1 pound* frozen diced mango (see notes for fresh mango)
  • ¾ cup water
  • 6 tablespoons granulated sugar
  • 2 tablespoons lime juice
  • 1 pinch kosher salt
  • Adders: ½ teaspoon grated ginger, ½ teaspoon minced jalapeno pepper (seeds removed)

Instructions

Note: Make sure the base of the ice cream maker is frozen overnight before making this recipe. 

  1. Place half the frozen mango chunks in a food processor or high-powered blender with the water, sugar, and lime juice. Puree until smooth, stopping and scraping down the sides as necessary. Then add the remaining mango chunks and puree until smooth, adding a splash more water if necessary. This forms a no churn sorbet that you can eat immediately, or move to Step 2 if you have an ice cream maker. (To make ahead, you can refrigerate at this point until you want to churn, up to 2 days.)
  2. Pour the mixture into an ice cream maker and freeze for about 15 minutes, until the texture becomes frosty and creamy. Serve immediately. Or, line a container with parchment paper and freeze up to 2 hours day of. Store in a parchment lined sealed container for up to 1 week; allow to come to room temperature for about 20 to 30 minutes before scooping.

Notes

*Some frozen mangos are sold in 15 ounce bags: this quantity also works! You can also use fresh mangoes. Use 3 cups diced fresh mangoes and substitute ½ cup ice for the ¾ cup water: blend all ingredients and freeze in an ice cream maker. 

  • Category: Dessert
  • Method: Sorbet
  • Cuisine: Frozen
  • Diet: Vegan

Keywords: Mango sorbet, mango sorbet recipe

A Couple Cooks - Recipes worth repeating.


from A Couple Cooks https://ift.tt/vZo5jk7

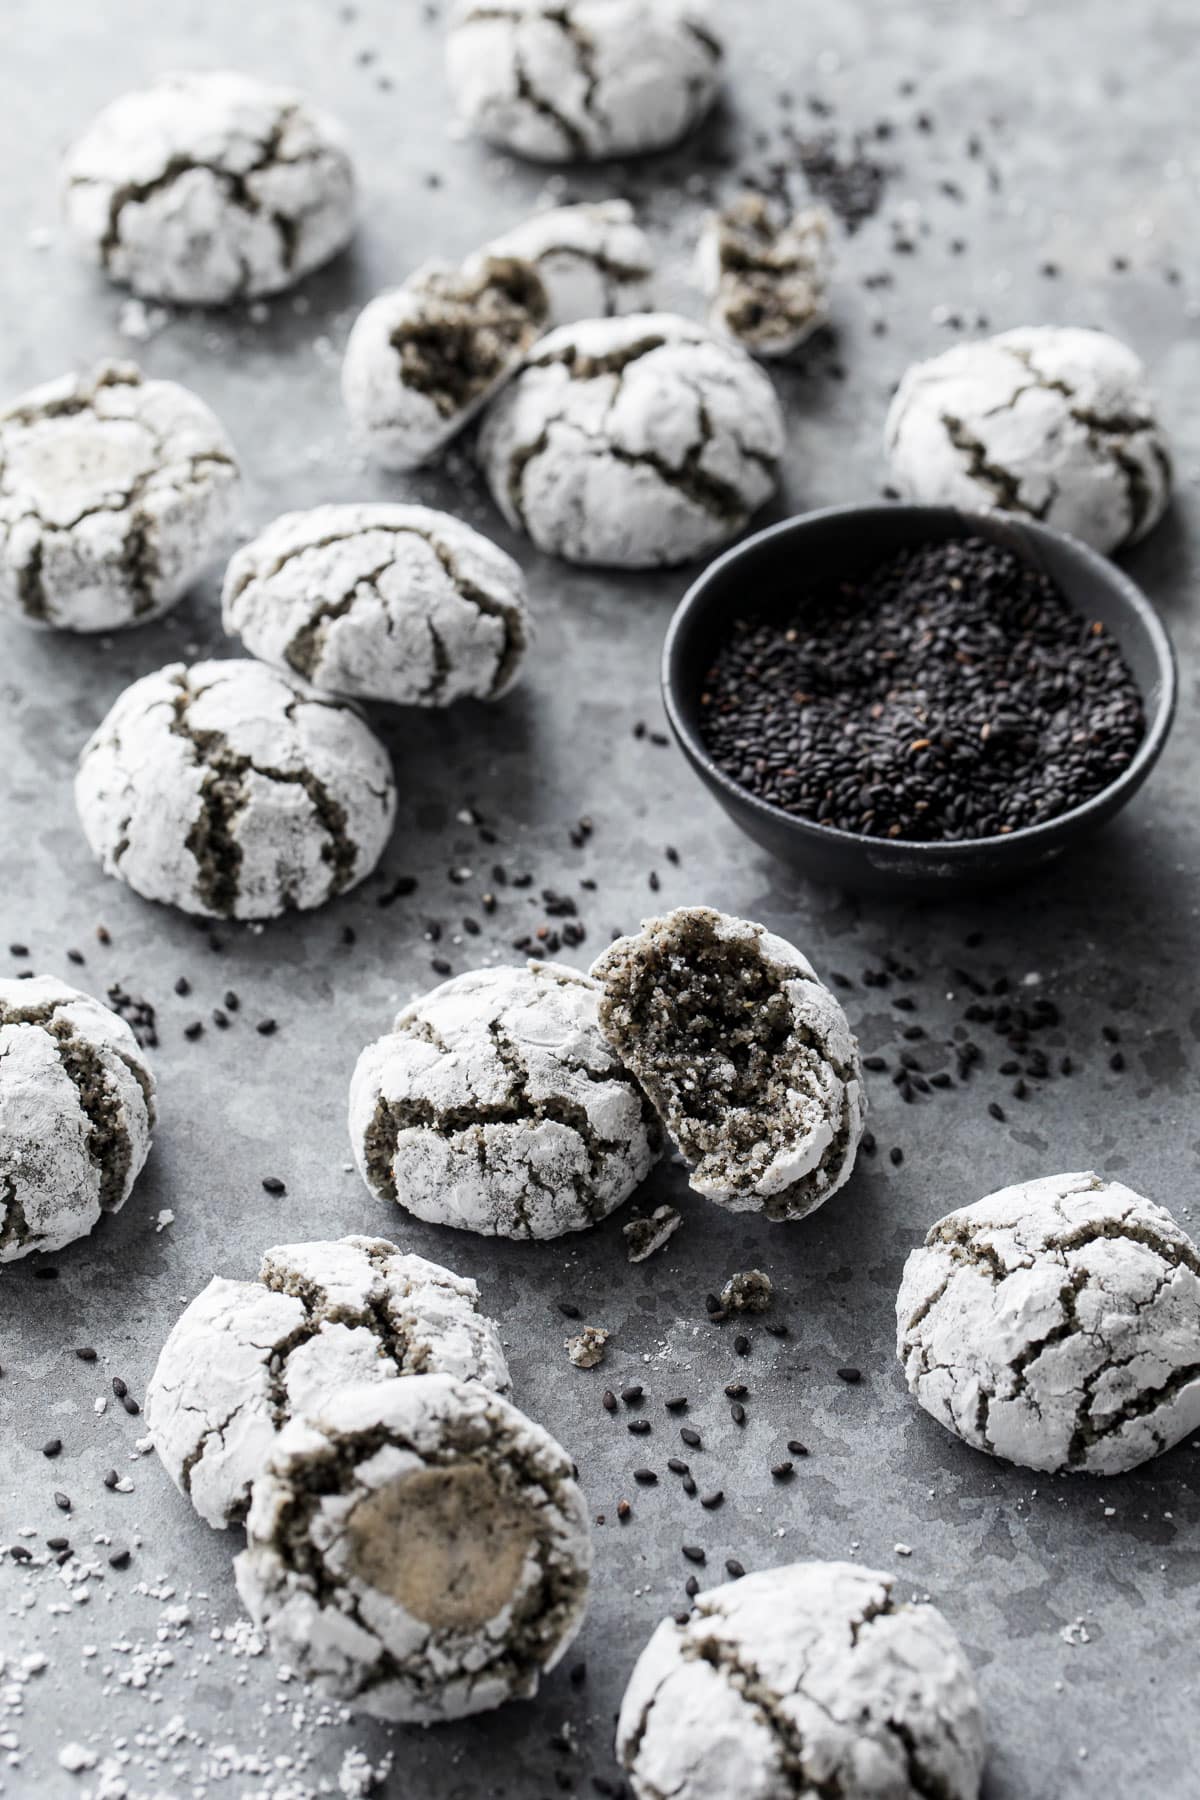
Black Sesame Amaretti Cookies

Amaretti are some of my favorite cookies for a reason: they are ridiculously simple to make, with only 3 main ingredients—plus the black se...