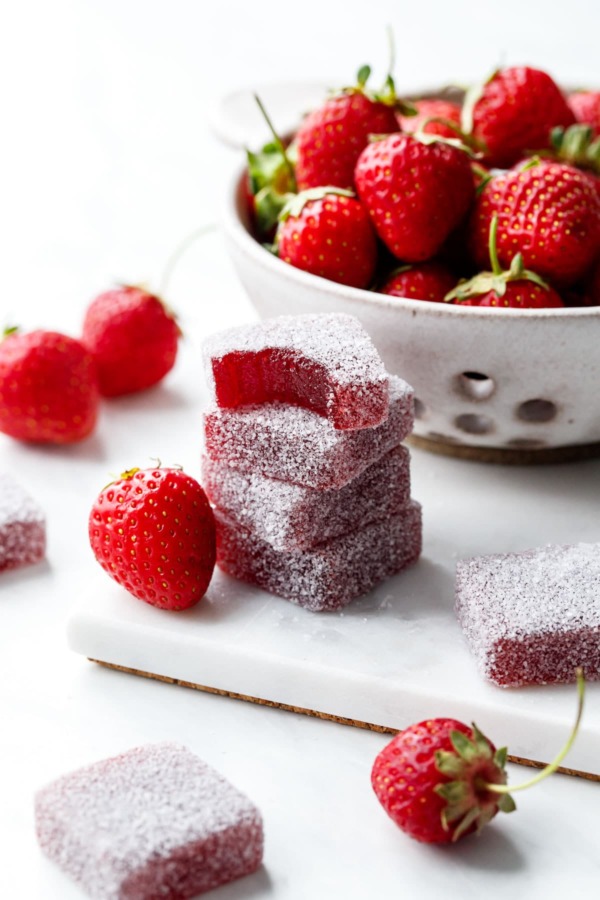
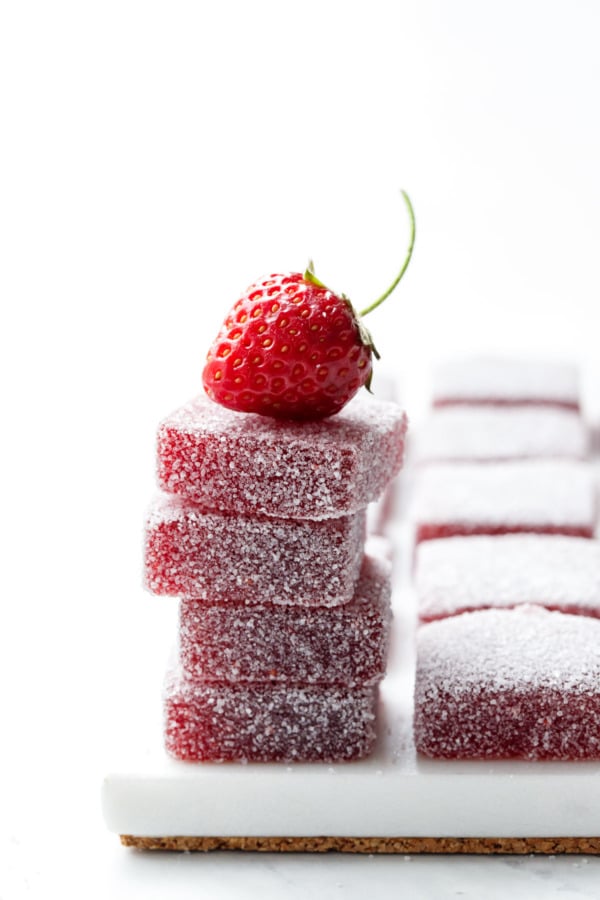
These homemade sour gummies are bursting with strawberry flavor from real fruit, coated with citric acid and sugar for a spectacularly sour finish.
Making your own gummy candies is not for the feint of heart, but the results are well worth the effort. These pectin-based gummies are sweet and sour with a delightful jelly-like texture that you’ll adore.
Before we start, let me just say: these aren’t those kinds of gummies. Don’t get me wrong, they are plenty fun, but just not that kind of fun, if you know what I mean. I have no experience with such confections (we live in the wrong state for that), and thus I cannot advise as to how you might convert this recipe into that kind of recipe, so please don’t ask. Sorry!
Now that that is cleared up, let me tell you a bit about these delightful (and family friendly!) sour strawberry gummy candies.
There is a lot of info in this post, including plenty of sugar science, that I encourage you to read through before attempting this recipe.
Made using real fruit (versus fruit extract or flavoring concentrates like many gummy recipe), these homemade gummies taste like a perfectly ripe spring strawberry, only more intense. Both the sugar and the citric acid serve to amp up the strawberry flavor even more.
The gummy itself is not overly sour; rather, the tart kick comes from a coating of sugar mixed with citric acid. You can certainly opt to use just sugar if you wanted a sweeter gummy (though don’t leave out the citric acid in the candy base itself as that is necessary for a proper set). You can also increase the citric acid in the coating for a truly mouth-puckering result.
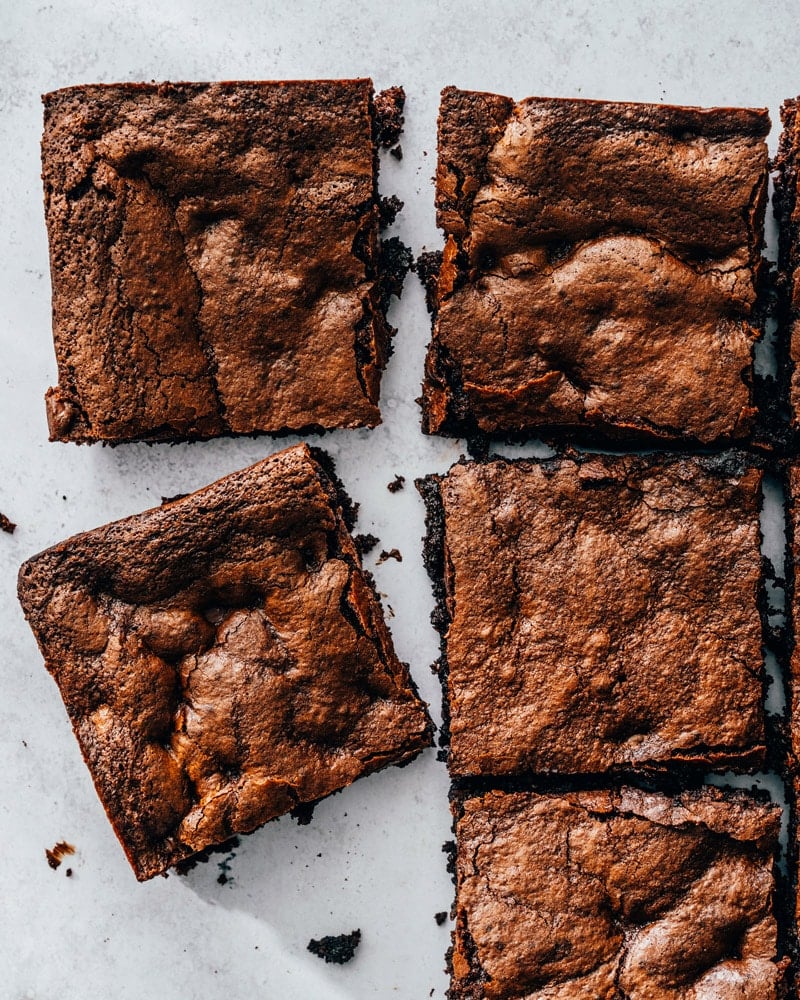
This gluten free brownies recipe is everything: thick, chewy, rich, fudgy and absolutely irresistible! No one will guess they’re flourless.
We try to steer away from superlatives on this website. But this recipe deserves its moniker. These really are amazing gluten free brownies! They’re hefty and thick, with just the right chewy, fudgy texture. The rich chocolaty interior is absolutely irresistible, and studded with chocolate chips: it’s downright impossible not to take another bite. No one will know these are flourless: they please just about everyone.
Ingredients in gluten-free brownies
This gluten free brownies recipe is quick, simple and absolutely crowd pleasing. The idea came about as we were brainstorming ideas for a pizza party dessert that wasn’t full of more flour. The birthday girl loved brownies, so we created a flourless brownie to contrast all the gluten in our main course. After tinkering a bunch and taking some inspiration from our friend Tessa’s chewy brownies, we think we found the perfect combination. Here are the ingredients in this gluten free brownies recipe:
Eggs
Granulated sugar
Butter
Vegetable oil
Vanilla extract
Cocoa powder
Almond flour (not meal) or gluten free flour
Baking soda
Cornstarch
Kosher salt
Chocolate chips
The biggest key here? Using both butter and oil as the fat in this recipe leads to extra chewy, moist brownies. Want to make it dairy free? Use vegan butter as a stand in.
Almond flour vs meal: why it’s important
The only specialty ingredient you’ll need for this recipe? Almond flour. Make sure you don’t buy almond meal, because it’s a much different product. They’re both made of ground almonds, but the difference is in the raw material and the production method:
Almond flour is made from blanched almonds, or almonds with their skins removed. It’s ground very finely, resulting in a fluffy texture in baked goods.
Almond meal contains the skins, making it darker brown in color instead of off-white like almond flour. It has a coarser grind than almond flour and results in denser, chewy texture in baked goods.
Don’t have almond flour? If you’re baking for a gluten-free diet, you’re probably used to using this ingredient. But if you don’t have it on hand or can’t find it, you can substitute the same amount of gluten-free flour.
Tips for baking gluten-free brownies
This gluten-free brownies recipe is quick to whip up: it’s a matter of dump and stir! Here are some particulars around the baking process:
A metal 9 x 9″ pan makes the most even bake. You can also use an 8 x 8 pan, but you’ll need to increase the bake time slightly.
Grease the pan, then add parchment paper extending off of 2 sides. Cut it to length on the top and bottom, but let the left and right sides extend. This makes it easy to lift the brownies out of the pan after baking.
Bake until a toothpick inserted has some clinging crumbs: and watch out for chocolate chips! When you insert a toothpick, it will likely hit a chocolate chip which may makes it look like the batter isn’t done yet. Try again or go with your gut! You won’t want to overbake these.
Storage info
These gluten-free brownies last well when stored: in fact, they get even moister and fudgier! Here’s how to store them:
Room temperature: Store in a sealed container at room temperature for 3 to 4 days.
Refrigerated: Store refrigerated for 1 week (allow to come to room temperature before enjoying).
More brownie recipes
These gluten free brownies are our favorite brownie recipe…of all! Here are a few more you might enjoy:
Preheat the oven to 350 degrees Fahrenheit. Grease a metal 9-inch square baking pan. Line the pan with a piece of parchment paper, cut so that it extends on two sides to easily remove it from the pan.
Whisk the eggs, then whisk in the sugar, melted butter, oil and vanilla extract. Use a spatula to stir in the cocoa powder. Then stir in the almond flour, baking soda, cornstarch, and kosher salt and stir to combine into a smooth batter.
Fold in the chocolate chips.
Pour the batter into the prepared pan and spread it into an even layer with a spatula.
Bake for 28 to 30 minutes, until the center of the pan is set and a toothpick inserted has some clinging moist crumbs**. Allow to cool to room temperature before slicing into pieces, about 1 hour. Store in a sealed container at room temperature for 3 to 4 days,or refrigerated for 1 week (allow to come to room temperature before eating).
Notes
*For dairy-free, substitute vegan butter.
**When you insert a toothpick, it will likely hit a chocolate chip which may makes it look like the batter isn’t done yet. Try again or go with your gut! You won’t want to overbake these.
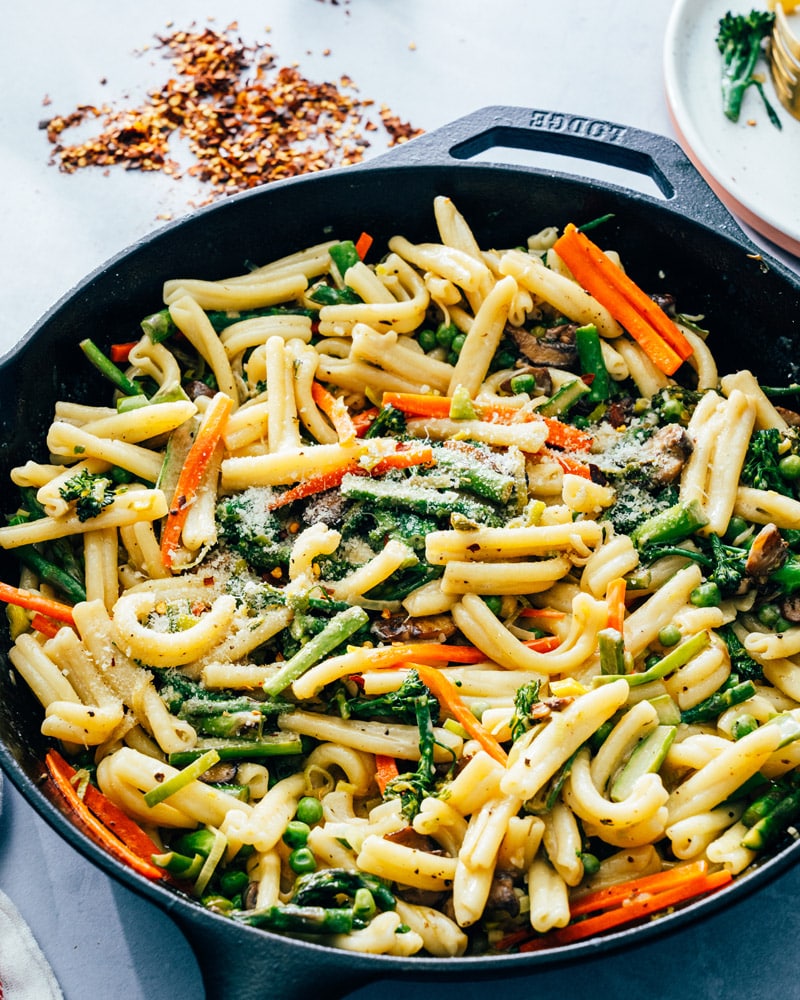
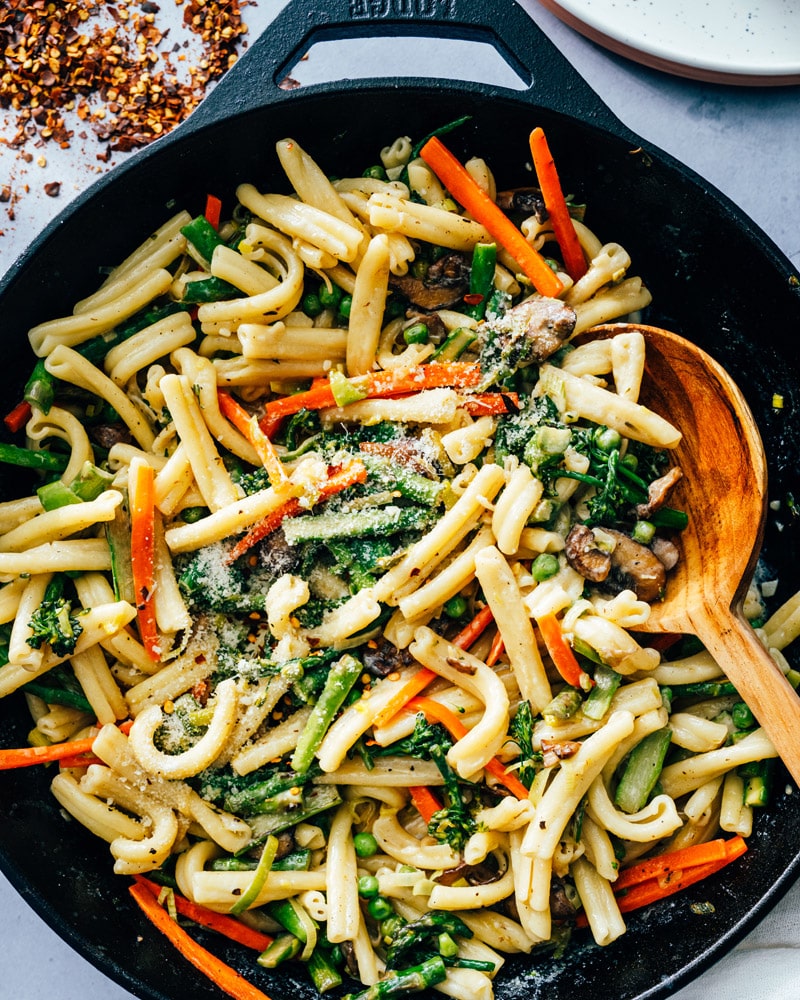
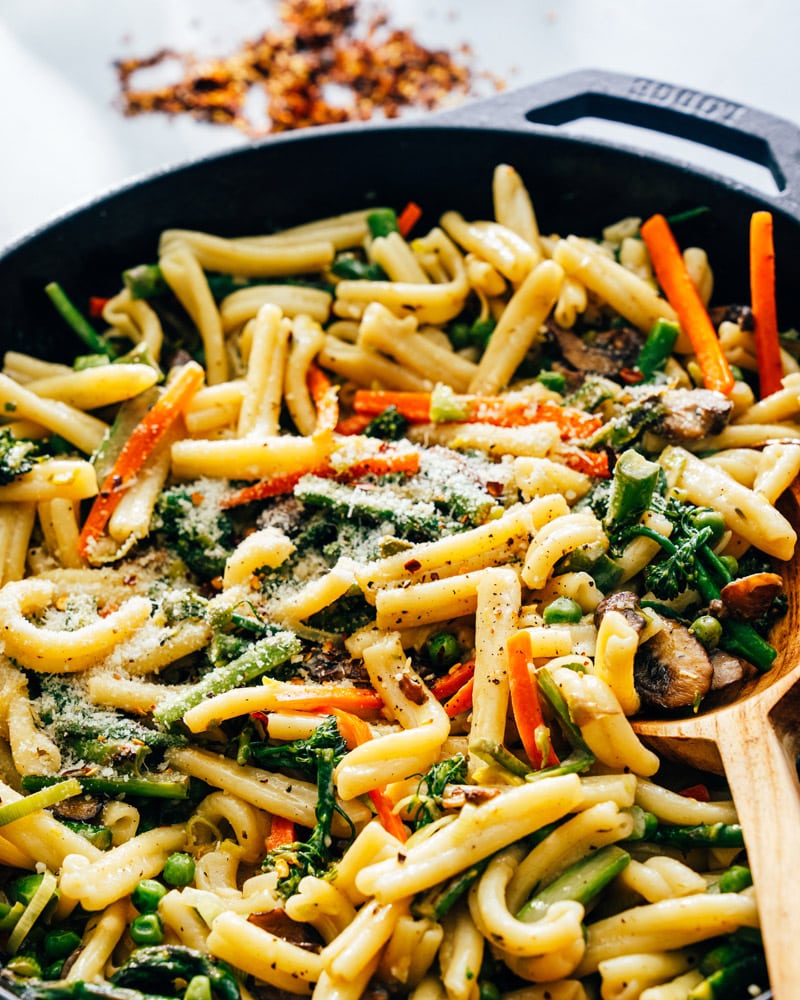
This pasta primavera recipe is bursting with fresh veggies and a creamy Parmesan sauce! It’s a veggie-packed dinner that pleases everyone.
Looking for a vegetarian pasta to impress? Try Pasta Primavera, the Italian-sounding American dish from the 1970’s that’s here to liven up your mealtimes! There are many ways to make a primavera, so here’s our spin. Tender pasta is mixed with spring vegetables like asparagus, broccolini, peas and carrots, then tossed with a creamy, luxurious Parmesan sauce. You won’t want the bowl to end!
The story behind pasta primavera
Pasta Primavera is an American pasta dish featuring fresh vegetables invented in the 1970’s. The dish was created by a New York chef named Sirio Maccioni at the home of an Italian businessman in Nova Scotia of all places. The dish mixed butter, cream, cheese, pasta and fresh vegetables, and went on to become popular all over the world. While it doesn’t sound like a revolutionary combination to our modern ears, it was the first of its kind.
What’s in this pasta primavera recipe?
Since then, Pasta Primavera has popped up on restaurant menus across the globe, popularly at Italian American chains like Olive Garden. There’s really no “correct” way to make this dish: no specifications on the exact sauce or the type of vegetables. Primavera means spring in Italian, so often you’ll see it with spring vegetables like asparagus and carrot. But just as many spins use summer vegetables like zucchini and tomatoes: so there’s a lot of variation!
In our opinion, a good Pasta Primavera should feature spring vegetables just like the title indicates, so that’s what we’ve used here. The veggies are accessorized with a creamy Parmesan sauce that makes everything taste irresistible. Here’s what you’ll need for this recipe:
Pasta: any shape! we like tortelli (shown), but any short or long shape works
Olive oil
Baby bella mushrooms
Asparagus
Leek: leek is a uniquely tasty spring vegetable; substitute shallot if you can’t find it
Broccolini: we love the elegant shape of broccolini here! You can substitute broccoli
Peas
Carrot
For the sauce: butter, garlic, flour, milk and Parmesan cheese
The basic idea? Cook the pasta, saute the veggies, make a quick cream sauce and mix it all together. Garnish with Parmesan cheese and serve warm.
Tips for cooking pasta to al dente
When it comes to any pasta dish, here’s the key: cook the pasta to the perfect al dente. Al dente means “to the bite” in Italian: pasta that’s tender with a firm center. Overcooked pasta turns out rubbery and unappetizing. Interestingly, it also has less nutrients and makes you less full. Here are some tips on how to cook pasta to al dente:
Set your timer a few minutes before the package instructions indicate. The timing on many pasta packages makes for overcooked pasta. Start taste testing the pasta a few minutes before the package says to.
Taste test and look for small white fleck at the core. You want to catch it right when there’s a small white fleck at the core, or just when it disappears.
Making the pasta primavera sauce
A few tips on the pasta primavera sauce: the sauce is a quick Parmesan sauce made with a roux. A “roux” is flour and butter cooked together (usually equal parts) that’s sed to thicken sauces. The cooking does go quickly, so you’ll want to understand the basic idea before you start.
Measure out the ingredients first, and don’t leave the stove. The cooking process goes so fast, you’ll want to have everything measured in advance.
Melt butter and saute the grated garlic 30 seconds. Be careful not to overcook: you don’t want it to brown!
Add flour and whisk constantly. Whisk constantly and cook just until it’s a golden color; be careful not to overcook.
Whisk in the milk gradually. Add a splash of milk and whisk constantly, then keep adding a few splashes at a time until the sauce is smooth. Simmer for several minutes, and the roux will thicken the sauce! It may feel like it won’t thicken, but just wait: it will come together in about 5 minutes.
Serving pasta primavera
This pasta primavera recipe takes a little over 30 minutes to make, but it’s pretty hands on: you don’t have a lot of waiting time to prep other items. So to make it into a meal, you’ll want some quick and simple sides. You can also add cooked protein to make the dish more filling. Here are a few ideas:
½ cup grated Parmesan cheese, plus more to garnish
Instructions
Bring a salted pot of water to a boil and cook the pasta to al dente (taste testing a minute or two before the package instructions indicate). Drain and toss the pasta with a bit of olive oil.
Meanwhile, prep the vegetables as noted above. In a dutch oven or large skillet, heat the olive oil over medium high heat. Cook mushrooms for 4 minutes, until starting to brown. Add asparagus, leeks, broccolini, carrots and ½ teaspoon kosher salt and cook additional 4 to 5 minutes until asparagus is tender and bright green. Add peas and continue cooking until peas are bright green, about 1 minute.
In a small or medium saucepan over medium heat, melt the butter. Add the grated garlic and cook 30 seconds until fragrant but not browned. Add the flour and whisk constantly for 1 minute to 90 seconds, until bubbly and golden. Add a splash of milk and whisk it in: the sauce will instantly turn chunky. Constantly whisking, continue to add splashes of milk and whisk them in until the entire quantity is incorporated and the sauce is smooth. Reduce the heat and whisk until the sauce thickens and no longer tastes like raw flour, about 5 minutes. Add ½ teaspoon kosher salt and the Parmesan cheese.
Drain the pasta, then add it to the skillet with the veggies and stir in the sauce. Taste and add the additional ½ teaspoon kosher salt. Serve warm, garnished with additional Parmesan cheese. Leftovers store well refrigerated.
There’s nothing better than the tangy, salty kick of this cucumber feta salad! It’s perfect for lunches, picnics, summer barbecues and more.
There’s nothing better than the cooling crunch of cucumber salad: and this one takes it up a notch with the punch of salty cheese. Try this Cucumber Feta Salad! It’s simple and no-frills with a punch of tangy vinegar and a salty burst of feta in every bite. Thinly sliced shallots add a note of savory onions, and it’s seasoned liberally with salt and pepper. It’s the best crunchy pairing for just about any meal: it’s great for lunches, picnics, summer barbecues and more!
Ingredients in cucumber feta salad
There are loads of ways to make a cucumber salad. In fact, most often we make this Cucumber Salad with Vinegar, where thin slices of cucumber and onion are marinated in a vinegar dressing for an hour before serving. This cucumber feta salad is even easier: simply mix the cucumbers with olive oil, vinegar, feta and a few herbs and you can eat immediately. Here’s what you’ll need:
The best type of cucumber to use in this cucumber feta salad? English cucumber, aka Persian cucumber. It’s got a much better flavor and texture that works well in this salad. Here’s why we prefer it here:
English cucumbers are long and straight, with a thin skin with ridges. The seeds are very small and the flavor is sweeter than a standard cucumber. The flesh has a bright green color, which looks lovely in salads! The best part: because of the thin skin and small seeds, it doesn’t need to be peeled or seeded before eating. You can find English cucumbers next to the standard cucumber in the produce section: it’s sold with a plastic covering to protect the delicate skin.
Standard slicing cucumbers are shorter, with thick, dark green skin and very large seeds. The thick skin and seeds can be bitter, so they’re often removed when cooking. You can use it here, but you’ll need to peel and seed it first. But we highly recommend seeking out the English variety.
Herbs to add
This cucumber feta salad is best with a handful of fresh herbs. There are a few great options that work best here:
Fresh chives work well
Fresh dill pairs well with cucumbers
Fresh basil adds a peppery kick
Fresh oregano also works
What to avoid? Woody, strong herbs like rosemary, sage, and even thyme don’t pair well with cucumber: they have a darker, moodier flavor than you’d want in this fresh salad.
More cucumber salad recipes
There are so many ways to build a cucumber salad! We hope you love this one. If you’re looking for more ways to use cucumber, here are a few more ideas:
2 tablespoons chopped fresh herbs (like chives or dill)
Fresh ground black pepper
Instructions
Thinly slice the cucumbers into half circles. In a large bowl, combine the cucumbers with the olive oil, red wine vinegar, kosher salt, feta cheese, chopped herbs, and several grinds of black pepper.
Eat immediately or allow to stand for 15 minutes for the flavors to meld. Stores up to 3 days refrigerated; it accumulates liquid during storage so serve with a slotted spoon.


 Posts
Posts






 Prep Time:
 Yield:
 Print Recipe
 Pin Recipe
 Category:
 Method:
 Cuisine: