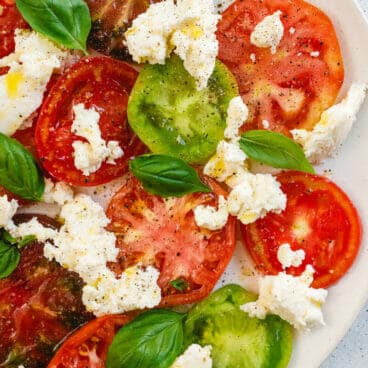
Caprese Sandwich

This Caprese sandwich is a stunning crowd pleaser! Layer tomatoes, mozzarella and pesto aioli for a splash of flavor.

Caprese Sandwich

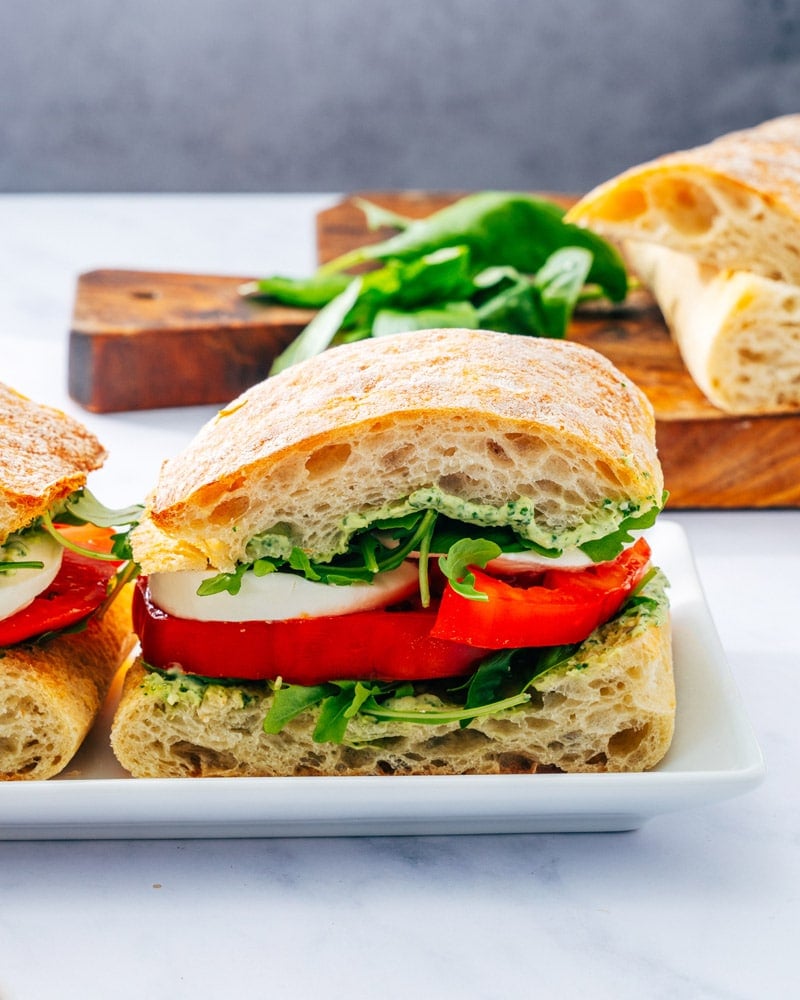
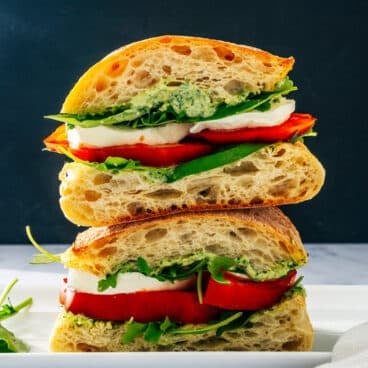
What’s better than the classic combination of tomatoes, mozzarella, and basil? Not much, in our opinion. So try this summery delight: the Caprese sandwich! This riff on the classic Italian salad from Capri layers the classic ingredients as a sandwich filling, with an irresistibly creamy, pesto aioli that adds a pop of savory brightness to each bite. It’s the perfect idea for an easy no-cook summer dinner, picnics, and more. When our son Larson tried a bite, he said, “Can we eat this every day?” We felt the same!

Ingredients in a Caprese sandwich

A Caprese sandwich is a sandwich that uses the ingredients in the classic Italian Caprese salad: tomatoes, mozzarella, and basil. There are many variations on this concept, sometimes using arugula, balsamic vinegar, or other spreads to embellish the sandwich. The traditional Italian version of Caprese salad doesn’t use balsamic vinegar or reduction and we don’t think the flavor pairs correctly, so you won’t need that here. For this recipe, we’ve used our fan-favorite pesto aioli as a creamy spread that adds a pop of savory flavor to each bite.

Here’s what you’ll need for this Caprese sandwich:

  • Ciabatta bread or other artisan bread: This Italian bread is soft and perfect for sandwiches! Steer clear of a French baguette, which can be tough to bite through. Any other type of artisan bread works!
  • Ripe tomatoes: This is a must! This sandwich only works with the ripest, juiciest tomatoes, much like a good BLT.
  • Fresh mozzarella cheese: Purchase it in an 8 ounce ball and slice off slices for the sandwich.
  • Fresh basil: All you need is a handful of leaves per sandwich.
  • Baby arugula: Arugula adds a bit of texture and flavor variation. Make sure to buy baby arugula in a box or bag, which has a feathery texture and milder flavor. Avoid mature arugula that’s sold in bunches: the flavor is too strong.
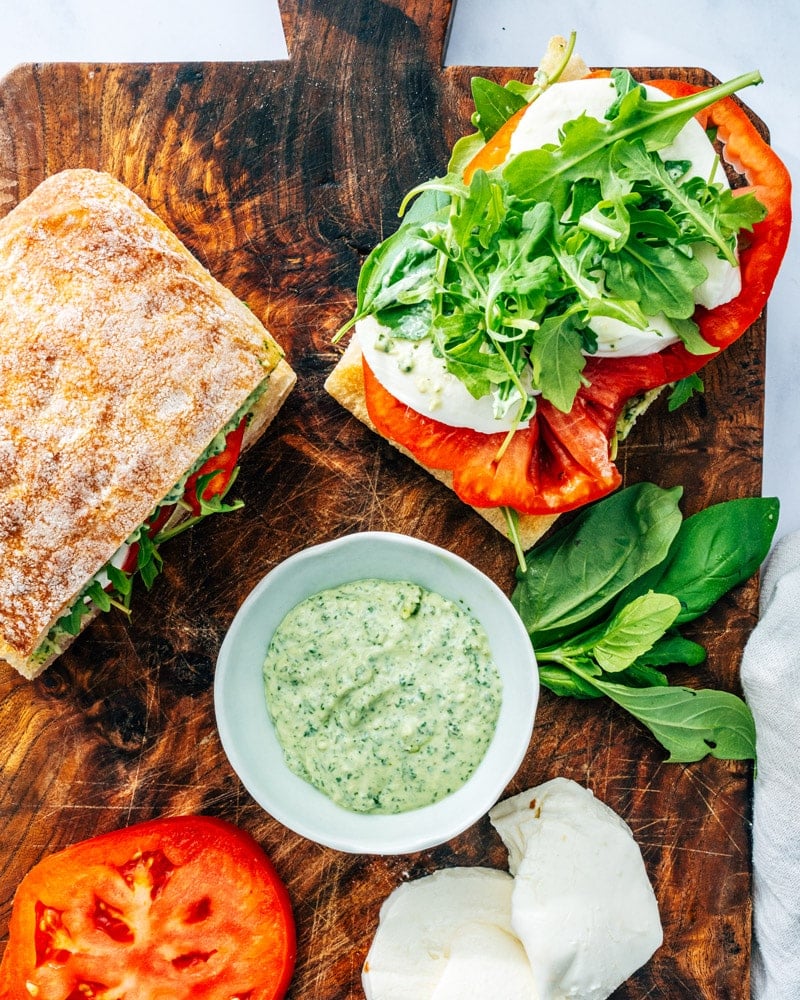
  • Pesto aioli: This is the kicker! The pesto aioli blends basil, mayonnaise, Parmesan cheese and lemon juice and absolutely makes the sandwich. Do not leave it out!
Caprese Sandwich

Tips for making the pesto aioli

The key to any good sandwich? A great sandwich spread. You absolutely cannot have a dry sandwich with unseasoned bread. Here, the pesto aioli adds just the right creaminess and seasoning to the entire sandwich. Here’s what to know about the pesto aioli:

  • Use a large or small food processor. A small blender would also work.
  • It works for several sandwiches. The quantity you’ll end up with is 10 tablespoons, so depending on how much you use it should work for 3 to 4 sandwiches.
  • You can make it in advance and store refrigerated. Keep in mind, the color does fade slightly over time.
Caprese Sandwich

Make ahead for a Caprese sandwich

This Caprese sandwich is perfect for a picnic: but does it hold up over time? Yes! Some sandwiches get soggy over time, but this one holds up well. However, you’ll want to keep the following in mind:

  • Spread each bread side with pesto aioli and have a layer of arugula and basil over each. This protects the bread from direct contact with the tomato or mozzarella, which can make it soggy.
  • If serving within 2 hours, refrigeration is not needed. The mayo in the sandwich spread should be refrigerated after 2 hours.
  • Otherwise, wrap and refrigerate or keep in a cooler until serving. The bread does become tougher when refrigerated, so allow the sandwich to come to room temperature before serving if possible.

Alternate method

You can also make a Caprese sandwich as a panini or hot sandwich, like the Panera Caprese sandwich. Simply use sliced sandwich bread to build the sandwich. Then toast it in a panini press for 3 to 4 minutes, or grill in a grill pan or skillet for 2 minutes per side.

Caprese Sandwich

More Caprese themed foods

Caprese has become a shorthand for anything that stars tomatoes, fresh mozzarella and basil. Of course, nothing beats the classic Caprese salad, made the Italian way with a drizzle of great olive oil and salt. Here are a few variations on the theme:

This Caprese sandwich recipe is…

Vegetarian. For gluten-free, serve on gluten-free bread.

Print
Caprese Sandwich

Caprese Sandwich


  • Author: Sonja Overhiser
  • Prep Time: 10 minutes
  • Cook Time: 0 minutes
  • Total Time: 10 minutes
  • Yield: 1 sandwich

Description

This Caprese sandwich is a stunning crowd pleaser! Layer tomatoes, mozzarella and pesto aioli for a splash of flavor.


Ingredients

For the sandwich

  • 2 slices ciabatta bread
  • 2 slices ripe tomato
  • 2 slices fresh mozzarella cheese (1 ounce)
  • 1 handful baby arugula
  • 1 handful basil leaves
  • 2 to 3 tablespoons pesto aioli (see below)

For the pesto aioli (makes 10 tablespoons)

  • 1 medium garlic clove
  • 1 cup loosely packed fresh basil
  • ½ cup shredded Parmesan cheese
  • ½ tablespoon fresh lemon juice
  • ⅛ teaspoon kosher salt
  • ½ cup high quality mayonnaise

Instructions

  1. Make the pesto aioli: In a food processor, blend the garlic until roughly chopped. Add the basil, Parmesan cheese, lemon juice, salt and mayonnaise. Blend until a smooth, creamy sauce forms. (Store leftovers refrigerated for 2 weeks.)
  2. Season the tomato slices with a pinch of salt. On each slice of bread, slather the pesto aioli. Build the sandwich by layering half the arugula and basil, the tomato slices, mozzarella slices, more arugula and basil, and then the aioli-slathered bread. Enjoy immediately, or wrap and refrigerate until serving.
  • Category: Sandwich
  • Method: No Cook
  • Cuisine: Summer
  • Diet: Vegetarian

Keywords: Caprese sandwich

A Couple Cooks - Recipes worth repeating.


from A Couple Cooks https://ift.tt/fkCFq3t

Classic Blueberry Pancakes

These classic blueberry pancakes are fluffy and golden brown, with pops of sweet tart berries. The best way to wake up!

Blueberry pancakes

Got a load of beautiful berries? Let’s make Blueberry Pancakes! There’s nothing better than the scent of frying up golden batter on a weekend morning (right?). Here’s how to make your morning dreams happen. This blueberry pancake recipe is classic and basic, using ingredients you probably already have on hand. It makes flapjacks that are light and fluffy, with just the right classic flavor interrupted by tangy pops of purple berries. In a word: they’re perfection.

Ingredients in blueberry pancakes

This blueberry pancakes recipe is based on our classic pancake recipe, which we developed after a lot of testing and research. (We will say, it made for a tasty few weeks!) What we found? Here’s the combination of ingredients that make very best blueberry pancakes:

  • All purpose flour
  • Granulated sugar
  • Baking powder and salt
  • Egg
  • Milk
  • Unsalted butter or neutral oil
  • Vanilla extract
  • Lemon juice or vinegar: Adding an acidic ingredient helps to make fluffy pancakes. If you don’t have fresh lemon juice on hand, use apple cider vinegar or white vinegar: it works too!
  • Fresh blueberries (or substitute frozen!)
Blueberry Pancakes

The best method for adding the berries

If there’s one thing about blueberry pancakes to know, it’s this: when to add the berries to the batter. How do you get the most even blueberry distribution? Place the berries right onto the batter while it’s cooking on the griddle. Why? If you place the berries into the bowl of batter, it makes lumpy pancakes and uneven berry distribution. Placing them right on top, you get even circular pancakes with just the right amount of fruit in each.

There’s just one thing to note: when you add the berries while the cakes are on the griddle, the “top” side of the pancake won’t really show much of the berries visually. And that’s ok! You can see them when you slice through the middle.

Tips for cooking blueberry pancakes

Once you’ve got the berry method sorted, there’s not much to cooking blueberry pancakes! They’re similar to any standard pancake recipe you’ve made. Here are a few best practices for getting them evenly golden brown:

  • Use a large griddle: non-stick is helpful. Some griddles are uneven with their heating (we had a cast iron griddle that would cook each pancake to a different color!). Non-stick is helpful and you don’t have to grease it.
  • Experiment to find the right heat level. Medium low heat is ideal, but it’s different on every stovetop. It should take a few minutes to get the pan up to heat.
  • Approximate about ¼ cup batter per pancake. This tends to make a medium-sized pancake.
  • Don’t worry if the first pancake doesn’t work! Use it as a test for honing in your pancake skills and adjust the heat accordingly.
Blueberry Pancakes Recipe

Blueberry pancakes variations

Once you’ve tried the standard, there are several ways to vary these blueberry pancakes. Here are a few fun adders and alternate methods to try:

More blueberry recipes

Love this purple berry? Here are a few more ways to use it:

This blueberry pancakes recipe is…

Vegetarian.

Print
Blueberry pancakes

Classic Blueberry Pancakes


  • Author: Sonja Overhiser
  • Prep Time: 10 minutes
  • Cook Time: 10 minutes
  • Total Time: 20 minutes
  • Yield: 8 medium pancakes

Description

These classic blueberry pancakes are fluffy and golden brown, with pops of sweet tart berries. The best way to wake up!


Ingredients

  • 1 cup all purpose flour
  • 2 tablespoons sugar
  • 2 teaspoons baking powder
  • ½ teaspoon kosher salt
  • 1 large egg
  • ¾ cup + 2 tablespoons milk
  • ¼ cup melted unsalted butter or neutral oil
  • ½ teaspoon vanilla
  • ½ teaspoon lemon juice or vinegar*
  • 1 cup blueberries
  • Optional: Blueberry Sauce, to serve

Instructions

  1. In a medium bowl, whisk together the flour, sugar, baking powder, and salt.
    In a separate bowl, whisk the egg, then whisk in the milk, melted butter (or oil), vanilla extract, and lemon juice (or vinegar).
  2. Stir the wet ingredients into the dry ingredients until a smooth batter forms. (It will thicken after it sits 1 to 2 minutes.)
  3. Lightly butter a skillet or griddle and wipe off extra grease with a paper towel. Heat the skillet to medium low heat. Pour the batter into small circles (about ¼ cup), then place a small handful of blueberries into the top of each pancake. Cook the pancakes until the bubbles pop on the top and the bottoms are golden. Then flip them and cook until cooked through.
  4. Place the cooked pancakes under and inverted bowl to keep them warm. Repeat with the remaining batter, adjusting the heat as necessary to maintain an even temperature. Serve immediately with maple syrup or Blueberry Sauce.

Notes

*Adding an acidic ingredient helps to make fluffy pancakes. If you don’t have fresh lemon juice on hand, use apple cider vinegar or white vinegar.

  • Category: Breakfast
  • Method: Stovetop
  • Cuisine: American
  • Diet: Vegetarian

Keywords: Blueberry pancakes, Blueberry pancake recipe, blueberry pancake, blueberry pancakes recipe

A Couple Cooks - Recipes worth repeating.


from A Couple Cooks https://ift.tt/Rcl6XFN

Dilly Beans

This dilly beans recipe is full of tangy flavor and a pop of dill! It’s quick and easy to whip up a jar of pickled green beans.

Dilly Beans

Are you a pickle lover? Here’s a jar you’ll fall hard for: Dilly Beans! These slender, crunchy pickled green beans pack a vinegary, herbaceous punch. They’re irresistible to snack on out of the jar, and make the ideal condiment to a picnic lunch, pitch in or cheese plate. Guess what: this old fashioned recipe doesn’t even require any fancy canning equipment! All you need is 20 minutes, a jar and some beans to whip up this quick pickles recipe: and you’ll be glad you did.

Ingredients for dilly beans

Dilly beans are pickled green beans that are preserved with garlic and dill seed (or fresh dill), which infuse the flavor of a classic dill pickle. You can make dilly beans as a classic canning recipe or as quick pickles or refrigerator pickles, where the jar is stored in the refrigerator immediately after making them. Quick pickles don’t require any special canning equipment, so it’s our preferred method for homemade pickles. They last for 1 month in the refrigerator (but are not shelf stable). Here’s what you’ll need to make dilly beans:

  • 1 wide-mouth pint canning jar
  • Green beans: the thinner the better! Look for very thin beans or even French green beans
  • Garlic
  • Bay leaf
  • White vinegar
  • Sugar
  • Salt
  • Peppercorns
  • Dill seed: not dried dill weed! (see below)
  • Fresh dill: you can omit if desired, but we like using both fresh dill and dill seeds
Dilly Beans

Dill seed versus dill weed: what’s the difference?

The key to this dilly beans recipe? Dill seed. But don’t confuse this with the similar but also important dried dill weed! Use dill weed here and you won’t be able to detect a dill flavor at all. Here’s why:

  • Dill seeds are small, brown flat seeds of the dill plant that are used in canning. The seeds infuse a very strong dill flavor into preserved foods, but they’re not often used in cooking.
  • Dried dill weed is the dried green leaves and stems of the plant. This spice is often used in cooking (it’s what gives Ranch Dip it’s signature flavor). But if used in canning, it has a very mild flavor that doesn’t penetrate the jar.
Dilly beans

How to make dilly beans: basic steps

This dilly bean recipe takes just 20 minutes to assemble the jar. Once it’s done, refrigerate for 24 hours for the best flavor and texture. The hardest part of this recipe is the waiting! Here are the basic steps (or jump right to the recipe):

  • Trim the green beans: Trim the beans so they fit into a wide-mouth pint jar. Add the garlic cloves, bay leaf, and fresh dill.
  • Bring the brine ingredients to a boil: Place white vinegar, water, sugar, salt, peppercorns, and dill seed in a pot and bring to a boil (see the recipe below for the exact quantities).
  • Pour in the jar and wait until it cools (about 1 hour). 
  • Refrigerate 24 hours. This helps to infuse the flavor into the beans and soften their texture. Very thin or French green beans pickle the best because their flavor is tender and crunchy right away! Some types of very thick green beans can still taste slightly tough after 1 day: so you may want to wait 48 hours if your beans are very thick.

Want to make more than 1 pint? It’s easy to double or triple this recipe. Head to the recipe below and press the 2x or 3x buttons next to the word Ingredients.

Storage info

How long can you store dilly beans? Store homemade dilly beans refrigerated for up to 1 month. This type of pickles are not shelf stable, so don’t attempt to store them in your pantry. Keep them in the refrigerator and you can eat off of them for days.

Dilly beans

Ways to serve dilly beans

We love dilly beans best right out of the jar! There are loads of ways

More green beans recipes

Love green beans? Here are more great green beans recipes for using this tasty veggie:

This dilly beans recipe is…

Vegetarian, vegan, plant-based, dairy-free and gluten-free.

Print
Dilly Beans

Dilly Beans


  • Author: Sonja Overhiser
  • Prep Time: 20 minutes
  • Cook Time: 0 minutes
  • Total Time: 20 minutes
  • Yield: 1 pint

Description

This dilly beans recipe is full of tangy flavor and a pop of dill! It’s quick and easy to whip up a jar of pickled green beans.


Ingredients

  • 8 ounces green beans (thin or French beans are best)
  • 2 garlic cloves, sliced
  • 4 sprigs fresh dill*
  • ½ cup white vinegar
  • ½ cup water
  • ½ tablespoon granulated sugar
  • 2 teaspoons kosher salt
  • 1 tablespoon black peppercorns
  • ½ tablespoon dried dill seed* (not dried dill weed)

Instructions

  1. Wash a wide-mouth pint mason jar and and its lid in hot soapy water. Then rinse and let air dry.
  2. Trim the green beans so they fit in jar with about 1/2” of space remaining at the top.
  3. Add the green beans, garlic and dill sprigs into the jar, squeezing them in as tightly as possible.
  4. In a small saucepan, combine the white vinegar, water, sugar, kosher salt, peppercorns, and dried dill seed. Bring to a boil, stirring occasionally to dissolve the sugar and salt (this will take only a few minutes).
  5. Once boiling, pour the brine into the jar. Tap the jar on the counter to release any air bubbles. 
  6. Discard any remaining brine, or top off the jar with extra water if any green beans are exposed at the top.
  7. Screw on the lid tightly and allow to cool to room temperature (about 1 hour). Refrigerate 24 hours for best flavor. Keeps up to 1 month refrigerated (this recipe is not shelf stable).

Notes

*Dill seed are small, brown flat seeds of the dill plant that are used in canning. Don’t use dried dill weed, which is the dried green leaves of the plant. Here we used dill seed in combination with fresh dill; if you can’t find fresh dill you can omit it.

  • Category: Pickles
  • Method: Pickling
  • Cuisine: Pickles
  • Diet: Vegan

Keywords: Dilly beans, dilly beans recipe, dilly bean recipe

A Couple Cooks - Recipes worth repeating.


from A Couple Cooks https://ift.tt/Wnl14Cv

Black Sesame Amaretti Cookies

Amaretti are some of my favorite cookies for a reason: they are ridiculously simple to make, with only 3 main ingredients—plus the black se...