Green Bean Salad

This green bean salad recipe is packed with flavor, starring tomatoes, feta and a zingy dressing. Ideal as a side or for summer potlucks!

Green bean salad

What’s more quintessential summer than the crunch of biting into a green bean? Here’s a salad that captures that essence: this homey Green Bean Salad! Imagine: tender blanched green beans covered in a zingy dressing, paired with tomatoes, baby arugula and the salty pop of feta crumbles. This one is ideal for pairing with a grilled meal, a trio of salads or dish for a summer potluck or pitch-in. We’ve made this one many times already: we hope you’ll love it much as we do!

Ingredients in this green bean salad recipe

This green bean salad recipe is basic, but combines just the right flavors to make the beans irresistibly tasty. The tender vegetables are mixed with a red wine vinegar and Dijon vinaigrette, which adds a hefty dose of tangy flavor to the entire dish. The basic idea? Blanch the beans, cut veggies, make the dressing, and mix it all together! Here’s what you’ll need:

  • Green beans
  • Red wine vinegar
  • Dijon mustard
  • Honey
  • Garlic powder
  • Olive oil
  • Cherry tomatoes
  • Shallot
  • Baby arugula
  • Feta cheese
  • Salt
Green bean salad

How to blanch green beans

The only part of this green bean salad that takes a bit of skill? Blanching the beans. Blanching is a cooking method that involves boiling vegetables until they’re crisp tender, then plunging them into ice water to stop the cooking process. The ice water helps to keep the veggies colorful by locking in a beautifully bright green color. Blanching is quick and easy; here’s what to do:

  • Prepare the water: Bring a large pot of water to a boil. Prepare a large bowl of ice water.
  • Boil the beans: Add the beans to the boiling water and cook for 4 to 5 minutes, until just tender but still bright green (taste a bean to assess doneness).
  • Place in the ice bath. Right when the beans are tender, remove them from the boiling water with tongs and transfer them to the bowl of ice water. After 2 minutes, remove the beans to a colander to drain.
  • Blot the beans dry! This is very important: otherwise you’ll end up with a watery salad! (Trust us, we forgot this once and we won’t again.)
Blanching green beans

Tips for serving and storage

Once you make this green bean salad, you can eat it immediately. Or, you can refrigerate it until serving, allowing the flavors to permeate the beans even more. To us, it’s just as delicious both ways! Here are a few things to note:

  • Toss the salad well before serving. The tomatoes and feta can sometimes fall to the bottom, especially if it’s in a large bowl. Also, make sure the dressing is evenly tossed through the veggies.
  • A shallow platter can be better for serving than a large bowl. This way you can make sure all the goodies are evenly dispersed.
  • Refrigerate leftovers for 3 to 4 days. We like this salad best the day of or the next day. But it can last up to 4 days refrigerated.

That’s it! Let us know what you think in the comments below.

Green bean salad

More green bean recipes

Capitalize on green beans while they’re in season! Here are some green bean recipes you’ll love:

This green bean salad recipe is…

Vegetarian and gluten-free. For vegan, omit the feta cheese.

Print
Green bean salad

Green Bean Salad


  • Author: Sonja Overhiser
  • Prep Time: 15 minutes
  • Cook Time: 5 minutes
  • Total Time: 20 minutes
  • Yield: 6

Description

This green bean salad recipe is packed with flavor, starring tomatoes, feta and a zingy dressing. Ideal as a side or for summer potlucks!


Ingredients

  • 1 1/2 pounds green beans
  • 1 ½ tablespoons red wine vinegar
  • ½ tablespoon Dijon mustard
  • ½ tablespoon honey
  • ¼ teaspoon garlic powder
  • 3 tablespoons olive oil
  • 1 pint cherry tomatoes, sliced in half
  • 1 shallot, thinly sliced
  • 2 cups baby arugula*
  • ¾ teaspoon kosher salt
  • 4 ounces feta cheese (or ¾ cup crumbles; omit for vegan)

Instructions

  1. Bring a large pot of water to a boil. Prepare a large bowl of ice water. Trim the green beans by snapping or chopping off the stem ends.
  2. Blanch the beans: Add the beans to the boiling water and cook for 4 to 5 minutes, until just tender but still bright green (taste to assess doneness). Right when the beans are tender, remove them from the boiling water with tongs and transfer them to the bowl of ice water. After 2 minutes, remove the beans to a colander to drain.
  3. Prep the dressing: Meanwhile, in a bowl whisk together the red wine vinegar, Dijon mustard, honey, garlic powder, and olive oil.
  4. Prep the fresh ingredients: Slice the cherry tomatoes and shallot.
  5. Serve: Pat the blanched green beans dry. In a large bowl or serving dish, add the beans, dressing, cherry tomatoes, shallot, arugula, salt, and feta cheese crumbles. Taste and adjust the salt as desired. Serve immediately or refrigerate until serving. Stores refrigerated up to 3 to 4 days.

Notes

*Make sure it is baby arugula, sold in boxes or bags. Don’t substitute the standard arugula sold in a bunch: the flavor is too strong for this salad (if you can’t find baby arugula, omit it).

  • Category: Side Dish
  • Method: Blanched
  • Cuisine: Salad
  • Diet: Vegetarian

Keywords: Green bean salad, green bean salad recipe

A Couple Cooks - Recipes worth repeating.


from A Couple Cooks https://ift.tt/iWVNwJU

Loaded Hummus Dip

Hummus dip is a quick and easy appetizer! Top a platter with cucumber, tomatoes, olives and feta cheese, then dip with pita chips.

Hummus Dip

Here’s a recipe that’s ideal for parties and entertaining in any season: Hummus Dip! This one even doubles as a tasty snack or a light dinner with a few other filling appetizers. Spread hummus on a platter or in a bowl, then top with cool cucumber, tomatoes, olives, artichokes and feta cheese. Each bite is a burst of tangy, bright and creamy flavor! It’s best with crunchy pita chips, but anything goes here. Once you start dipping…it’s hard to stop.

Ingredients in hummus dip

This hummus dip is a play on a layered dip: it’s like taco dip with Mediterranean flavors. It’s very simple to whip up: throw hummus on a platter or in a bowl and top with the toppings. Keep in mind: you’ll want a best quality hummus here: or you can make your own! Here are a few notes on the ingredients you’ll need:

  • Hummus: Use the best quality brand you can find. We suggest avoiding Sabra brand as the flavor is much too aggressive. We like Hope Hummus, but it can be expensive. It’s easy to make Homemade Hummus for the best flavor.
  • English cucumber: Use an English cucumber for best flavor. This variety is long and thin, and comes wrapped in plastic in the grocery store. The flavor is sweeter and milder than a standard cucumber, and the peel is not as tough.
  • Red onion
  • Cherry tomatoes
  • Artichoke hearts: Look for any type of canned artichoke hearts you can find; marinated works too!
  • Kalamata olives
  • Feta cheese
  • Fresh parsley or dill
Hummus Dip

Serve with pita chips, or make your own

The best thing to dip in hummus dip? Pita chips! They’re crispy and salty, and make the best vessel for delivering this tasty party snack to your mouth. Pita chips are easy to find at the store, but we love making our own. Why? They taste much fresher than the store-bought kind, which can have an artificial aftertaste.

All you have to do? Split open pita pockets, brush with olive oil and season with salt, cut into wedges and bake for about 8 to 10 minutes at 400 degrees. Head to this recipe: Homemade Pita Chips.

Pita chips recipe
Homemade pita chips are ideal for hummus dip

What to dip in hummus

The type of foods you can dip into hummus are endless! Both bread-items and veggies work here. You can get creative and go outside the box with ideas, but we find that classic flavors work the best. Here are our best ideas for what to dip in hummus:

  • Pita bread
  • Pita chips
  • Flatbread
  • Pretzel chips
  • Bagel chips
  • Crackers
  • Crostini
  • Carrots or rainbow carrots
  • Celery
  • Cucumber slices
  • Bell pepper slices
  • Snap peas or snow peas
  • Broccoli

Storage info

This hummus dip is best the day it is made, which is what we suggest if you’re serving it for entertaining. But it does keep well in the refrigerator! We like making a large platter for lunches and eating off of it all week. Store covered in the refrigerator for 3 days, but we’ve stretched it to 5 days.

Hummus Dip

How to serve hummus dip

Hummus dip is an ideal summer appetizer, great for barbecues, cookouts and potlucks. But it works any time of the year: it’s especially nice for showers like baby showers or bridal showers, or works for any type of pitch-in.

You can also eat it as a healthy snack or as part of an appetizer dinner! Make this hummus dip and a charcuterie board, grab a glass of wine and you’ve got an easy dinner.

More dip recipes

Homemade dips are ideal for parties, snacks and anytime! Here are a few more easy dip recipes:

This hummus dip recipe is…

Vegetarian and gluten-free (without pita chips).

Print
Hummus Dip

Loaded Hummus Dip


  • Author: Sonja Overhiser
  • Prep Time: 15 minutes
  • Cook Time: 0 minutes
  • Total Time: 15 minutes
  • Yield: 4 to 6

Description

Hummus dip is a quick and easy appetizer! Top a platter with cucumber, tomatoes, olives and feta cheese, then dip with pita chips.


Ingredients

  • 1 to 1 1/2 cups hummus (10 to 15 ounces)
  • ½ cup chopped English cucumber
  • ¼ cup finely chopped red onion
  • ½ cup cherry tomatoes, quartered
  • ½ cup canned artichoke hearts, chopped
  • ¼ cup Kalamata olives, chopped
  • ⅓ cup crumbled feta cheese
  • 1 handful fresh parsley or dill, chopped
  • Olive oil, for drizzling
  • Pita chips, for serving

Instructions

  1. Prepare the vegetables as noted above.
  2. Spread the hummus on a large plate, bowl or platter. Top with the cucumber, onion, tomatoes, artichokes, olives, feta cheese, and chopped herbs. Drizzle with olive oil, if desired. Serve with pita chips. Store leftovers covered in the refrigerator for 3 days.
  • Category: Appetizer
  • Method: No Cook
  • Cuisine: Mediterranean inspired
  • Diet: Vegetarian

Keywords: Hummus dip, what to dip in hummus

A Couple Cooks - Recipes worth repeating.


from A Couple Cooks https://ift.tt/vNlR9Sh

Salmon Caesar Salad

Salmon Caesar salad is a hearty main dish salad for dinner everyone loves! It’s irresistible drizzled with a creamy homemade dressing.

Salmon caesar salad

In summer, we crave all the main dish salads for dinner. Here’s one that’s basic but satisfies every time: Salmon Caesar Salad! Imagine: tender, perfectly seasoned chunks of salmon nestled with bursts of crunchy romaine, juicy cherry tomatoes and crunchy croutons. It’s all covered in a creamy homemade Caesar dressing that makes each bite absolutely sublime. This one is a smash hit every time we serve it (and our kiddo loves a deconstructed version with the Caesar as a dipping sauce!).

Elements in this salmon Caesar salad

You barely need a recipe for salmon Caesar salad: just cook salmon and add it to a bed of romaine with Caesar dressing. But making a big plate of this at home requires homemade dressing, in our opinion! We’ve also got a few adders that take it to the next level. Here’s what you’ll need for salmon Caesar salad:

  • Fresh salmon, canned or smoked salmon
  • Croutons (try them homemade!)
  • Cherry tomatoes
  • Romaine hearts
  • Parmesan cheese shavings
  • For the dressing: mayonnaise, Greek yogurt, garlic, Parmesan cheese, lemon juice, Dijon mustard, Worcestershire sauce or anchovy paste, salt and pepper
  • Optional: capers, dill sprigs
Salmon Caesar Salad

How to cook the salmon

This salmon Caesar salad works with a variety of different types and methods of cooking salmon. In fact, there are a few ways to make this salad without cooking the fish at all! It’s also a great way to use leftover salmon. Here are our top methods for cooking the salmon:

  • Pan Seared: Whip out a pan and cook it up on the stovetop.
  • Baked: Baked salmon is a simple, no fail method (though you do have to wait for the preheating).
  • Broiled: Faster than baked and just as good!
  • Blackened: Use the pan-seared method and coat the fish in a mix of Cajun seasonings. This makes a killer Caesar salad!
  • Grilled: If it’s the season, grilled salmon is ideal for this summery main dish.
  • Poached: Poaching is one of the fastest ways to cook salmon and what we used here! It’s melt-in-your-mouth tender.
  • Canned: Don’t have time to cook? Use canned salmon and mix it with olive oil, salt and pepper before adding to the salad.
  • Smoked: Another no cook method! Tear off pieces of smoked salmon for a quick fix salad.
Poached Salmon
Poached salmon is a fast and easy way to cook it for this salad

For Caesar dressing

The star of this salmon Caesar salad is the fresh, creamy homemade Caesar dressing. It’s a go-to we’ve been making for years. Using Greek yogurt lightens it up and reduces the calories from a standard Caesar. Here’s what you’ll need:

  • Greek yogurt: Yogurt replaces some of the standard mayonnaise in this dressing: it reduces calories while staying irresistibly creamy.
  • Mayonnaise: You’ll still need a bit of mayo for richness and to help the dressing cling to the greens.
  • Lemon juice: Fresh juice brings a pop of acidity.
  • Parmesan cheese: Cheese adds a savory saltiness.
  • Anchovy paste or Worcestershire sauce: Anchovies are traditional, or substitute Worcestershire sauce for vegetarian.
  • Garlic & Dijon mustard: These round out the savory flavor.

Serving tips

And that’s it! Mix up the creamy dressing, compose the salad and douse it all in Caesar. A few other notes on serving:

  • Capers add a nice briny pop. We love adding a handful of drained capers to a Caesar salad.
  • Add other veggies if you like. A traditional Caesar doesn’t have tomatoes, but we added them to make this into more of a main dish salad for dinner. Feel free to add other veggies of your choice!
  • Serve as a decomposed salad for kids. Our son loved this separated out with salmon, “lettuce chips,” cherry tomatoes, croutons, and a small cup of Caesar dipping sauce.
Salmon Caesar salad

More salmon recipes

Salmon is a dinnertime standby over here! Here are a few more easy salmon recipes to work into your repertoire:

This salmon Caesar salad recipe is…

Pescatarian. For gluten-free, use gluten-free croutons. For dairy-free, use Vegan Caesar Salad.

Print
Salmon caesar salad

Salmon Caesar Salad


  • Author: Sonja Overhiser
  • Prep Time: 10 minutes
  • Cook Time: 15 minutes
  • Total Time: 25 minutes
  • Yield: 4

Description

Salmon Caesar salad is a hearty main dish salad for dinner everyone loves! It’s irresistible drizzled with a creamy homemade dressing.


Ingredients

For the salad

  • 1 pound salmon (or 2 cans salmon or 12 ounces smoked salmon)
  • 1 cup croutons
  • 1 cup cherry tomatoes, sliced in half
  • 3 romaine hearts (or 1 large head romaine)
  • ½ cup Parmesan cheese shavings
  • Optional garnish: capers, fresh dill

For the Caesar dressing (makes 1 cup)

  • 1 medium garlic clove, minced or grated
  • ¼ cup grated Parmesan cheese
  • 2 tablespoons lemon juice (½ lemon)
  • ¼ cup mayonnaise
  • ½ cup Greek yogurt
  • ½ tablespoon Dijon mustard
  • 1 teaspoon anchovy paste or Worcestershire sauce (or omit)
  • ¼ teaspoon each kosher salt and black pepper

Instructions

  1. Cook the salmon using one of the following methods: Pan Seared, Broiled, Baked, Blackened, Grilled, or Poached (pictured). If using canned salmon, mix it with a drizzle of olive oil and salt and pepper to taste. 
  2. Whisk together the Caesar dressing ingredients in a bowl. Store leftovers refrigerated in a covered jar for up to 1 week.
  3. Tear the romaine leaves into pieces (or chop them). Top each salad with croutons, cherry tomatoes, Parmesan cheese shavings, and dressing. If desired, add a sprinkle of drained capers or dill sprigs. 
  • Category: Main Dish
  • Method: Salad
  • Cuisine: Salad
  • Diet: Gluten Free

Keywords: Salmon caesar salad

A Couple Cooks - Recipes worth repeating.


from A Couple Cooks https://ift.tt/wVxirEn

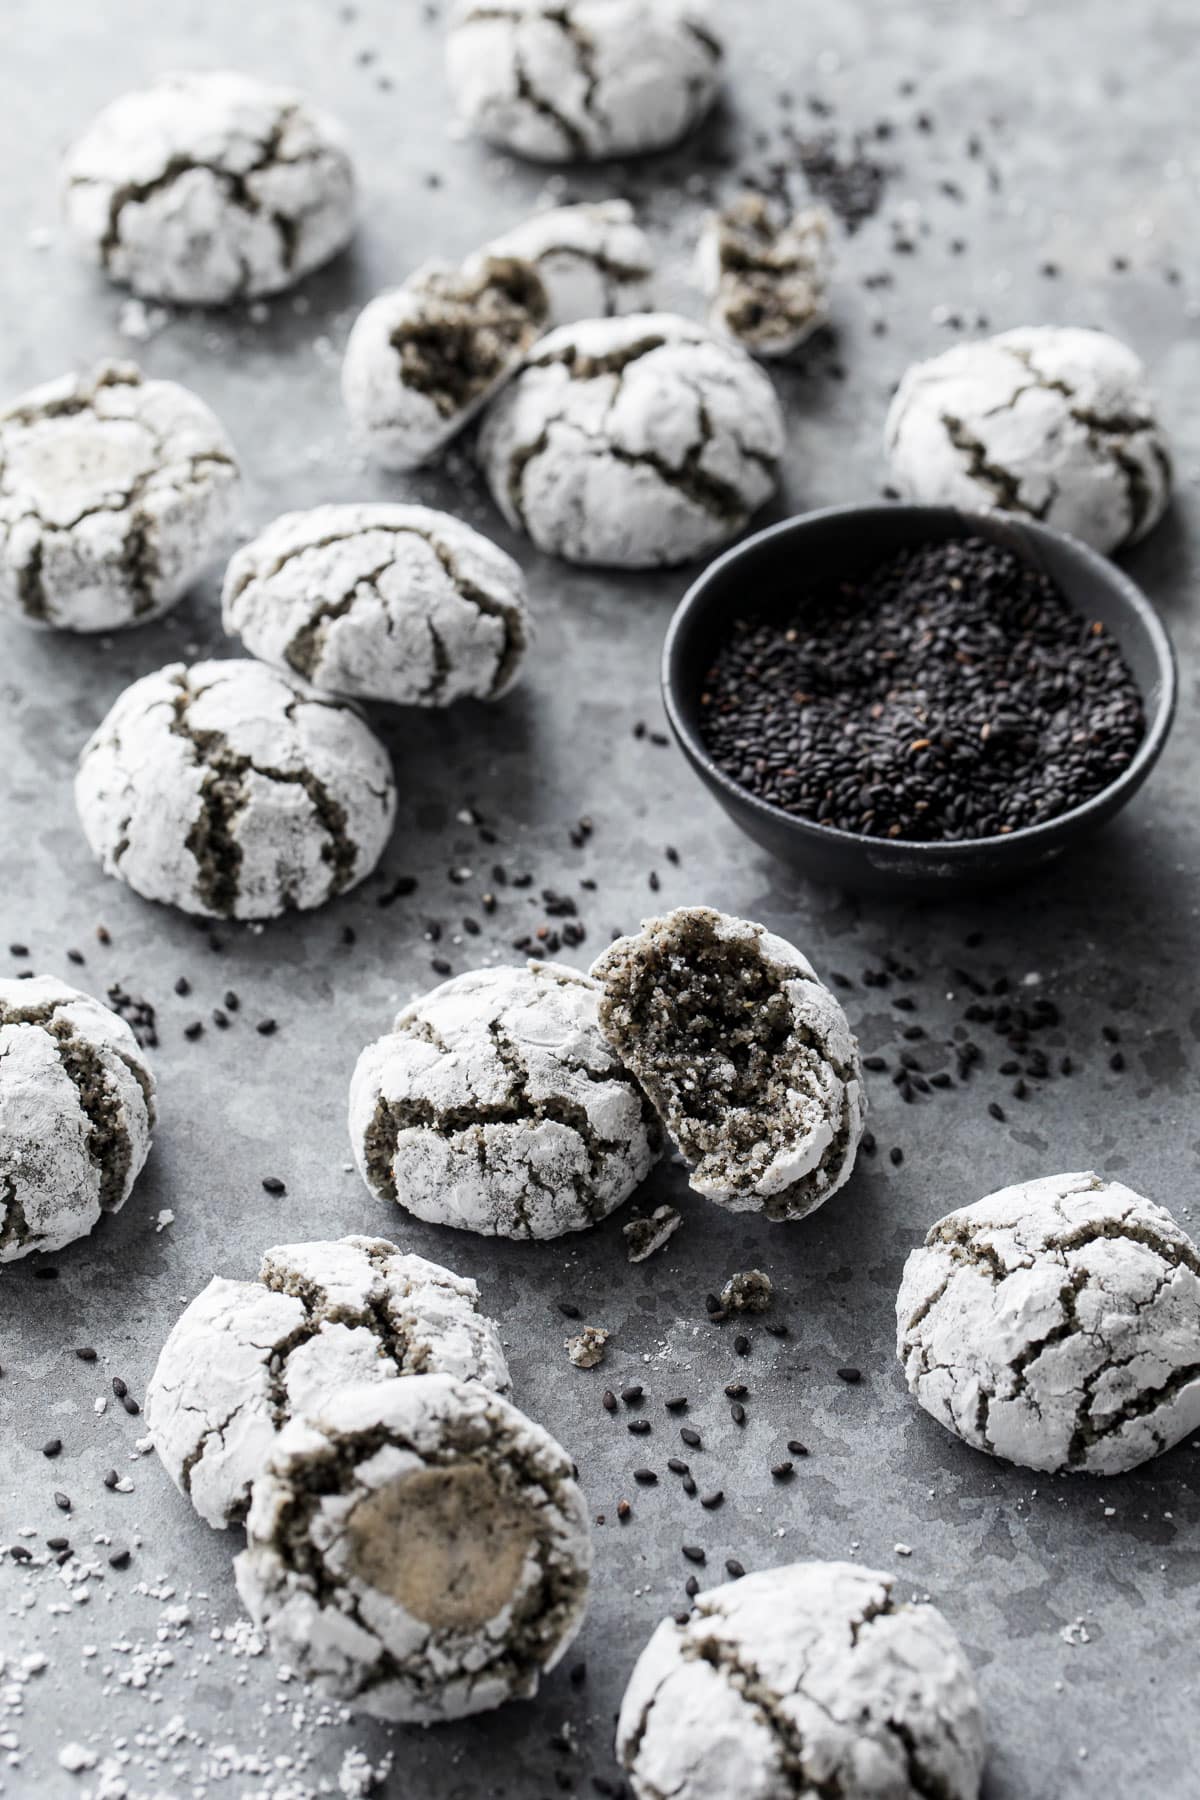
Black Sesame Amaretti Cookies

Amaretti are some of my favorite cookies for a reason: they are ridiculously simple to make, with only 3 main ingredients—plus the black se...