Posts
Posts


These spring recipes highlight all the produce this season has to offer! Browse ideas with asparagus, peas, radishes, carrots, and more.

When spring rolls around, it’s all we can do not to jump into cooking everything asparagus, radishes, and carrots. Because after a long winter, there’s nothing better than the invigorating crunch of fresh spring produce! Here are some of our favorite spring recipes that use the produce of the season.
Depending on where you’re located, the following produce may be in season in spring: Asparagus, Radishes, Carrots, Spinach, Butter Lettuce, Potatoes, Fennel, Chives, Leeks, Mint, Strawberries, and Rhubarb. You’ll see this produced featured in the recipes below. Let us know what other spring veggies you love to cook with!
And now…25 fresh spring recipes!

Creamy, savory, crunchy, and zingy: this spring recipe truly sublime: asparagus risotto! Roast up some asparagus with lemon at the same time that you’re stirring up a creamy risotto on the stovetop. Then throw the tender bright green asparagus into the risotto, right along with the lemon. You’ll wish the pot would never end.

Here’s a spring recipe that tastes like sunshine: Carrot Ginger Soup! This recipe is ideal for when you’ve got spring carrots on hand. Coconut milk adds a velvety texture and a subtle fruitiness that compliments the carrot perfectly. It’s great as a first course, or for lunch with grilled cheese.

Here's an easy spring dinner that pleases everyone: this baked salmon and asparagus recipe! It’s simple, it’s elegant, but it tastes like something you’d order at a restaurant. Roasting it up on a sheet pan with lemon slices and fresh herbs adds effortless flavor that feels fresh yet refined.

This green vegetable chowder has a bright green color and homey vibe. It’s full of spring vegetables: green peas, baby greens, chives, and mint. The soup has a cozy, hearty and almost meaty flavor from cumin, coriander, and garlic, set off by the fresh herbs. Add a squeeze of lemon to heighten the brightness, and top with a good sprinkling of mint.

Here’s a festive spring recipe: Carrot Cake Cupcakes! These little cakes are fun, easy to put together, and overwhelmingly satisfying. The moist, carrot-studded cakes have just the right warm spiced interior. Piled high with tangy cream cheese frosting, the flavor combination is out of this world good.

What's more of a spring recipe than peas? Peas can taste amazing in 5 minutes. Yep, you can transform these green spheres into an easy side dish that everyone around the table will love. (Promise!) The secret? A little olive oil, butter, garlic and lemon.

Serve this carrot salad to your friends and family, and they’ll be singing your praises! We know because when we make this at our house, it disappears within minutes. It’s simple and refreshing, featuring strings of carrots doused in a a tangy Mediterranean-style vinaigrette.

The buttery scent of this recipe in the oven may win you one or two marriage proposals…or at least it will have the neighbors wandering by to snatch up leftovers. Try this crowd-pleasing Asparagus Quiche! It’s packed with savory, cozy flavor, perfect for spring brunches or light dinners with a crisp glass of white wine.

There’s nothing lovelier than the bright chartreuse of young spring lettuce leaves. Here’s a simple way to make them into an impressive side dish: this Butter Lettuce Salad! These delicate lettuce leaves are irresistible coated in creamy, savory Parmesan Peppercorn dressing and topped with a few simple veggies and Parmesan shavings. A sprinkle of crunchy breadcrumbs seals the deal.

Looking for a unique spring recipe? May we present…roasted radishes! Here’s a way to eat them that most people haven’t thought of: roasted in a hot oven! They’re unlike anything you’ve tasted before: tender, mild, and almost sweet.

Ready for a veggie-filled pasta that celebrates spring? Meet this pasta primavera. Pasta primavera is all about fresh, green spring veggies and a delicate, light flavor. It’s everything that a heavy mac and cheese or lasagna are not. So once the first sprouts of green start to come in the spring: we start to crave pasta primavera.

Need a side dish on the table fast? Try this roasted asparagus! It’s so simple: the asparagus is tossed with olive oil, salt, pepper, and lemon zest. The secret ingredient? Grated garlic, which infuses a delightful savory flavor. Throw that lemony garlic asparagus in the oven and roast for 10 to 15 minutes, until it’s tender.

Try this Fresh Radish Salad! It’s a great way to use this crisp, peppery veggie for lunches and as an easy side dish. Throw together the radishes with crunchy cucumber, chickpeas, olive oil and vinegar it makes a delightfully zingy mix. This spring salad has just the right proportions to highlight the refreshing flavor of this veggie.

Another spring salad recipe? Try this asparagus salad! It’s got savory sautéed asparagus, cooked up in a hot pan for a few minutes then spritzed with lemon. Add that to a bed of greens and sprinkle with with peppery radishes and salty feta cheese. A Dijon mustard dressing tops it off, perfectly balanced with tangy and savory notes.

Looking for tasty pancakes that are perfect for spring? Try these Carrot Cake Pancakes! They’re lightly sweetened with maple syrup, tender and moist from the carrots, and perfectly spiced with cinnamon, ginger and nutmeg. Even better, top them with maple Greek yogurt and the sweet tang is magic.

Here's a great spring side dish recipe: Honey Glazed Carrots! What’s better than a butter and honey glaze? This recipe comes together in just 15 minutes, and the flavor is out of this world: sweet, savory, and salty, with fruity and floral notes from the honey.

Here’s a fun way to turn spring spinach into a classy side dish: Spinach Rice! Take plain old white rice and cook up a pot with spinach and garlic, then flavor it with a pop of lemon and sprinkle of feta cheese. It’s an elegant side dish that you can serve for guests or just use to spice up weeknights.
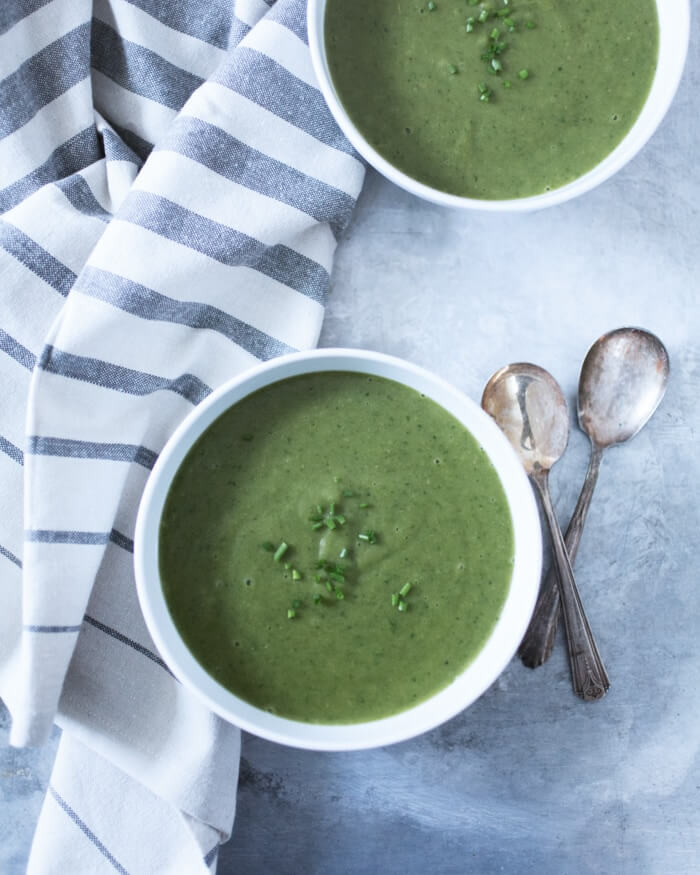
- Here's a spring soup that's a spin on vichyssoise, traditional French potato leek soup. Pureed white beans give the soup body instead of cream. Add some spring spinach and it turns entire soup green, which gives it a vibrant color and vibe!

Try this refreshing spring Romaine Salad! The electric green of the romaine leaves, pastel dressing and delicate pink radishes have a fresh monochrome effect tastes as good as it looks. The Green Goddess Dressing smothers it all in herbaceous creaminess. Take it over the top with a sprinkle of crunchy breadcrumbs, an ingenious alternative to croutons.

Rhubarb is a unique fruit that starts to become available in spring. And what's better than strawberry rhubarb crisp? The crisp topping is oats and oat flour, and it's naturally sweetened with maple syrup. It results in a sweet tart crisp that’s seriously nostalgic.

Deviled eggs are everything spring, and these have got a twist: Greek yogurt in the filling along with the mayo. Along with both yellow and Dijon mustard, it adds the perfect flavoring to these eggs without being overly rich! Garnish with dried dill or smoked paprika, or a mix of the two to make it festive.

Got fresh strawberries? Here’s one of the best ways to use them…a pitcher of homemade Strawberry Lemonade! This drink is bright and beautiful, citrusy with a hit of berry on the finish. It tastes infinitely better made at home: the flavors are brilliantly fresh.

Baby potatoes abound in spring, and these tiny spuds roast up beautifully. Each bite is crispy on the outside and tender on the inside. Season them with a little garlic powder and smoked paprika, and they’re bursting with delicious flavor!

Spring is ideal for a frittata! This light, Italian egg pie is often served for breakfast or brunch, but it works for dinner too. This one has just the right thickness and texture. The spinach feta filling is perfectly salted, savory and delicious. You can make it with lots of different fillings, but this one is a knock out.

Here’s a spring recipe that’s even more delicious than it sounds…these insanely tasty Strawberry Cream Cheese Muffins! Imagine: a muffin with a tender crumb: just sweet enough and delightfully moist. Then add a strawberry cream cheese topping, that coats everything in sweet savory richness.

25 Fresh Spring Recipes: Asparagus Risotto & More!
 Prep Time: 20 minutes
- Cook Time: 15 minutes
- Total Time: 35 minutes
 Yield: 3 to 4
 Print Recipe
 Pin Recipe
Description
This flavor-packed asparagus risotto pairs creamy arborio rice with Parmesan and lemony roasted asparagus. A true crowd pleaser!
Ingredients
- 1 quart vegetable broth
- 1 quart water
- 1 ½ teaspoons kosher salt, divided
- 1 pound asparagus
- 3 tablespoons extra-virgin olive oil, divided
- 1 lemon (Zest from half, plus 4 slices from the other half)
- 2 tablespoons salted butter
- 1/2 yellow onion
- ¼ teaspoon garlic powder
- 2 cups white arborio rice
- 1 cup dry white wine, such as Pinot Grigio or Chardonnay
- 1 cup shredded Parmesan cheese
- Freshly ground black pepper
- Optional garnish: Toasted pine nuts
Instructions
- Preheat the oven to 425 degrees Fahrenheit.
- Heat the broth: Combine the broth, water, and 1 teaspoon kosher salt in a saucepan and place it over low heat. (You’ll use this warmed broth to stir into the risotto).
- Cut the vegetables: Mince the onion, then place it in a bowl and reserve. Cut off the tough bottom ends of the asparagus and then cut them into two-inch pieces.
- Prep the asparagus: Add the asparagus stalks to a parchment-lined baking sheet. Drizzle them with 1 tablespoon olive oil, then sprinkle on ½ teaspoon kosher salt and a few grinds of black pepper. Add the zest of ½ lemon and mix with your hands. Thinly slice 2 lemon wheels from the lemon, then cut each in half and add them right on the tray.
- Start the risotto: Heat 2 tablespoons olive oil and the 2 tablespoons butter in a large skillet over medium heat. Add the minced onion and cook for 4 to 5 minutes until tender. Add the garlic powder and rice and cook, stirring occasionally, about 2 minutes until the rice starts to turn light brown. Stir in the wine and cook until the liquid is fully absorbed.
- Roast the asparagus: Place the tray with the asparagus in the oven and 10 to 15 minutes, until bright green and tender when pierced by a fork at the thickest part. The timing will depend on the thickness of the asparagus spears. (You’ll remove it from the oven while you’re cooking the risotto in the next step.)
- Meanwhile, cook the risotto: Add two ladles of the hot broth to the risotto. Cook, stirring occasionally until the liquid is fully absorbed, then add two more ladles of both. Cook in this same manner for about 12 minutes, adding two ladles and stirring. After the 12 minutes, taste a grain of rice. If it’s creamy but still al dente in the center, you’re ready for the final step! If not, continue to cook and add broth for a few minutes more.
- Finish the risotto: When the rice is al dente, reduce the heat to low. Add two more ladles of broth, the Parmesan cheese and a few grinds of black pepper. Stir vigorously for 1 to 2 minutes until you’ve got a thick and creamy risotto. Then stir in the asparagus and roasted lemon wedges and serve immediately. Stores refrigerated in a sealed container for 3 days, though the color of the asparagus will fade (reheat before serving).
 Category: Main dish
 Method: Stovetop
 Cuisine: Spring
- Diet: Vegetarian
Keywords: Spring recipes
A Couple Cooks - Recipes worth repeating.
from A Couple Cooks https://ift.tt/FGE2wS6