Lemon Pasta

This lusciously creamy lemon pasta recipe is the ideal balance of richness and acidity! It’s a comforting meal or stellar side dish.

Lemon pasta

Here’s a lusciously creamy pasta that will become the meal of your dreams. Try this Lemon Pasta! It’s rich and silky, with just the right balance of sharp citrus from loads of lemon zest. Don’t consider this a health food or even a healthy spin: it’s here for when you need a properly indulgent bit of pasta. This one is modeled off of a favorite of ours at a fantastic local restaurant and let’s just say: it’ll be tough to put down your fork.

Ingredients in this lemon pasta recipe

This lemon pasta recipe is a mess of citrusy, creamy long noodles smothered in cream, Parmesan and lemon zest. While most of the recipes on this website fit under the umbrella of healthy, this one is all about being just plain amazing. If you prefer a healthy spin, go to Vegan Fettucine Alfredo! For this lemon pasta you’ll need:

  • Pasta: spaghetti or bucatini
  • Milk
  • Heavy cream
  • Butter
  • Garlic
  • Lemon zest
  • Parmesan cheese
  • Salt and pepper
Lemon Pasta Recipe

Use any long noodle (bucatini is best)

You can use any type of long noodle for this lemon pasta recipe. If you have fresh pasta, this would be a great sauce for using it! Of course, it’s much more accessible to use dried long noodles. Here are some options:

  • Bucatini: It’s spaghetti with a hole in it! It lends a deliciously chewy texture to the pasta.
  • Spaghetti: The classic!
  • Linguine: A slightly wider noodle.
  • Fettucine: A flatter and wider noodle.

Of course, this sauce works well with a short noodle as well, if you’re looking for a short pasta! Some ideas: Rigatoni, Penne, Orecchiette and Cavatappi would be great contenders.

How to make lemon pasta: a few tips

This lemon pasta takes just a few minutes to whip up. Here are a few tips to keep in mind during the cooking process:

  • Consider cutting it in half! The recipe below makes 6 to 8 servings, so cut in half if you don’t want leftovers (though they do save well!).
  • Zest the lemons first. You’ll need zest from two lemons, which can take a while. We like using a microplane grater to make quick work.
  • Loosen the sauce with pasta water. Like with many Italian pasta recipes, save a bit of the pasta water after you’ve boiled it: you may need a few splashes to get the sauce to a creamy consistency.
Lemon pasta

Serves a crowd, or works as leftovers

This lemon pasta makes quite a big pot of noodles! You’ll use 1 pound of pasta here, which in our book makes enough for 6 to 8 servings. This might be less than you’re used to when it comes to pasta, but this one is so rich we recommend having smaller servings.

You may want to halve this recipe, or it works great as leftovers! The flavor is still fantastic after 3 days refrigerated. We even ate it cold! You can also reheat it in a skillet with a splash of milk to get it creamy again.

What to serve with lemon pasta

Here’s an important thing about this lemon pasta recipe: how to make it into a meal! The serving size is smaller than you might be used to, because it’s such a rich and fatty pasta. You’ll want to accessorize it with a crisp green salad or some vegetable sides. Here are some ideas:

Lemon pasta

Or, serve it as a simple side dish

Another great way to serve lemon pasta? As a side dish! It works very well with fish or chicken for an elegant meal. Here are a few mains we’d serve it with:

This lemon pasta recipe is…

Vegetarian. For gluten-free, use gluten-free or legume pasta.

Print
Lemon pasta

Lemon Pasta


  • Author: Sonja Overhiser
  • Prep Time: 10 minutes
  • Cook Time: 10 minutes
  • Total Time: 20 minutes
  • Yield: 6 to 8
  • Diet: Vegetarian

Description

This lusciously creamy lemon pasta recipe is the ideal balance of richness and acidity! It’s a comforting meal or stellar side dish.


Ingredients

  • 1 pound spaghetti or bucatini pasta*
  • 1 cup 2% milk
  • ¾ cup heavy cream
  • 1 teaspoon kosher salt, divided
  • 4 cloves garlic, grated
  • Zest from 2 lemons
  • 5 tablespoons salted butter, sliced
  • ½ cup grated Parmesan cheese
  • Fresh ground black pepper

Instructions

  1. Cook the pasta (and save the pasta water!): Bring a large pot of heavily salted water to a boil. Add the pasta and cook until al dente. Set the timer for a few minutes less than the package instructions and then taste: the pasta should be just done, still with some firmness. The pasta should also taste salty from the salted water. Save out ½ cup pasta water using a glass measuring cup for the sauce, then quickly drain the pasta.
  2. Make the sauce: In saucepan, add the milk and cream and bring to a simmer over medium heat. As it comes to a simmer, grate in the garlic. Add ½ teaspoon kosher salt, zest of 1 lemon, and 4 tablespoons butter and stir for 1 minute. Slowly sprinkle in the Parmesan cheese, stirring constantly until fully incorporated and the sauce thickens.
  3. Serve: Add the drained pasta to the sauce and toss to combine. Allow to sit 3 minutes. Add the remaining zest of 1 lemon, ½ teaspoon kosher salt, and 1 tablespoon butter. Add a few drizzles of pasta water as necessary until nicely coated. Serve with fresh ground black pepper. Store leftovers refrigerated for up to 3 days (reheats nicely in a skillet with a splash of milk).

Notes

*This quantity serves 6 to 8: make sure to cut in half if you’re serving less eaters! Pair with a green salad or veggie side to round it out as a meal.

  • Category: Main dish
  • Method: Pasta
  • Cuisine: American

Keywords: Lemon pasta

A Couple Cooks - Recipes worth repeating.


from A Couple Cooks https://ift.tt/3k5bsut

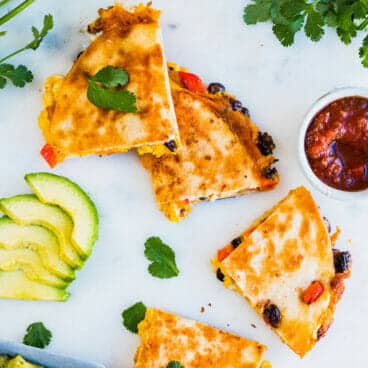
Easy Breakfast Burrito

This genius breakfast burrito recipe is irresistibly satisfying and so easy to whip up! It’s got two layers of eggs for massive savory flavor.

Breakfast burrito recipe

Need ideas to start your morning? Or love breakfast for dinner? Try this genius Breakfast Burrito Recipe! In just 15 minutes, you’ve got a burrito that’s bursting with zesty flavor. Many breakfast burrito recipes call for rice or cooked meat or potatoes: and who has time for that in the morning? (Not us.) You’ll need just 5 minutes to cook two layers of eggs here: one chorizo-spiced and one cheesy. Take a bite and it’s irresistibly savory and delicious, with all the right cozy textures. We even make this Tex Mex classic for a quick dinner, it’s so darn good.

Ingredients in a quick breakfast burrito recipe

It’s hard to plan ahead for mornings, and it’s hard to meal prep. So here’s a breakfast burrito recipe that you can whip up in a flash! This recipe makes 2 burritos, and you can freeze one for later too. Here are the quick and simple components: no meat browning or potato cooking required!

  • Eggs
  • Spices: chili powder, garlic powder and cumin
  • Salt and butter
  • Shredded cheddar cheese
  • Avocado
  • Pico de gallo
  • Large 10″ tortillas
Breakfast Burrito Recipe

The trick: two layers of eggs

Here’s the cool thing about this breakfast burrito recipe: you need no meat, because the spiced eggs stand in for meat! Here’s a break down of how this trick works, with a total of 2 eggs per serving:

  • Spiced eggs: Adding chili powder, garlic and cumin to scrambled eggs makes them taste like a combination between taco meat and chorizo. Really! We made up this concept for our Amazing Egg Tacos and have been riffing on it ever since.
  • Cheesy eggs: Of course, any breakfast burrito needs a layer of cheesy eggs! Combining these two layers makes a satisfying bite where you don’t miss the meat.

How to roll a breakfast burrito

The hardest part about a breakfast burrito? Rolling the burrito! This is notoriously challenging, so here are a few of our top tips:

  • Tortilla size: Breakfast burritos need large tortillas, at least 10″ (or up to 12″).
  • Tortilla type: We have the best luck with flour tortillas. Some gluten free or grain free tortillas work, but it depends on the brand.
  • Warm it: It’s helpful to bring the tortilla to room temp or lightly warm it in the microwave before rolling. This helps to reduce breakage.
  • Rolling tips: Fold the tortilla in half over the filling, then tuck it around and underneath the filling, forming a tight roll. Fold in each side of the burrito, then roll it up. Keep it as tight as possible while rolling.
Breakfast Burrito

One last step: toast it!

This is totally optional, but who doesn’t love a breakfast burrito that’s toasted on the outside? They get those lovely golden marks on the outside, which makes it look (and smell) absolutely irresistible! All you have to do is heat a little butter in a skillet, then cook on medium high heat for about 1 minute per side. It works like a charm!

Leftover storage: how to freeze it

This breakfast burrito recipe makes 2 servings. It’s also an easy recipe to multiply: you can make a double or triple batch if you like! If you happen to have leftovers, you can freeze the burrito for later. This is preferable to refrigerating the burrito, as it can become very soggy. There are still concerns with a breakfast burrito becoming soggy after freezing it, so here are a few small tips to keep in mind:

  • When you assemble, add a small handful of shredded cheese on the tortilla first. This can help to form a moisture barrier.
  • Let the egg filling come to room temp before rolling. This prevents extra moisture as well.
  • Freeze wrapped in foil. Store up to 1 month.
  • To reheat, place it in foil in a 350 degree oven and bake until warmed through, about 15 minutes.

And that’s it! It results in the tastiest, easiest breakfast burrito around. And remember: you don’t have to wait for breakfast for this one! Try it as an easy dinner.

More savory breakfast recipes

Savory breakfast is where it’s at! Here are a few more breakfast recipes that make mornings more delicious:

This breakfast burrito recipe is…

Vegetarian. For gluten free, use gluten free tortillas (just be careful of the brand, as some gluten free tortillas can be more brittle).

Print
Breakfast burrito recipe

Easy Breakfast Burrito


  • Author: Sonja Overhiser
  • Prep Time: 10 minutes
  • Cook Time: 5 minutes
  • Total Time: 15 minutes
  • Yield: 2 burritos
  • Diet: Vegetarian

Description

This genius breakfast burrito recipe is irresistibly satisfying and so easy to whip up! It’s got two layers of eggs for massive savory flavor.


Ingredients

  • 4 eggs
  • 1 teaspoon each chili powder, garlic powder, and cumin
  • ¼ teaspoon kosher salt, divided
  • 1 tablespoon butter, divided
  • ½ cup shredded cheddar cheese
  • 1 mashed avocado, divided
  • ¼ cup purchased pico de gallo, drained and divided
  • 2 10-inch large tortillas (burrito size)

Instructions

  1. In one medium bowl, whisk together 2 eggs with the chili powder, garlic powder, cumin, and ⅛ teaspoon of the salt. In another medium bowl, whisk 2 eggs with ⅛ teaspoon of the salt, then add the shredded cheese.
  2. In a skillet, heat ½ tablespoon butter. Add the first bowl of eggs and cook over medium low heat, scraping as the eggs solidify, about 1 to 2 minutes total. As you scrape, they’ll start to form together into a meat-like texture. Remove the cooked eggs to a plate. Then add ½ tablespoon butter to the pan and do the same thing to cook the second bowl of cheesy eggs.
  3. Bring the tortillas to room temperature or lightly warm them in the microwave: this helps them to not break when wrapping the burritos.
  4. Place the tortilla on a cutting board. Place the toppings in the center of the tortilla: a sprinkle of cheese (optional but can help reduce sogginess of the tortilla), the spiced eggs and the cheesy eggs, 2 tablespoons of the drained pico de gallo, and the ½ mashed avocado. Fold the tortilla in half over the filling, then tuck it around and underneath the filling, forming a tight roll. Fold in each side of the burrito, then roll it up. Repeat with the other burrito. Cut in half and serve. (You can freeze the leftover burrito if you like. Let the egg filling come to room temperature first. Place a foil wrapper under the tortilla before you roll it. Roll it up and freeze for up to 1 month. Reheat in the foil in a 350 degree oven until warmed through, about 15 minutes or so.)
  5. Toast the burrito (optional): Add a bit of butter to a skillet, and add the wrapped burrito. Cook on medium high heat for about 1 minute until golden, then flip and toast the other side for another minute.
  • Category: Breakfast
  • Method: Burrito
  • Cuisine: Mexican inspired

Keywords: Breakfast burrito, Breakfast burrito recipe

A Couple Cooks - Recipes worth repeating.


from A Couple Cooks https://ift.tt/3tEAlQJ

Bread & Butter Refrigerator Pickles

Perfectly sweet and delightfully crisp, these quick bread & butter refrigerator pickles are leaps and bounds better than anything you can buy in the store, with the added benefit of being completely customizable to your personal tastes and preferences.

Refrigerator pickles are undeniably the easiest kind of pickles no make, no fancy equipment or complicated water baths necessary. They come together in minutes, and keep beautifully in the fridge for weeks, and result in beautifully crispy pickles.

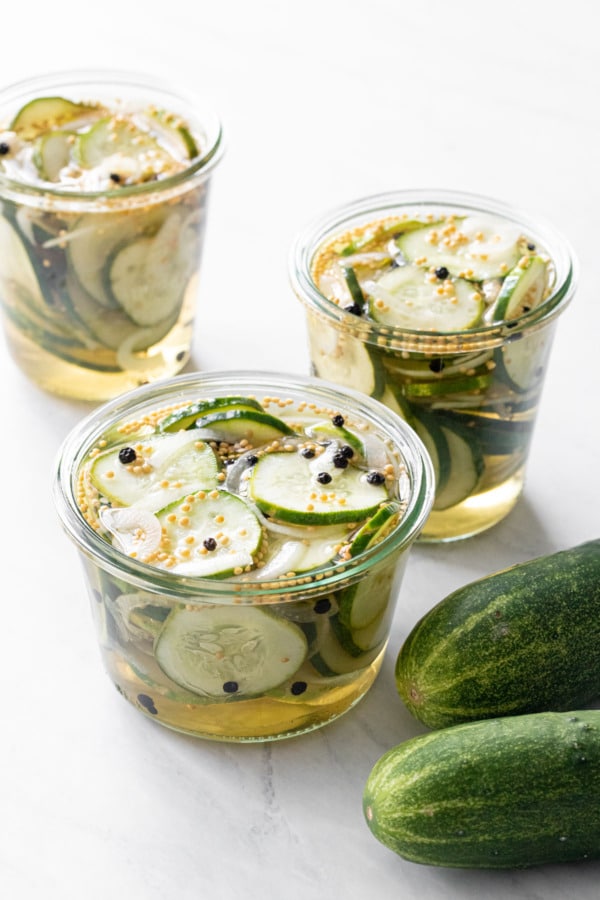
Three uncovered jars of Bread & Butter Refrigerator Pickles in brine, with two kirby cucumbers on the side

The two main kinds of pickles commercially available are kosher dill and bread & butter. Dill pickles obviously have a dill-forward flavor, and are less sweet and more vinegary overall.

Bread and butter pickles, on the other hand, have more sugar and a different combination of spices and seasonings (primarily onion, mustard, and celery seed), resulting in a vastly different flavor profile.

I have yet to find any definitive information on the origins of the name; it seems to be somewhat of a mystery, though many sources claim the name is derived from a common depression-area sandwich featuring pickled cucumbers layered between slices of buttered bread.

(more…)


from Love and Olive Oil https://ift.tt/3k5Ywoj

Rum Punch

No one can resist this Rum Punch recipe! Here are the classic ingredients that make a perfectly balanced tropical flavor.

Rum Punch

Here’s a cocktail recipe that’s so pristine, it’s no wonder it’s got a long history. Try this Rum Punch recipe! The concept of rum punch goes back to the 1600’s, though this one is closer to a Planter’s Punch from the early 1900’s. The balance of the ingredients is ideal: instead of overly saccharine is perfectly sweet tart, fruity, and tropical. In fact, it’s so good you won’t be able to resist another sip. Try this easier spin on the Mai Tai: and prepare to be amazed.

What is rum punch?

What’s rum punch? A punch is any drink that includes fruit juices, either non-alcoholic or alcoholic, often served in a large bowl with glasses. The first printed record of a punch dates back to 1632 in English documents, a concept borrowed from India. Modern punch evolved in the 1650’s with Jamaican rum. The single serving punch, called a sling, came about after that (the most famous of which is the Singapore Sling).

Some of the oldest punches are rum-based, and were made using the following recipe in a rhyme: “One of Sour, Two of Sweet, Three of Strong, Four of Weak.” This rum punch recipe is similar to Planter’s Punch, which originated in Jamaica and was first published in an 1878 London magazine. Our recipe adds pineapple, orange and grenadine, which is traditional in many rum punch recipes you’ll find today. The rum punch ingredients you’ll need are:

  • White rum
  • Dark rum
  • Pineapple juice
  • Orange juice
  • Lime juice
  • Grenadine
Rum punch recipe

Types of rum

Many rum punch recipes use more than one type of rum. Why is it necessary? Different types of rum add a lot of nuance in flavor. Taste the different varieties, and you’ll find that they almost taste like different liquor. You can use only one type if it’s all you have, but it’s worth seeking out two types for the flavor difference. Here’s an outline on types of rum:

  • Dark rum has a deep, caramel flavor and notes of cinnamon and spices (see Dark Rum Drinks)
  • White rum has a straightforward flavor rum with the signature fruity finish
  • Aged rum, aka golden or añejo rum, has notes of vanilla, coconut, almond, citrus, or caramel
  • Coconut rum is a sweet coconut-flavored liqueur made with rum (Malibu is the most popular)

Because Malibu rum is so sweet, make sure to use it in combination with another rum. But if all you have is white rum or dark rum, you can use just one type of rum in a pinch.

Grenadine syrup

Buy grenadine or make homemade

Got grenadine on hand? Grenadine is a red non-alcoholic syrup with a sweet tart flavor, commonly used in cocktails and mocktails. Many people think it’s cherry flavored, but it’s actually made from pomegranate juice! It’s been used in grenadine cocktails for hundreds of years, from the Singapore Sling to the Shirley Temple.

Much of the grenadine on the market today has artificial sweeteners and colors. Look for an all natural grenadine, or you can make homemade grenadine! It’s easy to make with pomegranate seeds.

How to make rum punch

This rum punch recipe is for a single serving drink, in the tradition of the classic Singapore Sling or Hurricane. But you can serve it in a punch bowl, too! Here’s how to make rum punch (or jump to the recipe below):

  • Stir: In a hurricane glass, add 1 ounce each white rum and dark rum, 2 ounces pineapple juice, 1 ounce orange juice and ½ ounce lime juice.
  • Top with grenadine: Top with ½ ounce grenadine, which will settle to the bottom and make a gradient effect. Serve garnished with an orange slice and cocktail cherry!
Rum punch ingredients

Or, serve it in a punch bowl

If you’re making rum punch for a crowd, the best way to serve it is in a punch bowl! It’s easy to multiply the quantities for 8 drinks. Simply replace each ounce with 1 cup of the ingredient! Here’s what to do:

  • Add all ingredients, including the grenadine, to a punch bowl.
  • Add a few handfuls ice to cool.
  • Garnish with orange slices!

And that’s it! This rum punch has risen to the top of our favorite drinks to make: we hope you’ll love it too! It’s great as a tropical drink or beach drink, and works in any season.

More rum drinks

Love rum? Here are a few more top rum cocktails to try:

Print
Rum Punch

Rum Punch


  • Author: Sonja Overhiser
  • Prep Time: 5 minutes
  • Cook Time: 0 minutes
  • Total Time: 5 minutes
  • Yield: 1 drink (or 8 drinks)
  • Diet: Vegan

Ingredients

  • 1 ounce* (or 1 cup) white rum
  • 1 ounce (or 1 cup) dark rum
  • 2 ounces (or 2 cups) pineapple juice
  • 1 ounce (or 1 cup) orange juice
  • ½ ounce (or ½ cup) lime juice
  • ½ ounce (or ½ cup) grenadine
  • For the garnish: orange slice, cocktail cherry

Instructions

  1. For the single serving: In a highball glass, stir together all ingredients (in ounces), except for the grenadine. Fill the glass with ice and top with the grenadine. Garnish with the orange slice and cherry.
  2. For party size (8 servings): Place all ingredients in a punch bowl or pitcher, and add a few handfuls of ice. Add orange slices or wheels as a garnish.

Notes

*To convert to tablespoons, 1 ounce = 2 tablespoons

  • Category: Drink
  • Method: Stirred
  • Cuisine: Cocktails

Keywords: Rum punch, rum punch recipe

A Couple Cooks - Recipes worth repeating.


from A Couple Cooks https://ift.tt/2X1BYwj

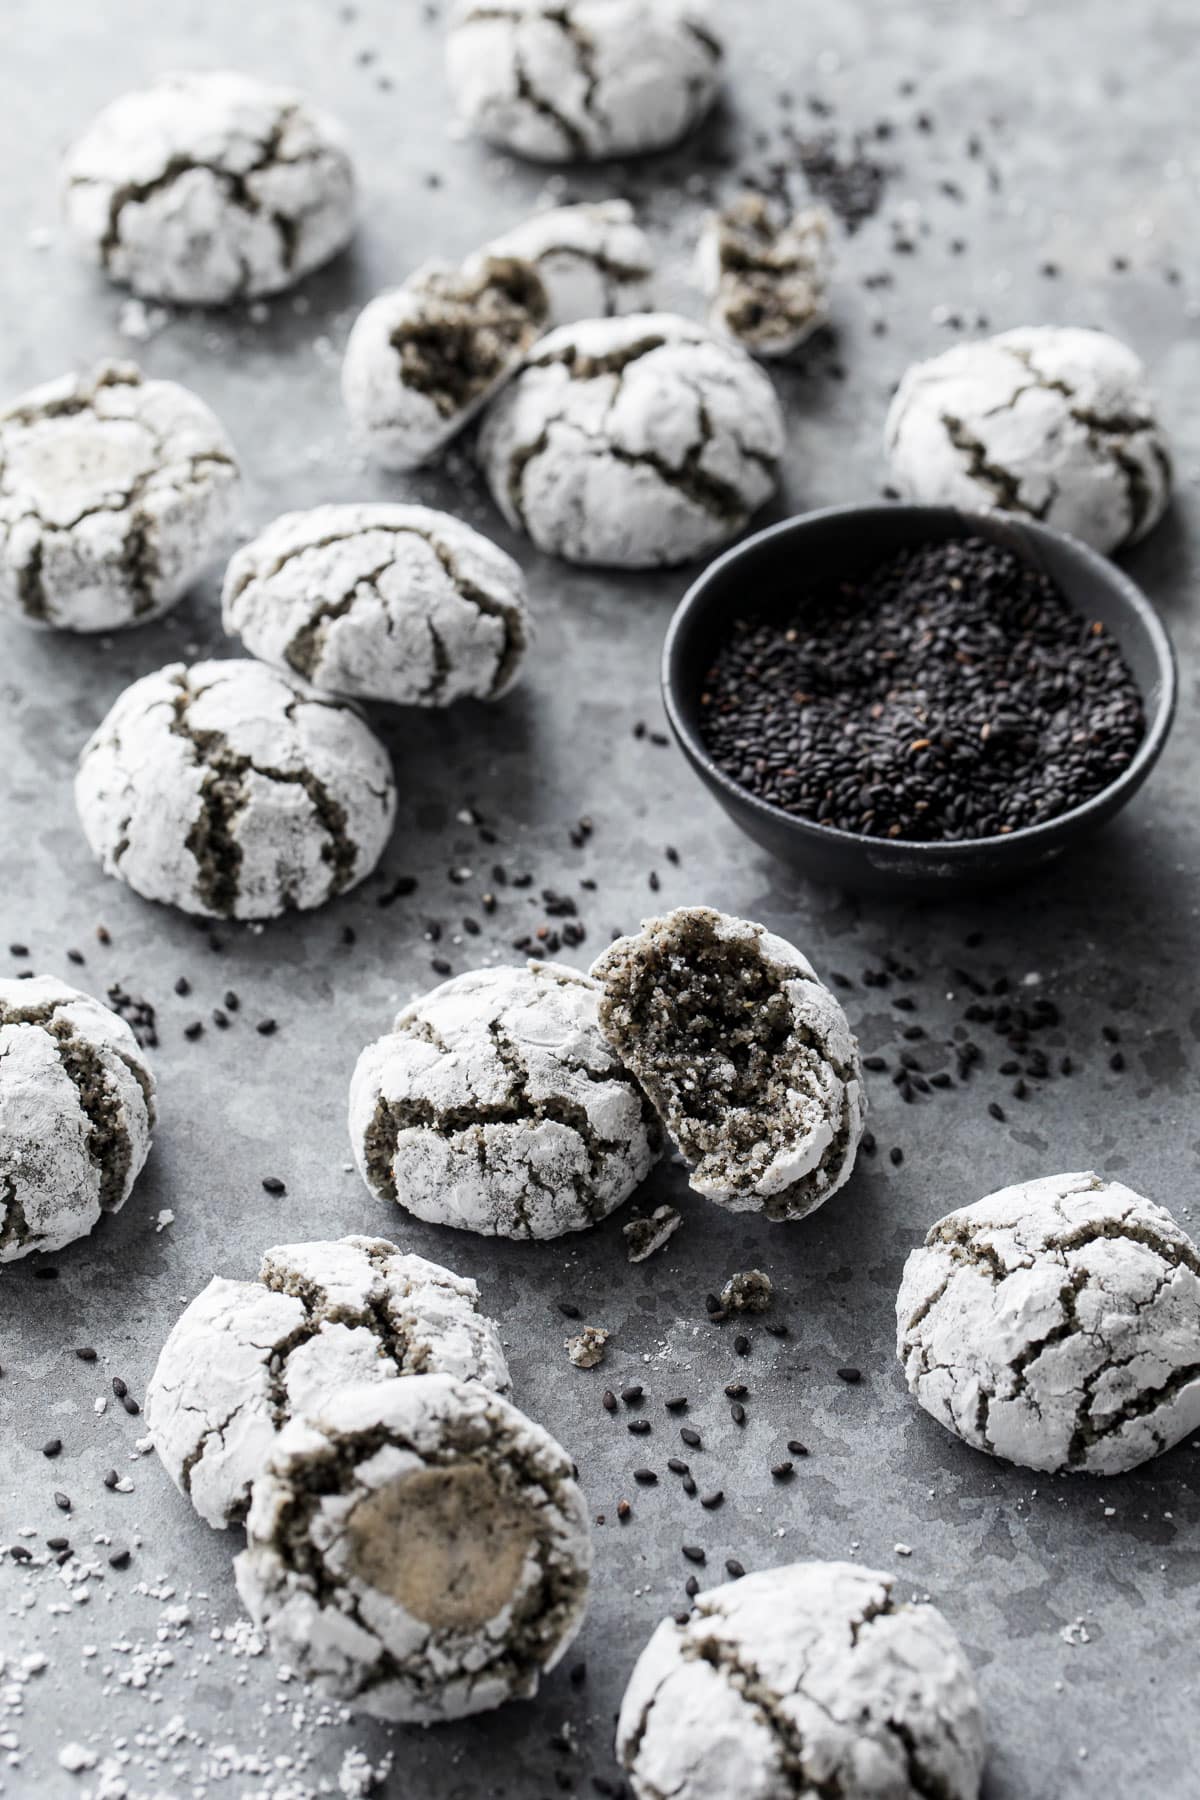
Black Sesame Amaretti Cookies

Amaretti are some of my favorite cookies for a reason: they are ridiculously simple to make, with only 3 main ingredients—plus the black se...