Strawberry Waffles

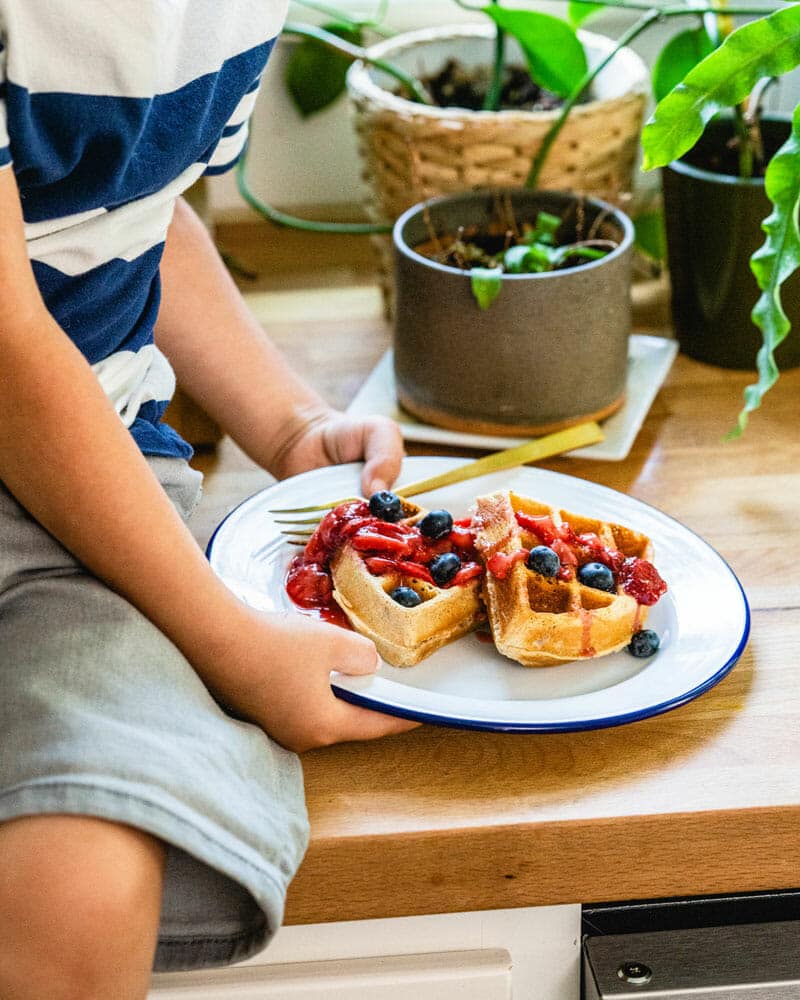
Strawberry waffles are the best breakfast treat! Drench these fluffy waffles with a bright and tangy homemade strawberry sauce.
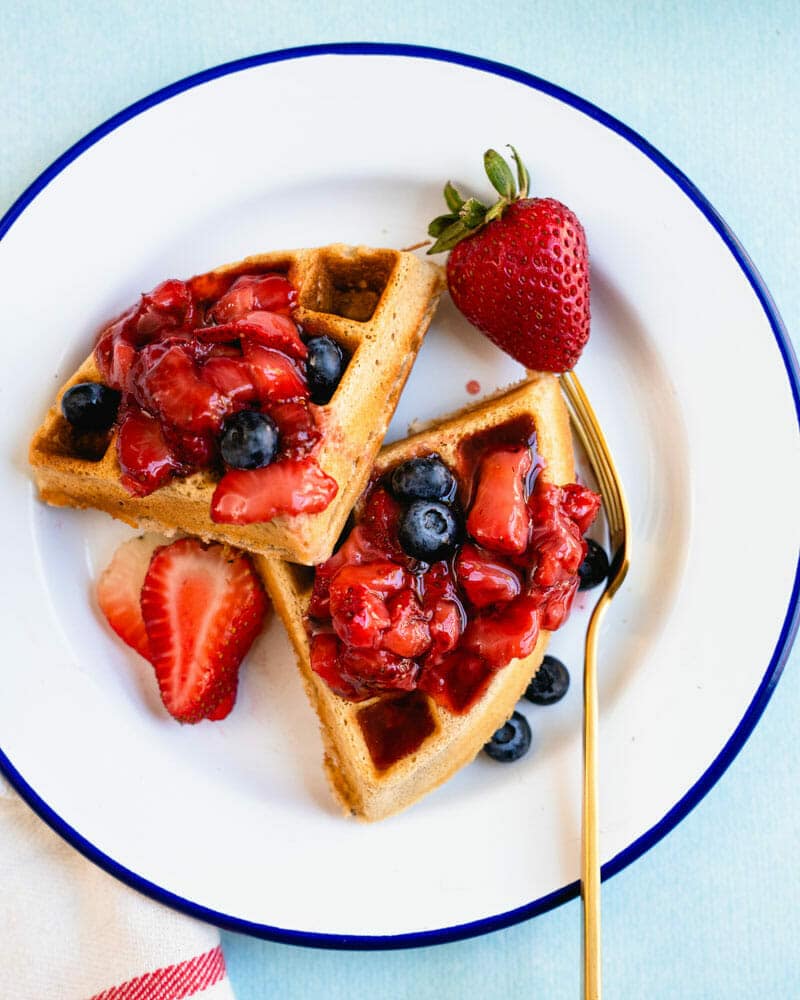
Strawberry waffles

Here’s a breakfast treat that will blow you away: strawberry waffles! This stunning recipe is easy to make and full of flavor, perfect for Sunday brunch or any time you need to impress.The waffles are perfectly fluffy, full of big flavor with a short ingredient list. And the strawberry sauce…it’s thick and sweetened with maple, full of beautiful strawberry flavor. This recipe has a healthy spin: it’s not too sweet and the waffles made of all plant based ingredients. Serve it up for guests or your significant other, you’ll earn major points.

How to make strawberry waffles: some tips!

These strawberry waffles are simple to make using ingredients you likely already have on hand! They’re full of plant-based ingredients and have just the right sweetness: they’re not too sugary! Based on our healthy vegan waffles, they’re customizable so you can make them plant based or use regular dairy milk. Here’s what to know about these waffles:

  • Make the strawberry sauce first, or in advance. Speed up the process by making the sauce in advance: or make it right before the waffles. It takes only 15 minutes to whip up, and you can use some of the simmering time to make the waffles.
  • Use your favorite non-dairy milk OR dairy milk for the waffles. These waffles are dairy free and vegan if you use oat milk or almond milk. You can also use dairy milk if it’s all that you have on hand!
  • This recipe makes 4 standard waffles or 2 Belgian. Note this when you go to pour the batter in your waffle iron. More on Belgian waffles below…
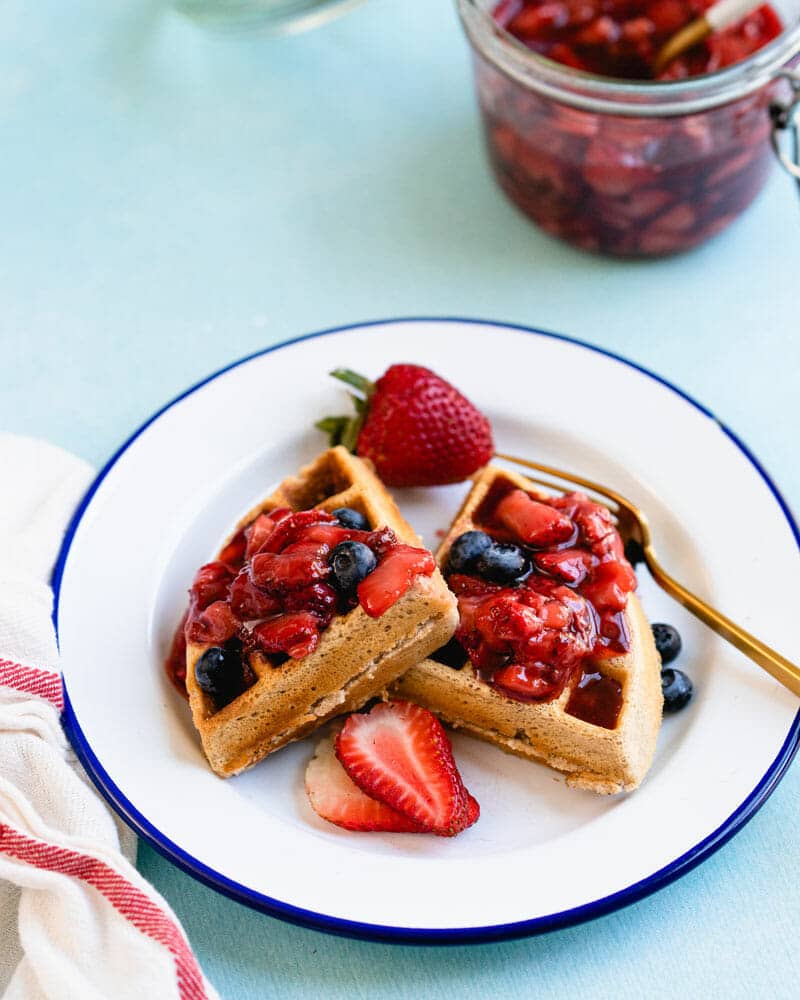
Strawberry waffles

Strawberry sauce seals the deal!

The star of this strawberry waffles recipe is this Easy Strawberry Sauce! It’s naturally sweet and made with pure maple syrup. It’s a chunky, thick sauce that cooks down into a beautifully glossy compote. You can keep the berries chunky as you see in the photos, or mash them with a spoon to help them break down more during cooking. Here’s the basic idea behind this strawberry sauce:

  • Slice: Slice the strawberries.
  • Simmer: Simmer them with maple syrup. If you’d like a less chunky sauce, mash the berries as it cooks.
  • Thicken: Pull out a bit of the sauce and mix it with cornstarch (this avoids clumping). Then stir it back in and heat until the sauce thickens. The total simmer time is only 10 minutes!
Strawberry sauce

Tip: find the ripest berries possible

It goes without saying that this strawberry sauce is best with the ripest, most beautiful red strawberries. If you can find local strawberries, that’s even better! The flavor is unreal. If you don’t have access to local berries, simply find the ripest strawberries you can at the grocery store. You’ll thank us later!

Standard waffles vs Belgian waffles

You can make these strawberry waffles with a standard waffle maker or as Belgian waffles. Our preference? Belgian waffles all the way. They’re taller and fluffier, they look prettier and are more fun to eat. Here’s the breakdown:

  • Belgian waffles are twice as large as regular waffles: they’re thicker with a deeper grid pattern. Because they’re taller, they look more impressive and have a fluffier texture. If you’re eating Belgian waffles, remember that a serving size is 1/2 of the waffle.
  • Standard waffles are thinner: about 1/2-inch thick. If you’re making a standard waffle, the serving size is one waffle.

Looking for a waffle iron? Here’s a Belgian waffle iron we recommend.
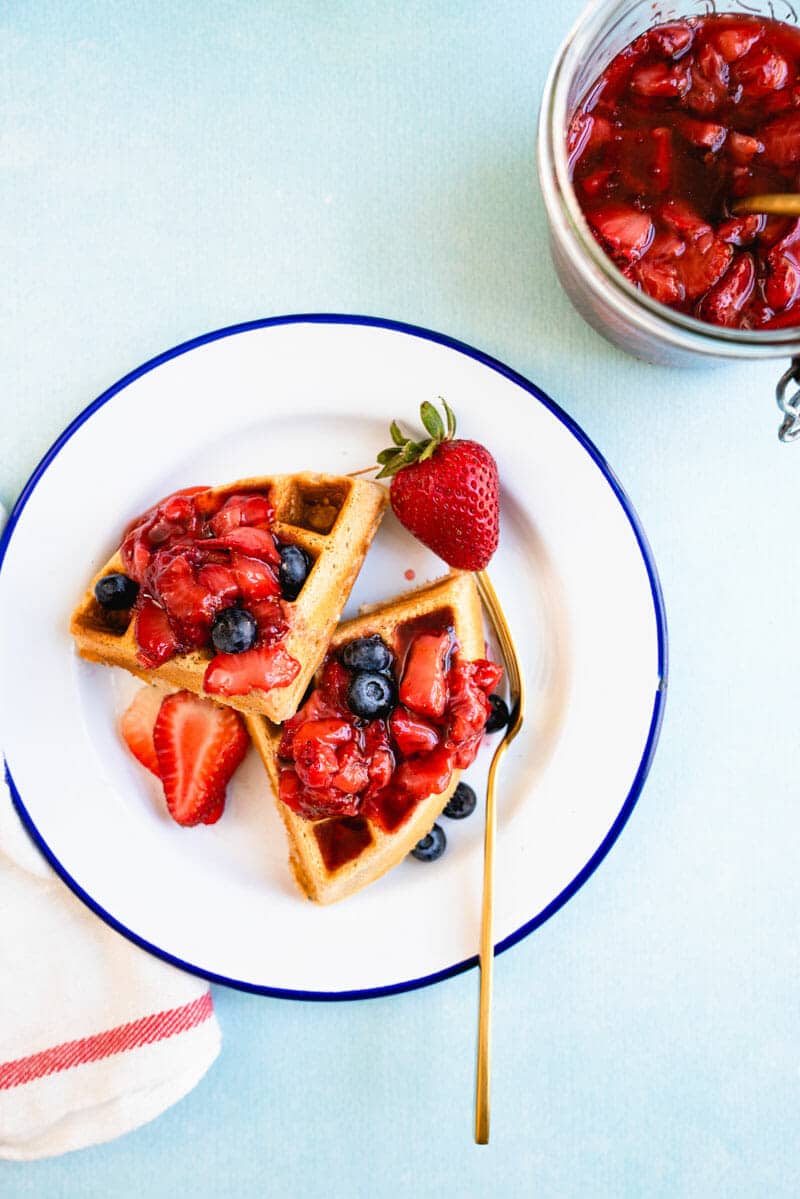
How to make strawberry waffles

Make ahead instructions for strawberry waffles

Want to take all the morning work out of these strawberry waffles? It’s easy to whip up the sauce and waffles ahead of time. Or, you could make a double batch of waffles and save more for later. The strawberry sauce makes 8 servings, so you’d also have enough sauce for later. Here’s what to do:

  • Strawberry sauce storage & reheating: Make the sauce following the instructions below. Then place it in a sealed jar and refrigerate for up to 1 week (or freeze for 6 months). Warm on the stovetop or in the microwave before serving.
  • Waffles storage & reheating: Make the waffles, then let them cool completely on a wire rack. Once they’ve cooled, stack the waffles in a freezer-safe baggie. They’ll keep for up to 3 months. To reheat waffles, pop them into the toaster and cook them on a low setting two or three times. Or warm them on an oiled baking sheet in a 300 degree oven.

Variation: make them gluten free!

Need a gluten free waffles recipe? Make these healthy strawberry waffles a gluten free recipe by using one of the recipe below, then topping with the easy strawberry sauce. Here are some options:

Strawberry waffles

This strawberry waffles recipe is…

Vegetarian, vegan, plant-based and dairy-free. For gluten free, go to Fluffy Gluten Free Waffles or Sweet Cornbread Waffles.

Print
Strawberry waffles

Best Strawberry Waffles


1 Star2 Stars3 Stars4 Stars5 Stars (7 votes, average: 4.71 out of 5)

  • Author: Sonja Overhiser
  • Prep Time: 15 minutes
  • Cook Time: 15 minutes
  • Total Time: 30 minutes
  • Yield: 4
  • Diet: Vegan

Description

Strawberry waffles are the best breakfast treat! Drench these fluffy waffles with a bright and tangy homemade strawberry sauce.


Ingredients

For the strawberry sauce (makes 8 servings)

  • 1 pound strawberries
  • 6 tablespoons maple syrup
  • 2 teaspoons cornstarch

For the waffles (makes 4 servings)

  • 1 cup all purpose flour
  • 1/2 cup whole wheat flour (or substitute all purpose)
  • 2 teaspoons baking powder
  • 2 tablespoons sugar
  • 1/2 teaspoon cinnamon
  • 1/2 teaspoon kosher salt
  • 1/4 cup neutral oil
  • 1 1/2 cups milk, oat milk or almond milk
  • 2 teaspoons vanilla extract

Instructions

  1. Make the strawberry sauce: Hull and slice the strawberries. Add the berries to a small saucepan with the maple syrup and cook over medium heat, stirring occasionally while it bubbles gently. After about 5 to 7 minutes when strawberries start to break down, remove 2 tablespoons of sauce that has formed in the pan and whisk together with the cornstarch. Add it back to the pan and stir until thickened, about 3 minutes. Makes 8 servings. You can make ahead or store leftovers in a sealed container refrigerated for up to 1 week, or cool and freeze up to 6 months.
  2. Make the waffles: Preheat the waffle iron to the high heat setting.
  3. In a medium bowl, mix the all purpose flour, whole wheat flour, baking powder, sugar, cinnamon, and kosher salt until thoroughly combined.
  4. In another bowl, whisk the oil, milk, and vanilla. Pour the wet ingredients into the dry ingredients and mix gently until the batter is mostly smooth.
  5. Immediately, add the batter (1 1/4 cups for a Belgian waffle maker and a little over 1/2 cup for a standard waffle maker) into the center of the waffle iron, then cook according to the waffle iron’s instructions. Remove the cooked waffles and place them on an oiled baking sheet without stacking. Make the waffles to order, or place cooked waffles in a 200°F oven to keep warm. Serve with strawberry sauce (and if desired, peanut butter to add protein and a PB&J vibe).
  6. Cooked waffles can be frozen; place them in a plastic bag and remove the remaining air with a straw before sealing. To reheat, remove from the freezer and lightly toast in a toaster.

  • Category: Breakfast
  • Method: Waffle Iron
  • Cuisine: American

Keywords: Strawberry Waffles

More waffles recipes

Are you a waffle lover? Us too. Here are a few more waffle recipes to try:

A Couple Cooks - Healthy, Whole Food, & Vegetarian Recipes


from A Couple Cooks https://ift.tt/2ZcipOV

Broccoli Salad

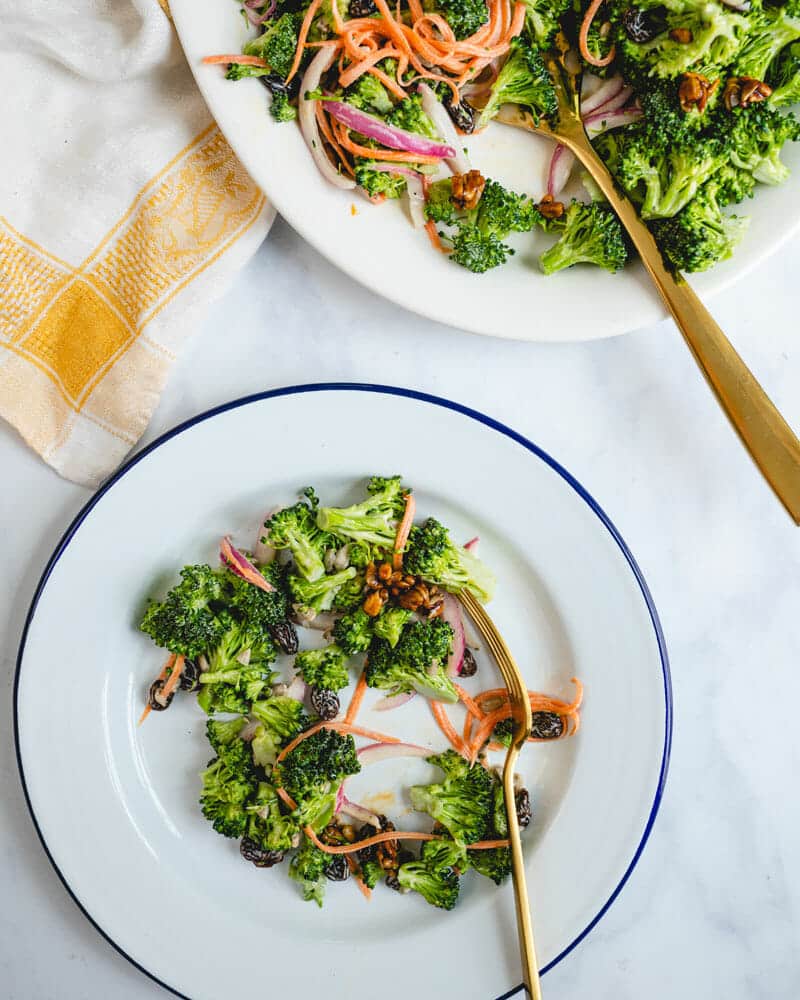
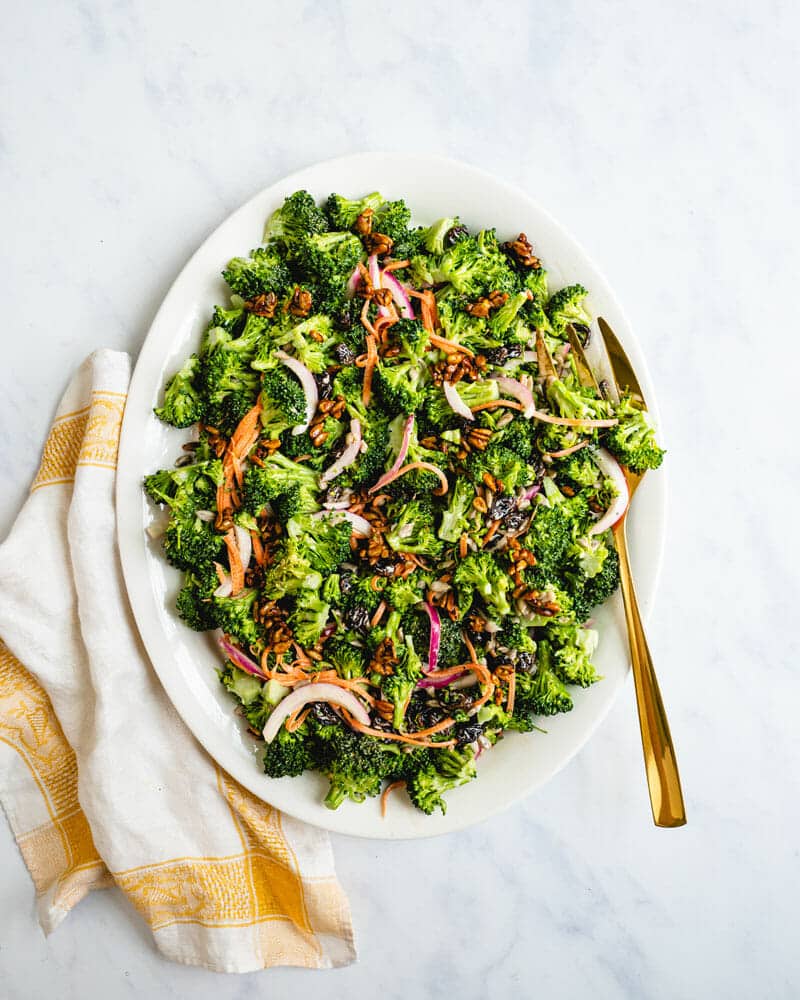
A new and improved take on the classic broccoli salad! Crunchy and savory sweet, it stars broccoli, raisins, and a flavor-popping dressing.

Broccoli Salad

Love broccoli salad? Us too. There’s something about that classic American broccoli salad: you know, the one with raisins and a mayo-based dressing? It’s a retro summer salad, where the florets are marinaded in the sauce until they’re soft and savory sweet. It’s oddly satisfying and gives us all those nostalgic vibes. Here’s a new and improved version of to make it fresh and healthy: but it keeps all the character and deliciousness of the original. In fact: we think it’s even better.

Broccoli salad: new and improved!

Mayo dressing and raisins reeks of the 1950’s and 60’s, right? While we couldn’t find a definitive history of broccoli salad, it’s got all the markers of those decades. Usually this salad is topped with bacon and sometimes cheese: taking it from a fresh and healthy salad to a decadent treat. So here at A Couple Cooks, we set about to modernize this classic (just like we did with this green bean casserole). Here’s why you should make this broccoli salad recipe:

  • Dressing with just enough mayo. Mayo brings big flavor and texture, but it doesn’t need to be swimming in the stuff. This dressing is just the right blend of creamy and savory sweet. Vegan mayo is becoming easy to find: use that for a plant-based broccoli salad.
  • Skip the cheese and bacon. Salad doesn’t need cheese and bacon to taste good! Removing those, it’s fresh and plant based.
  • Same great flavor…or better! This salad is just as satisfying as the standard…in fact, we think it’s even tastier!
Broccoli salad

Ingredients for broccoli salad

Are you convinced? Here are the ingredients you’ll need for the base of this broccoli salad:

  • Fresh broccoli: make sure it’s at its peak freshness. The fresher the broccoli, the better the salad!
  • Red onion
  • Carrot
  • Raisins: You also can use dried cranberries or cherries
  • Mayo: Use vegan mayo as desired
  • Cider vinegar
  • Dijon mustard
  • Maple syrup or sugar: Either works! use pure maple syrup for a naturally sweet salad!
Broccoli salad

Add the smoky sunflower seed topping!

Remember we told you we removed the bacon from the classic broccoli salad? You don’t need anything in place of it. But if you really want to take this salad over the top: make this smoky sunflower seed topping! It mimics the flavor of bacon using sunflower seeds that are flavored with soy sauce, maple syrup and smoked paprika. They bring just the right smoky and savory flavor to the salad.

What’s smoked paprika? It’s a smoky Spanish version of sweet paprika. You should be able to find it at most grocery stores: it’s sometimes labeled pimentón. Smoked paprika is our secret weapon in plant-based cooking and we use it in so many recipes! Go to Best Smoked Paprika Recipes to use up a jar.

How to make broccoli salad

Do you really have to refrigerate 1 hour?

Great question: and we like that you love shortcuts (we do too). In this case though: the wait time makes a difference. Yes, you do have to refrigerate broccoli salad for 1 hour! Here’s why:

  • It makes just the right tender broccoli texture. Technically, you can eat it right away. But if you do, the broccoli is crisp. Honestly, it just doesn’t taste right! Refrigerate 1 hour, and it softens just enough.
  • The flavors permeate even more! The flavor also tastes better after that 1 hour soak. The broccoli salad tastes even more tangy and savory sweet.
Broccoli salad

More broccoli recipes

Guess what? We have so many more classic broccoli recipes to enjoy this healthy veggie! Here are some favorites that you should try:

  • Broccoli Slaw This creamy broccoli slaw is irresistibly tasty! It’s easy to make using fresh broccoli or the packaged mix you can find in most grocery stores.
  • Epic Roasted Broccoli Makes this green veggie taste SO GOOD you can’t stop sneaking bites! It’s charred until tender, then spritzed with lemon juice.
  • Creamy Broccoli Potato Soup Intensely creamy, satisfying, and 100% plant based! It’s an easy healthy soup that everyone loves.

This broccoli salad recipe is…

Vegetarian and gluten-free. For vegan, plant-based, and dairy-free, use vegan mayo.

Print
Broccoli Salad

Broccoli Salad (New & Improved!)


1 Star2 Stars3 Stars4 Stars5 Stars (6 votes, average: 5.00 out of 5)

  • Author: Sonja Overhiser
  • Prep Time: 75 minutes
  • Cook Time: 0 minutes
  • Total Time: 1 hour 15 minutes
  • Yield: 6
  • Diet: Vegan

Description

A new and improved take on the classic broccoli salad! Crunchy and savory sweet, it stars broccoli, raisins, and a flavor-popping dressing.


Ingredients

  • 1 1/2 to 2 pounds broccoli on the stalk, enough for 8 cups florets
  • 1 cup sliced red onion
  • 1 carrot, julienned or grated
  • 1/2 cup raisins
  • 1/2 cup mayonnaise (vegan mayo as needed)
  • 3 tablespoons apple cider vinegar
  • 1 tablespoon sugar or maple syrup
  • 2 teaspoon Dijon mustard
  • 1 teaspoon kosher salt

For the topping

  • 1/4 cup sunflower seeds
  • 1 tablespoon soy sauce or tamari
  • 1 tablespoon maple syrup or sugar
  • 1 teaspoon smoked paprika

Instructions

  1. Chop the broccoli into very small florets. Slice the red onion. Stir together with the raisins.
  2. Whisk together the mayo, apple cider vinegar, sugar, Dijon mustard and salt. Add to the vegetables and mix to combine. Refrigerate for 1 hour to allow the flavors to meld and the broccoli to become soft (you can eat right away but the broccoli is crisp and has less of the traditional texture).
  3. Meanwhile, place the sunflower seeds, soy sauce, sugar, smoked paprika, and 2 pinches kosher salt in a skillet. Heat over medium low heat and sauté for about 5 to 6 minutes, stirring frequently, until they are sticky and most of the liquid is evaporated, taking care that they do not burn and scraping any sticky bits from the bottom of the pan. When they are sticky and darkened in color (and may have clumped together), remove from the heat and spread them onto parchment paper in a single layer and allow them to dry until serving, about 10 minutes.
  4. When ready to serve, top the salad with the sunflower seeds.

  • Category: Salad
  • Method: Raw
  • Cuisine: American

Keywords: Broccoli Salad, Best Broccoli Salad

More amazing salad recipes

Salads are the best way to eat your veggies! Here are some of our favorite salad recipes:

A Couple Cooks - Healthy, Whole Food, & Vegetarian Recipes


from A Couple Cooks https://ift.tt/37XPSk0

Baked Rigatoni Pasta

This easy baked rigatoni is all about crowd pleasing flavor! Bake this tublar pasta with garlicky tomato sauce, fresh basil, and gooey mozzarella.

Baked rigatoni

Here’s a vegetarian dinner idea that marries basic Italian flavors into a mess of garlicky, gooey goodness: Baked Rigatoni! It’s a pasta bake that’s got all the comfort of tomato sauce and cheese, but has intrigue and uniqueness in the flavors. The tomato sauce is full of garlic and a little fennel for meatiness, and it’s got lots of fresh peppery basil for a herbaceous kick. Cover it in gooey mozzarella cheese and you’ve got a dish that’s hearty enough to please any eater.

Ingredients in baked rigatoni

The sauce in this baked rigatoni is full of tangy tomato flavor! As you’ll see, we’ve used a few tricks to get big flavor with little effort. Here’s what you’ll need:

  • Rigatoni pasta
  • Marinara sauce Use your favorite, high quality brand.
  • Fire roasted crushed tomatoes If you can’t find them, use any high quality crushed tomatoes. More on fire roasted is below!
  • Fresh garlic Key for big Italian flavors!
  • Onion powder and fennel These add to the meatiness.
  • Fresh basil Peppery fresh basil brings an herby zing.
  • Fresh mozzarella cheese Use shredded mozzarella if you can’t find it.
  • Parmesan cheese Grated Parmesan finishes it off with a savory sharpness.
Rigatoni

What is rigatoni?

Rigatoni is a tube-shaped pasta that usually has ridges on the outside, used in cuisine from Southern and Central Italy. It’s larger in diameter than penne and is cut straight, not on the diagonal. Rigatoni comes from the Italian word rigato which means “ridged”. It’s easy to find at most grocery stores.

What we like about rigatoni? One bite of rigatoni feels somehow more substantial than penne, and the shape tends to hold sauces a bit better. However, it’s very similar to penne and can easily be substituted for it. Rigatoni is a short cut type of pasta, so you can substitute it with many short cut pasta shapes.

How to make baked rigatoni: basic steps

This baked rigatoni is missing one thing that most rigatoni recipes have: meat! That makes it even easier than most to put together, and it works as a vegetarian main dish. Here’s all you have to do to make it:

  • Boil the pasta to al dente. Air on the side of a firm al dente, since the pasta will cook a little more as it bakes. See below for more!
  • Make the sauce. Saute garlic, add marinara, fire roasted tomatoes and spices, and simmer just a few minutes.
  • Combine, top with cheese, and bake. You’ll bake 25 minutes: 15 with foil and 10 without.
Baked rigatoni

How to cook pasta to al dente

What’s al dente? In Italian it means “to the bite” and means pasta that is still firm on the inside when cooked. The ideal al dente texture is a tender exterior balanced by a firm bite with a fleck of white at its core. Note that for this rigatoni recipe, you can air on the side of firm because the pasta cooks more as it bakes. Here’s how to cook pasta to al dente:

  • Boil the pasta in a large pot of salted boiling water.
  • While cooking, check pasta continually for doneness.
  • As soon as the pasta has a tender exterior but a fleck of white at its core, drain it! Even a few seconds can be the difference between al dente and limp noodles.

Make ahead tips!

Yes! You can make the pasta right up until the baking step. Then refrigerate it until baking! We’d suggest refrigerating for only 24 hours. You may have to bake slightly longer: make sure that it’s fully warmed through and the cheese is fully melted.

Rigatoni

Fire roasted tomatoes have the best flavor

Last note on ingredients: we recommend using canned fire roasted tomatoes here. Why fire roasted? Fire roasted canned tomatoes have a sweet flavor right out of the can. So you don’t have to spend a long time simmering for great flavor. There are several of brands of fire roasted tomatoes these days that should be available at your local grocery.

Using these tomatoes is a little less crucial for a recipe like this where you’re combining them with marinara sauce. So if you can’t find them: buy the best quality tomatoes you can find!

Variations on baked rigatoni

You can always add mix-ins to this rigatoni! Here are some ideas on ingredients to add:

  • Cooked ground beef or plant based meat crumbles: Make it ultra traditional and saute meat or veggie crumbles. Add them to the pasta and sauce before baking.
  • Spinach and mushrooms: Saute mushrooms and spinach like in our Vegan Lasagna filling.
  • Other veggies. Saute other veggies you have on hand to add to the mix! Some ideas: kale, red pepper, zucchini, and so forth.
Cheese pull

This rigatoni recipe is…

Vegetarian. For gluten-free, use gluten-free or legume pasta.

Print
Baked rigatoni

Baked Rigatoni Pasta


1 Star2 Stars3 Stars4 Stars5 Stars (6 votes, average: 5.00 out of 5)

  • Author: Sonja Overhiser
  • Prep Time: 10 minutes
  • Cook Time: 35 minutes
  • Total Time: 45 minutes
  • Yield: 8
  • Diet: Vegetarian

Description

This easy baked rigatoni is all about crowd pleasing flavor! Bake this tublar pasta with garlicky tomato sauce, fresh basil, and gooey mozzarella.


Ingredients

  • 1 pound rigatoni pasta
  • 24 ounce jar marinara sauce
  • 15 ounce can crushed fire roasted tomatoes (or best quality tomatoes)
  • 2 tablespoons olive oil
  • 4 cloves garlic, minced
  • 1/2 teaspoon fennel seeds
  • 1 teaspoon kosher salt, divided
  • 1/2 cup basil, chopped, plus more for garnish
  • 1/2 teaspoon onion powder
  • 1 pinch red pepper flakes
  • 8 ounces fresh mozzarella cheese (or shredded)
  • 1/2 cup grated Parmesan cheese, plus more for sprinkling.

Instructions

  1. Preheat the oven to 375 degrees Fahrenheit. Brush a 9 x 13″ baking dish.
  2. Start a pot of well salted water to a boil. Boil the rigatoni until it is just al dente (start tasting a few minutes before the package recommends: you want it to be tender but still a little firm on the inside; usually around 7 to 8 minutes). Drain.
  3. Meanwhile, mince the garlic. In a separate pot, heat the olive oil over medium high heat. Add the garlic and fennel seeds and cook for 1 to 2 minutes until fragrant. Add the basil and tomatoes and stir for 1 minute. Stir in 3/4 teaspoon kosher salt, 1/2 teaspoon onion powder and 1 pinch red pepper flakes and the 1/2 cup Parmesan cheese. Remove from the heat.
  4. Pour the sauce and the drained pasta into the baking dish. Top with torn pieces of mozzarella. Sprinkle the entire top with generous sprinkles of Parmesan cheese.
  5. Cover with foil and bake 15 minutes. Remove the foil and bake for an additional 10 minutes until browned.
  6. Remove the pan from the oven and top with 1/4 teaspoon kosher salt, divided over the top. Let stand 5 minutes. If desired, garnish with chopped basil. (Make ahead instructions: Make the pasta through Step 4 and cover with foil. Refrigerate until baking, up to 24 hours.)

  • Category: Main Dish
  • Method: Baked
  • Cuisine: Italian

Keywords: Rigatoni

More rigatoni recipes

Love rigatoni? Us too! Here are a few recipes that highlight this tasty pasta shape:

A Couple Cooks - Healthy, Whole Food, & Vegetarian Recipes


from A Couple Cooks https://ift.tt/2A6YmZE

Black Sesame Amaretti Cookies

Amaretti are some of my favorite cookies for a reason: they are ridiculously simple to make, with only 3 main ingredients—plus the black se...