Weeknight Chickpea Curry

This chickpea curry is the ultimate healthy and easy weeknight dinner! It’s done in 20 minutes, totally plant based, and full of flavor.

Easy Chickpea Curry

Everyone is always asking for easy weeknight dinners. Guess what: so are we! Even though we love to cook, there are always nights where Alex and I need to get dinner on the table fast. The two of us are always experimenting and on the lookout for the best concepts for quick and easy dinner recipes. So we present: our new favorite easy weeknight dinner: this chickpea curry! It takes only about 20 minutes to make! Warm spices and coconut milk make it one the most tastiest things you can make in that short time window—hands down.

Chickpea curry recipe

Why it’s the best chickpea curry recipe

This chickpea curry is made for weeknights. That is: it’s 100% designed to get dinner on the table fast. At the same time, there are no shortcuts. You’ll saute real onion, garlic and fresh ginger, then add tomatoes, chickpeas and coconut milk to make a thick sauce. The way it comes together, you’ll be hooked on it as a go-to fast dinner. Here’s why this is the best chickpea curry for weeknights:

  • It takes about 20 minutes to make. Of course, this depends on your ability to chop a few veggies quickly. But the cook time is only 12 minutes, making this a super fast meal!
  • It’s a healthy dinner full of plant-based protein. Chickpeas and spinach bring loads of nutrients, along with the veggie-based sauce. It makes for a healthy, filling plant based dinner.
  • It’s got big flavor. Onion, garlic and ginger make an aromatic base, and cumin, coriander and curry powder put it over the top. It’s got a swirl of coconut milk at the end for creamy body.
  • Fire roasted tomatoes shortcut the cook time. This variety of tomatoes tastes sweet right out of the can, so it shortcuts some of the cook time.
Weeknight chickpea curry

Is this an authentic Indian curry?

This this weeknight chickpea curry authentic Indian cuisine? It’s actually similar to chana masala, the traditional Indian curried chickpeas. While this isn’t a 100% authentic Indian curry, it uses the flavors of Indian cuisine to make a fast weeknight dinner.

If you’d like an authentic Indian dinner recipe, head to our Masoor Dal (Indian Red Lentils). This recipe was shared with us directly from Asma Khan, an Indian chef with a popular restaurant in London. You’ll love these creamy flavorful lentils, and you can serve with basmati rice as well! Another great resource for authentic Indian recipes is chef and author Madhur Jaffrey.

Easy weeknight dinner

What to serve with chickpea curry

How to serve this weeknight chickpea curry? We like it with long-grain basmati rice. Here’s what we’d suggest for serving:

  • Basmati rice: Here’s our method for how to cook brown or white basmati rice: white takes about 15 minutes total and brown takes about 20 to 25 minutes. Brown rice is a bit more nutrient dense than white rice, which is why we like to take the extra time when we have it.
  • Naan bread: If you’re in a rush, store-bought naan bread is a great quick side dish for this chickpea curry.

What else do you like to serve with curry? Let us know in the comments below.

What if I can’t find fire roasted tomatoes?

Fire roasted tomatoes are key in this recipe, because of their sweet flavor right out of the can. These tomatoes have been charred over an open fire, then canned. Other tomato varieties can taste bitter out of the can, and need to be cooked for longer.

If you can’t find fire roasted tomatoes for this recipe, you can substitute any high quality variety of canned tomatoes. You may find you have to cook the sauce a little longer to remove the bitterness. Take a taste before you add the coconut milk at the end, and see if it needs a little extra love. In this recipe, there’s a lot going on flavor-wise, so you may be ok with the cook time as printed depending on the quality of tomatoes you use.

Fast dinner recipe

Do kids like curry?

Our son Larson is 2 years old, and Alex and I have made it our goal to expose him to lots of flavors! He’s very open minded about foods, but when things have lots of spices he sometimes says that it’s too “spicy”. When we served him this chickpea curry, I was wondering how he’d like it. I could see the “spicy” comment being prepped and ready in his mind.

But he took one bite and said, “It’s good!” Then he proceeded to eat an entire bowl of this chickpea curry with some basmati rice on the side. So, we can’t speak for your children, but ours absolutely loved it!

More easy weeknight dinners

If you’re in the market for easy and healthy weeknight dinners (like we are!), we’ve got many ideas on this website! But here are a few of our top recipes for when we’re in a rush on a weeknight. Since we have a 2-year-old, they have been tested on him and are absolutely family friendly.

  • Epic 5 Minute Tacos: One of our favorite quick dinners is this 5 Minute Tacos recipe! Featuring spiced eggs that taste like meat (we call them “chorizo eggs”) and topped with quick toppings.
  • Easy Creamy Gnocchi: This is basically gourmet fast mac and cheese, made with just Pecorino Romano cheese, butter and pepper. With doughy gnocchi dumplings, it’s to die for.

This chickpea curry recipe is…

Vegetarian, gluten-free, vegan, plant-based, and dairy-free.

Print
Easy Chickpea Curry

Weeknight Chickpea Curry


1 Star2 Stars3 Stars4 Stars5 Stars (1 votes, average: 5.00 out of 5)

  • Author: Sonja Overhiser
  • Prep Time: 5 minutes
  • Cook Time: 15 minutes
  • Total Time: 20 minutes
  • Yield: 4 to 6

Description

This chickpea curry is the ultimate healthy and easy weeknight dinner! It’s done in 20 minutes, totally plant based, and full of flavor.


Ingredients

  • 1 yellow onion
  • 1 large garlic clove
  • 1 teaspoon grated ginger
  • 1 tablespoon coconut oil or olive oil
  • 6 cups (5 ounces) baby spinach leaves (or chopped spinach)
  • 28-ounce can crushed fire roasted tomatoes
  • 1 tablespoon curry powder
  • 1 teaspoon cumin
  • 1/2 teaspoon coriander
  • 3/4 teaspoons kosher salt
  • 2 15-ounce cans chickpeas
  • 1/2 cup coconut milk
  • White or brown basmati rice, to serve

Instructions

  1. If you’re serving with rice, start the basmati rice.
  2. Mince the onion. Mince the garlic. Peel and mince the ginger (or grate it).
  3. In a large skillet, heat the oil over medium high heat. Add the onion and saute for 5 minutes. Add the garlic, ginger, and spinach and saute for 2 minutes until the spinach is fully wilted.
  4. Carefully pour in the tomatoes, then add the curry powder, cumin, coriander, salt, and chickpeas. Cook for 5 minutes until bubbly.
  5. Stir in the coconut milk until fully combined, then remove from the heat. Serve with basmati rice.

  • Category: Main Dish
  • Method: Stovetop
  • Cuisine: Indian Inspired

Keywords: Chickpea Curry

A Couple Cooks - Healthy, Whole Food, Vegetarian Recipes


from A Couple Cooks https://ift.tt/32lsoAO
Pumpkin Ruffled Milk Pie

Skip the boring old pumpkin pie—this unique twist on a traditional Greek dessert is the show-stopping Thanksgiving dessert you’ve been looking for!

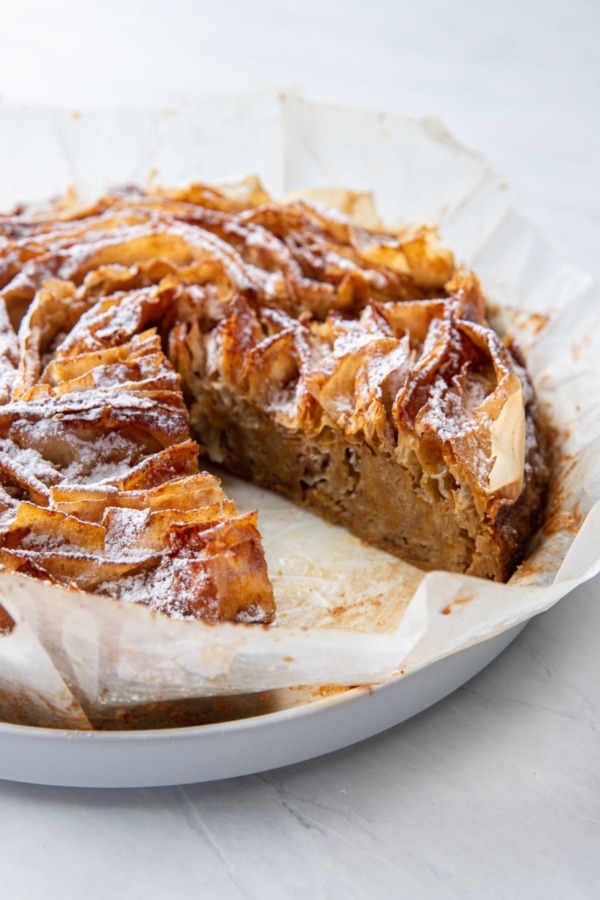
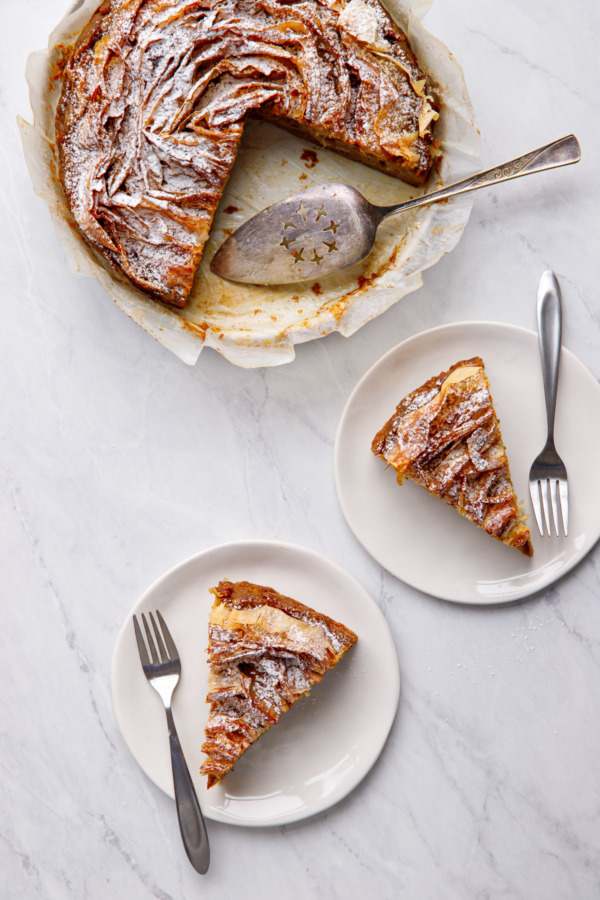
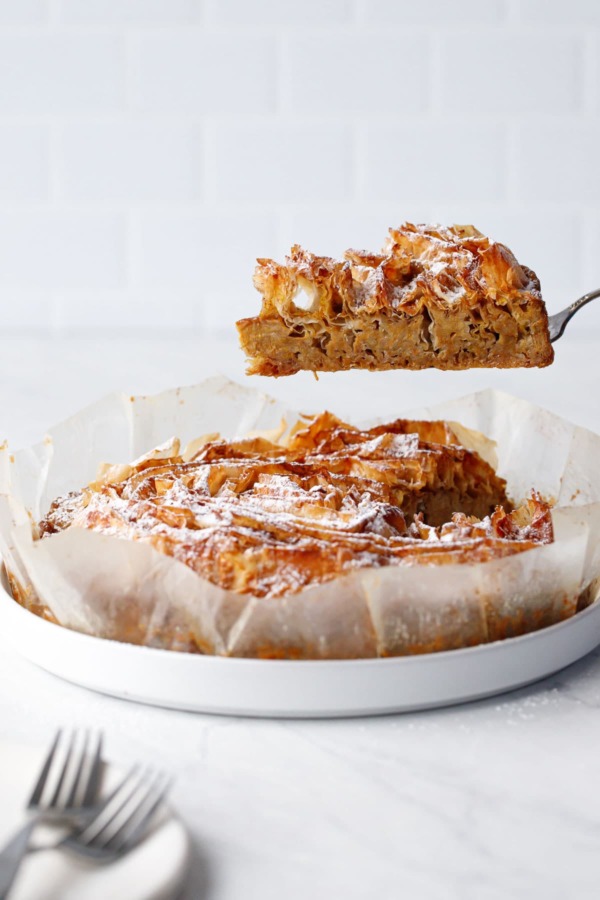
With crispy, ruffled layers of phyllo dough on top and a custardy, bread pudding-like interior infused with pumpkin and spices, this ruffled milk pie is a textural experience unlike anything you’ve ever had before.

Pumpkin Ruffled Milk Pie

The most unusual twist on pumpkin pie yet?

Perhaps.

This pumpkin-spiced ruffle milk pie gives me all the feels. I mean, talk about a stunning dessert with surprisingly little effort (I’ll take phyllo dough over pie crust any day).

Ruffled milk pie has Greek origins, known also as galatopita (literally ‘pie made with milk‘), made from layers of flaky phyllo dough and a sweet milk and egg custard. This version adds pumpkin and spices for a festive twist that will no doubt make an impression on your Thanksgiving table.

Pumpkin Ruffled Milk Pie

It’s really hard to compare galatopita to anything else in the American dessert repertoire. For those of us who’ve never had the original Greek version before, I would describe it as something like a phyllo bread pudding, with a crispy top and a soft and creamy, yet slightly chewy center.

The texture reminded me a lot of the dish called štruklji that we enjoyed in Croatia and Slovenia this past spring (in Slovenia it was a sweet version, steamed phyllo filled with an orange-scented chocolate sauce, while in Croatia it was savory, baked with fresh farmers cheese). But the texture of the steamed phyllo is very similar to what you end up with here when the phyllo bakes within the milk custard.

I infused the milk custard with pumpkin puree and pumpkin spices (enough to be brightly flavored, but not so much spice that the delicate flavor of the milk custard and buttery phyllo get overpowered). With a brush of honey butter and a dusting of powdered sugar on top, it’s the perfect amount of sweetness to balance out the more savory nature of the phyllo itself.

The top of the ruffled phyllo dough turns golden brown and gorgeously crispy in the oven, while the base softens within the silky sweet, lightly spiced pumpkin custard.

Pumpkin Ruffled Milk Pie

I will say this: some people might not like this pie, mainly because the texture of it is so unexpected and unusual. Soft baked phyllo dough is interesting, to say the least, and not what you expect when you see that beautiful crispy topping.

The two phyllo-based dishes most Americans are familiar with are baklava and spanakopita, and this pie isn’t anything like either of them.

So keep an open mind… and maybe make a second dessert to serve alongside this one (might I suggest this Pecan Fudge Pie? It’s a sure crowd-pleaser.)

(more…)


from Love and Olive Oil https://ift.tt/2WK8HBI

Best Apple Pie Recipe

This really is the best apple pie recipe. It’s got flaky lattice pie crust and a tender, perfectly spiced apple filling. Prepare to be amazed!

Best apple pie recipe

This post was created in partnership with ALDI. All opinions are our own.

Are you ready for this? This really is the best apple pie recipe. Every single thing about it has been tweaked to perfection: the flaky crust, the rustic lattice, and the tender, spiced filling. Alex and I may have eaten one too many apple pies testing this recipe for you (oops!). But the end result is absolutely worth it. This apple pie is a stunner, perfect for Thanksgiving or any dinner party or holiday. We got all the ingredients for this pie from ALDI, our go-to for affordable, high-quality organic ingredients for holiday entertaining. Ready for everything you need to know to make the very best apple pie on the internet?

Make this pie? We want to know! Tag @acouplecooks and @aldiusa on Instagram.
Coupon: ALDI now delivers using Instacart! Use coupon code “ALDIACC” to get $10 off your first three orders of at least $35 (for first-time Instacart shoppers only).

Best apple pie recipe

What makes the best apple pie recipe?

Of course, “best apple pie recipe” is pretty subjective! Alex and I have designed this pie recipe to be exactly what we want in our perfect apple pie. Here’s what it’s got:

  • Rustic lattice crust and maple glaze. Thick lattice work gives the pie a stunning, rustic look. Painting on a maple glaze makes it beautifully shiny.
  • Super flaky pie dough. This dough is perfectly flaky and tender, and the bottom stays perfectly crisp.
  • Tender apple filling. The apples are tender and gooey, with just the right amount of sweet.
  • Perfect spices. Using fresh ginger adds big flavor, and a hint of cloves makes it extra cozy.

Best apples for apple pie

What are the best apples for apple pie? We’re glad you asked. First off: if you can, use organic apples. Apples are one of the best fruits to buy organic! We used organic Gala apples from ALDI. Here are what we’ve found are the best apple varieties that hold their shape and flavor in apple pie:

  • Gala
  • Jonathon or Jonagold
  • Ida Red
  • Honeycrisp
  • Golden Delicious
  • Granny Smith
Best apple pie recipe

Equipment you need for the best apple pie

All you really need for this best apple pie recipe is a pie pan and a rolling pin! But a few pieces of equipment are helpful if you have them. Here’s what we recommend:

  • Metal pie plate: A metal pie plate can help the bottom crust to come out crispier. But you can use any pie plate you have on hand!
  • Pastry cloth and rolling pin cover: A pastry cloth and rolling pin cover help to avoid sticking when you’re rolling out the dough. If you don’t have one, generously flour your work surface and rolling pin.
  • Microplane grater: You’ll use a grater to grate the butter when making the crust. A coarse grate microplane is easiest, but you can also use a box grater.
  • Food scale: In baking it’s helpful to weigh flour because it can change based on environmental conditions. If you don’t have one, just measure the flour in cups and adjust the water as needed.

Simplify it: If you’re craving simple: try our Apple Crumble recipe instead! It uses similar ingredients but is quick and easy to put together.

Cooking the apple filling

How to slice apples: in a flash!

You’ll need to slice quite a few apples for this recipe. And we have a trick to make it faster! Here’s what to do: watch the 10-second video below! You’ll be surprised how quickly it is to slice the apple this way. (It’s my new favorite!)

How to slice apples

How to make a lattice pie crust

The biggest area of technique in this best apple pie recipe is making the lattice crust! If you’ve never made a lattice pie crust before, it looks tricky but it’s actually quite simple. Here we’ll show you how to weave the lattice pieces, and then tuck them under to form with the bottom pie crust. Watch the 20-second video below to see how it’s done.

How to make a lattice pie crust

Error-proofing apple pie

Alex and I have done all the recipe testing and error-proofing of this best apple pie recipe so you don’t have to! Here are a few things we learned about pie making through this recipe.

  • How do you make sure the pie crust doesn’t shrink when baked? A few things: letting the dough rest after rolling it out helps. Placing the pie in the freezer between filling steps can also help.
  • How to you avoid a soggy apple pie? The apple filling is cooked before baking to reduce liquid. Preheating the baking sheet in the oven helps to crisp up the bottom, and the pie is baked at a higher temperature (425 degrees) for the first 15 minutes. We also find using a metal pie pan can help to get the bottom extra crispy.
  • How do you make flaky pie crust? Freezing the butter and grating it into the dough helps make sure the butter is extra cold, which makes it flaky. (We use the same trick in our Blueberry Scones.)
Slice of apple pie

Serve it with…

Of course, the best apple pie is perfection with a high quality vanilla ice cream topping. Or, top with homemade whipped cream (or a fancy version: bourbon whipped cream).

Are you ready to make the best apple pie recipe?

The recipe below might look a little daunting, but it’s actually pretty easy to make! Just follow the step by step instructions and hit us up on Instagram if you have any questions. Make sure to tag us and @aldiusa if you make it: we can’t wait to see your creations!

Best apple pie recipe
Print
Best apple pie recipe

Best Apple Pie Recipe


1 Star2 Stars3 Stars4 Stars5 Stars (5 votes, average: 5.00 out of 5)

  • Author: Sonja Overhiser
  • Prep Time: 1 hour 15 minutes
  • Cook Time: 1 hour
  • Total Time: 2 hours 15 minutes
  • Yield: 8

Description

This really is the best apple pie recipe. It’s got flaky lattice pie crust and a tender, perfectly spiced apple filling. Prepare to be amazed!


Ingredients

For the crust

  • 11 tablespoons frozen unsalted butter
  • 2 cups Baker’s Corner All Purpose Flour (260 grams)
  • 3/4 teaspoon kosher salt
  • 1/2 teaspoon baking powder
  • 1/2 cup cool water
  • 1/2 tablespoon fresh lemon juice
  • 2 ice cubes

For the filling

  • 8 small organic cooking apples (2 1/2 pounds), such as Gala
  • 1 tablespoon cornstarch
  • 1/2 cup granulated sugar
  • 1 1/2 teaspoons ground Simply Nature Organic Cinnamon
  • 1/8 teaspoon ground cloves
  • 1/4 teaspoon kosher salt
  • 1/2 teaspoon finely grated fresh ginger or 1/4 teaspoon ground ginger
  • 1 teaspoon lemon zest plus 2 tablespoons lemon juice (about 1/2 lemon)
  • 1 tablespoon vanilla extract

For the glaze

  • 1/4 cup Specially Selected 100% Pure Maple Syrup
  • 1/8 teaspoon cinnamon

Instructions

  1. Make the pie dough: Freeze the butter at least 30 minutes.
  2. In a mixing bowl, use a spatula to stir together the flour, baking powder, and salt (using a food scale to weigh out the flour, if you have one). In a small bowl, mix the water, lemon juice, and ice.
  3. Use a grater or microplane to large grate the butter into the bowl with the dry ingredients (it will look like shredded cheese!). Then stir it gently with a spatula to coat the butter with flour. Add 3 tablespoons water and stir with the spatula to combine. Add 3 more tablespoons and stir again. Add up to 3 more tablespoons and use your hands to gently knead until a ball of dough is formed. You may need to add a little more water a tablespoon at a time so that the flour is just incorporated. Divide the dough into two equal balls. Place in a covered container and refrigerate while you’re making the filling. (You can also make the dough in advance. See the notes below!)
  4. Preheat the oven: Place a baking sheet on the middle rack of the oven and preheat to 425 degrees.
  5. Make the filling; Peel and core the apples, then thinly slice them about 1/8 inch thick (see the “How to slice apples” section above). Place the apples in a large pot with lid or Dutch oven. In a small bowl, mix the cornstarch, sugar, cinnamon, cloves, and salt. Stir into the apples. Then stir in the peeled and grated ginger, lemon zest, lemon juice, and vanilla. Cover and cook over medium heat for 6 minutes, stirring occasionally, until softened slightly and liquid is thickened. Remove from the heat and remove the lid.
  6. Roll out the dough: If you have a pastry cloth, set it up and dust it with flour; otherwise, flour a clean work surface. Put on a rolling pin cover (optional), and coat the pin in extra flour. Remove one ball of dough from refrigerator and roll it evenly from the center to the edge, until the dough is a large circle about 1/8-inch thick. If it starts to get sticky, dust lightly with flour. Rest the dough for 3 minutes. Then trim the dough to an even 12-inch circle with a pizza cutter (this corresponds to the 9-inch circle on the pastry cloth).
  7. Add the filling: Gently place the dough into center of the pie plate, using the rolling pin to transfer it. Use your fingers to press the pastry into the form of the pie pan. Then fold the excess dough around the edges under itself, so that it sits evenly on the rim of the pie plate (see photos above). Spoon the apple filling into the pie plate, discarding any remaining liquid at the bottom of the pot. Place the pie into the freezer while rolling out the lattice topping.
  8. Make the lattice: Roll out the second dough ball into an 11” x 14” rectangle (it will be intentionally slightly thinner than the previous dough). Rest 3 minutes. Then use a straight edge to cut it into 7 strips, where each strip is 11” x 2”.
  9. Weave the lattice: Remove the pie plate from freezer. Carefully lay out 4 strips of dough in same direction on the pie (see the “How to make a lattice pie crust” above). Be careful to place the strips down without stretching. Weave the strips together to create the lattice with the remaining 3 strips.
  10. Bake & glaze the pie (3 steps): Place the pie on the preheated baking sheet and bake for 10 minutes at 425 degrees. Reduce the heat to 375 degrees and bake for 30 minutes. About 5 minutes before the 30 minute timer goes off, make the maple glaze: In a small pot add the maple syrup and cinnamon. Heat over medium heat until bubbles just start to appear (about 2 minutes). Turn off the heat. Remove the pie from the oven and brush an even layer of the maple glaze (leftover glaze can be discarded). Bake an additional 10 to 15 minutes until golden brown and bubbly. Remove from the oven and place on a cooling rack. Allow to cool for at least 1 hour until warm, or a few hours until it is room temperature. Then slice into pieces and enjoy! The pie is best eaten the day it is made. For make ahead and reheating instructions, see below.

Notes

Make ahead / reheating instructions: 

  • Pie is best eaten the day of making it. 
  • You can make the pie dough in advance: make it up to 3 days ahead, wrap well and refrigerate. Or, wrap in plastic wrap and freeze it for up to 3 months. When ready to use, remove from the freezer and let it thaw in the refrigerator overnight or up to 24 hours. 
  • Store leftovers at room temperature loosely covered with foil, plastic wrap, or with an overturned bowl. Reheat at 350 degrees for 15 minutes. When reheated, the glaze will not be shiny like after the original bake, but leftovers still taste fantastic!
  • Category: Dessert
  • Method: Baked
  • Cuisine: American

Keywords: Best Apple Pie Recipe, Apple Pie, Apple Pie Recipe

A Couple Cooks - Healthy, Whole Food, Vegetarian Recipes


from A Couple Cooks https://ift.tt/2qh7Dsz

Black Sesame Amaretti Cookies

Amaretti are some of my favorite cookies for a reason: they are ridiculously simple to make, with only 3 main ingredients—plus the black se...