Watermelon Feta Salad

Watermelon feta salad is the ultimate fresh summer treat! Sweet melon with salty cheese is laid back and perfect for the season.
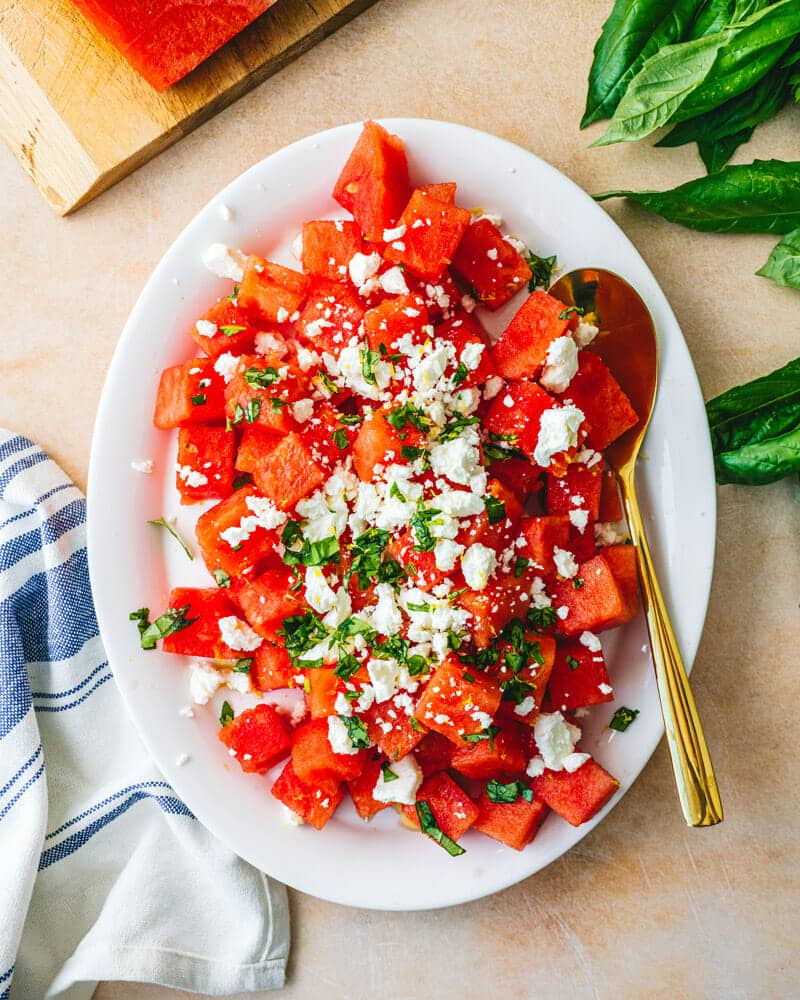
Watermelon feta salad

Here’s the best recipe for when watermelon is in season, hands down: Watermelon Feta Salad! This classic combination of sweet juice melon and salty cheese is one of summer’s great pleasures. This summer salad has grown to massive popularity in recent years, and for good reason: it’s fast and easy to make, and has a lazy, laid-back vibe that screams flip flops, pool parties, and picnics.

What is watermelon feta salad?

Watermelon feta salad combines fresh cubed watermelon with feta cheese, and is often topped with olive oil or a quick vinaigrette. The origin of this salad may be Egyptian in origin, and it’s consumed in the Middle East and Mediterranean regions.

Why it works? It’s a refreshing dish for hot weather, and highlights the pairing of sweet fruit with salty cheese, an age old tradition in these cuisines. So while you may see it all over Pinterest: no, it was not invented by social media influencers!
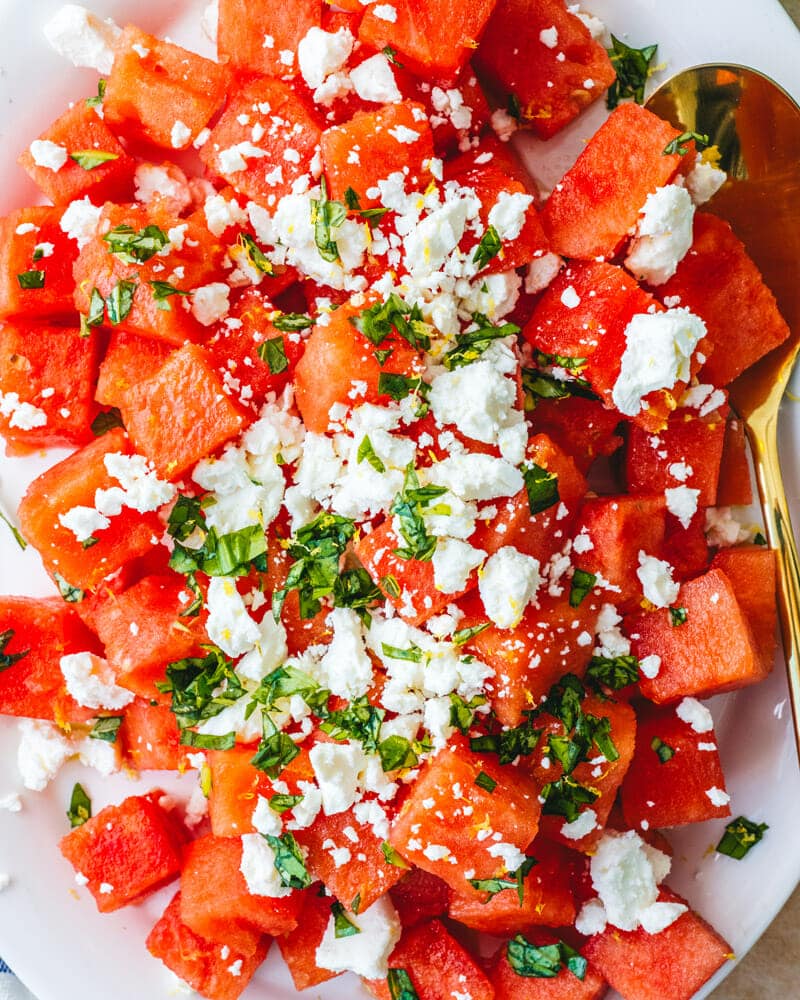
Watermelon feta salad

Ingredients for watermelon feta salad

This watermelon feta salad recipe was the very first recipe we ever wrote for this website, back in August 2010. So much has changed since then, of course. But this salad recipe has grown massively in popularity! You’ll often see this type of recipe at summer potlucks and cookouts. Some recipes use a quick vinaigrette to dress the watermelon, but we like a simple drizzle of olive oil. Here are the watermelon feta salad ingredients:

  • Ripe watermelon
  • Feta cheese
  • Fresh herbs: basil or mint
  • Olive oil
  • Salt and pepper

The best part of this concept is you barely need to measure. Cube the watermelon, drizzle with oil, and sprinkle with herbs. It’s that easy! We prefer the fresh bite of a watermelon feta mint salad, but it’s nearly as delicious with fresh basil.

How to find a ripe melon (important!)

Because this watermelon feta salad is so simple, it’s important that you buy the best quality ingredients. An unripe watermelon tastes bitter and flat: not at all what you need for this salad! Here’s how to select a great ripe fruit:

  • Shop in watermelon season. It’s the only sure way we’ve found to get a great fruit.
  • Look for the field spot. Most watermelons should have a patch on the bottom, which is where they were resting on the ground before being picked. If the patch is yellow, the watermelon is ripe (if it’s white, it’s unripe).
  • Look for a watermelon that feels heavy for its size. That means there’s lots of juice inside! Honestly this one is hard to assess in the grocery, but keep it in mind when you’re shopping.
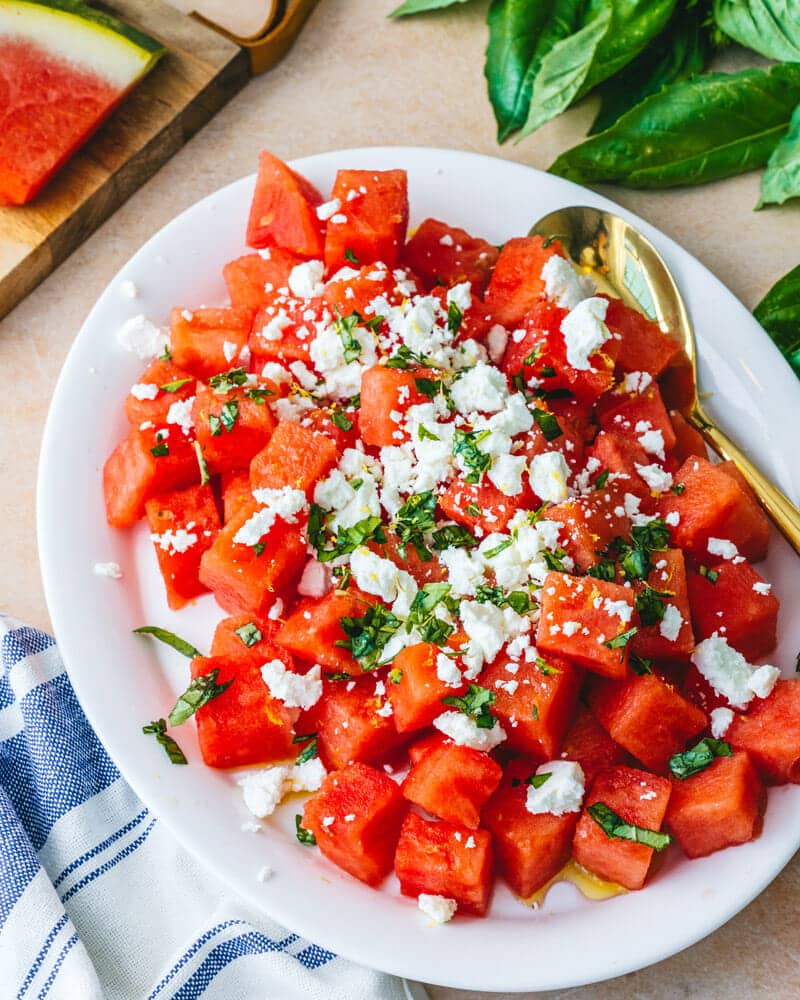
Watermelon feta mint salad

Buying the best feta cheese

Equally as important is the feta cheese you purchase. Skip the pre-crumbled stuff, and go for a block of full-fat feta cheese. This kind of feta has the best flavor, and it’s most like the feta served in Greece.

You also want to avoid feta that’s made from cow’s milk, as that’s not true feta. It crumbles more easily, which isn’t what you want. Feta from Greece has incredible flavor if you can find it! We’ve been able to locate Greek feta at our local grocery store.

Storage and make ahead instructions

This watermelon feta salad is best freshly made, so we have a few tips for making it ahead:

  • Cut the watermelon and store it separately. Cut watermelon releases a lot of liquid. So the best way to make this salad in advance is to cut the watermelon into cubes and store it separately. Then make up the salad right before serving.
  • Leftovers store up to 2 days. However, this salad is sub-optimal as leftovers because it releases so much juice. It does work, but it’s better for laid back lunches than impressing dinner guests.
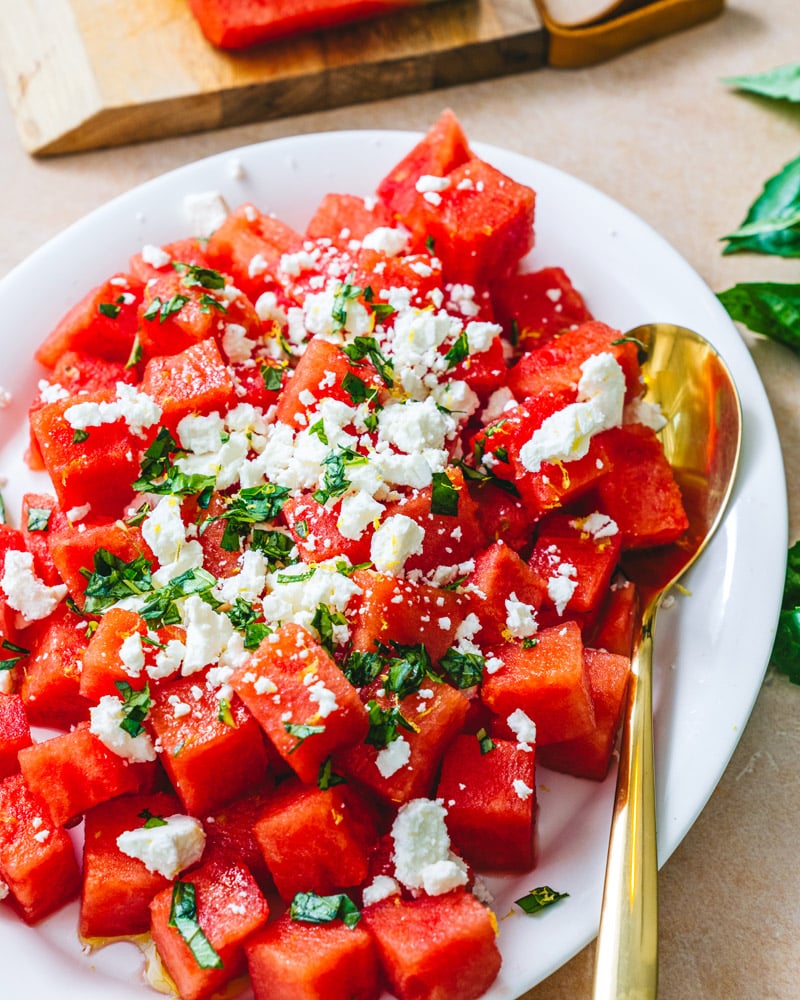
Watermelon feta salad

Variations on watermelon feta salad

There are lots of variations on watermelon feta salad, swapping in different cheeses, herbs, and dressings. Here are a few options:

  • Mint and lime: This Watermelon Mint Salad is a favorite variation! Add lime juice and mint, and skip the feta entirely.
  • Cucumber: Add cucumber for Watermelon Cucumber Salad. The cooling veggie pairs well with melon.
  • Onion: Add red onion slivers or minced shallot for a hint of savory spice
  • Baby arugula: Add baby arugula for a fluffy texture

More watermelon recipes

Watermelon feta salad is one of our top ideas for using this summery melon! But there are many more great ways to use this summer fruit. Here are some top watermelon recipes to try next:

This recipe is…

Vegetarian and gluten-free. For vegan, plant-based, and dairy-free, go to Watermelon Salad with Mint.

Print
Watermelon feta salad

Watermelon Feta Salad


  • Author: Sonja Overhiser
  • Prep Time: 10 minutes
  • Cook Time: 0 minutes
  • Total Time: 10 minutes
  • Yield: 4 to 6 servings

Description

Watermelon feta salad is the ultimate fresh summer treat! Sweet melon with salty cheese is laid back and perfect for the season.


Ingredients

  • 8 cups cubed ripe seedless watermelon (5 pounds or 1/2 medium watermelon)
  • 1 tablespoon olive oil
  • 2 ounces feta cheese, crumbled
  • 4 basil or 6 mint leaves, minced
  • Lemon zest (optional)
  • 1 pinch kosher salt, for garnish
  • Fresh ground black pepper (optional)

Instructions

  1. Chop the watermelon and arrange it on a platter. Drizzle with olive oil. Sprinkle with feta crumbles, basil or mint, and kosher salt. Add lemon zest or black pepper if desired.
  2. Serve immediately. If making ahead, refrigerate the cubed watermelon separately: it releases a large amount of water after it is cut. Then assemble the salad right before serving. Leftovers store for up to 2 days.
  • Category: Salad
  • Method: Raw
  • Cuisine: Salad
  • Diet: Vegetarian

Keywords: Watermelon feta salad, watermelon feta mint salad

A Couple Cooks - Recipes worth repeating.


from A Couple Cooks https://ift.tt/zfiRrJN

Roasted Carrots with Basil & Carrot Top Pesto

Roasting carrots brings out their natural sweetness; when topped with a tangy pesto made with the parsley-like carrot tops (just say no to food waste!) it makes for a perfect seasonal side dish.

The feathery carrot greens are blended with sweet basil, pine nuts, olive oil and vinegar to make a tangy green sauce that’s a perfect compliment to the natural flavor and sweetness of the carrots.

Blue and white ceramic platter with pile of Roasted Carrots, drizzled with Basil and Carrot Top Pesto on a blue background.

We’ve been getting big beautiful bundles of carrots in our CSA lately, vibrantly orange and sweet, with plumes of feathery greens still attached that I hate to just throw away (yes, they’re edible just like beet greens or turnip greens). Add in bunches of fragrant sweet basil that came with our most recent share, and this recipe basically developed itself.

If you haven’t had them before, carrot greens have an earthy, parsley-like flavor that can be used in myriad different ways, including this unique and flavorful pesto-like green sauce. It’s somewhat similar to the carrot top pesto I served with this creamy carrot soup; the flavors of the sweet carrot and grassy pesto are perfect compliments to each other. You know what they say, if they grow together, they go together (actually, I don’t know anyone who says that, but in this case it totally fits).

(more…)


from Love and Olive Oil https://ift.tt/HeQUrq7

Easy Bruschetta

This bruschetta recipe pairs the traditional Italian grilled bread with tomatoes, garlic and basil. A simple, crowd-pleasing appetizer!

Bruschetta

Need a crowd-pleasing appetizer or snack? Let’s make classic bruschetta! This Italian appetizer has become ubiquitous all over the world because of its easy-to-love flavors. Who can say no to crunchy, toasted bread piled with tasty toppings? The most popular way to serve bruschetta in America is with chopped tomatoes, garlic and basil: but it’s actually not the traditional Italian way. Here’s how to make it and more about the background of this classic dish.

What is bruschetta?

Bruschetta is an Italian appetizer (antipasto) of toasted bread with vegetable, cheese, or meat toppings. The term bruschetta refers to the toasted bread, not to the topping itself. The tomato and garlic topping that’s often served in America is actually not traditionally Italian. Italian-style bruschetta has varied toppings that are often seasonal or up to the chef (like mushroom bruschetta, artichoke bruschetta, ricotta bruschetta, and more).

How to pronounce it

How to pronounce bruschetta? Italians say it broo-skay-ta. The “ch” sound is pronounced like a “k”. This word is often mispronounced in America as bruh-shetta. What’s the plural of bruschetta? The Italian word is bruschette (prounounced broo-skay-tay).

Bruschetta Recipe

Ingredients in this bruschetta recipe

This bruschetta recipe features the classic American-style topping: tomatoes, onion, garlic and basil. This recipe is perfect for summer when fresh tomatoes abound. The ingredient list is simple, but there are a few things to note in the method that make the classic flavors possible. Here’s what you’ll need to make bruschetta:

  • Tomatoes: of any variety, make sure they are ripe. Some people swear by using roma tomatoes, but this type of tomato is often tasteless and mealy (more on that below).
  • Garlic
  • Basil
  • Red onion
  • Olive oil
  • Balsamic vinegar
  • Baguette
  • Salt and pepper
How to make bruschetta

Tips for how to make bruschetta

It might seem simple (just put tomatoes on toast!). But there are a few tricks to making bruschetta. The most important challenge: tomatoes are juicy and can easily soak through the bread. This bruschetta recipe avoids becoming soggy for at least 1 hour at room temperature, plenty of time for eaters to enjoy. Here are a few tips for how to make bruschetta:

  • Chop only the flesh of the tomatoes. Discard any liquid and seeds.
  • Mix the vegetables with seasonings. Add the chopped vegetables with olive oil and balsamic vinegar, and allow them to sit while you toast the bread.
  • Toast or grill the bread. Brush the bread slices with olive oil and toast in the oven at 400 degrees Fahrenheit for 5 to 10 minutes. Or grill the bread on a grill or grill pan.
  • Strain the tomato mixture. Here’s the important part! Strain off all extra liquid with a fine mesh strainer before topping the toasts.
  • Add the tomatoes to the bruschetta, then top with flaky sea salt. The extra sprinkle of salt provides the final flavoring.
Bruschetta

Make ahead and storage

Making bruschetta for a party? Here are a few tips for making this tasty summer appetizer ahead of time:

  • Make the tomato topping in advance without the basil. Store refrigerated until serving, up to 1 day in advance. The strain before using as a topping, then add the fresh basil. (Basil becomes brown when refrigerated).
  • Toast the bread in advance. Toast the bread. Allow it to cool completely, then store it in a container with the lid loosely closed or a towel on top. Any extra moisture can cause the bread to become soggy, so use caution. If it does become soggy, place it in the oven for a few minutes to re-crisp up.
  • Assemble directly before serving. Add the topping to the bread directly prior to serving.

More appetizer recipes

Entertaining and need some party ideas? Try these crowd-pleasing appetizer recipes:

This bruschetta recipe is…

Vegetarian, vegan, plant-based and dairy-free. For gluten-free, use gluten-free bread.

Print
Bruschetta

Easy Bruschetta


  • Author: Sonja Overhiser
  • Prep Time: 10 minutes
  • Cook Time: 10 minutes
  • Total Time: 20 minutes
  • Yield: 8 to 10

Description

This bruschetta recipe pairs the traditional Italian grilled bread with tomatoes, garlic and basil. A simple, crowd-pleasing appetizer!


Ingredients

  • 1 1/2 pounds or 3 large tomatoes (2 1/2 to 3 cups diced)*
  • 3 medium garlic cloves (2 minced and 1 whole)
  • 10 large basil leaves, thinly sliced
  • ¼ cup minced red onion
  • 1 ½ tablespoons olive oil, divided
  • ½ tablespoon balsamic vinegar
  • ½ teaspoon kosher salt
  • Fresh ground black pepper, to taste
  • 1 baguette or thin French bread loaf
  • Sea salt, for garnish (or more kosher salt)

Instructions

  1. Preheat the oven to 400 degrees Fahrenheit.
  2. Chop and dice the flesh of the tomatoes, discarding liquid and seeds. Mince the garlic, slice the basil and mince the red onion. Gently mix the chopped tomatoes with the garlic, red onion, basil, ½ tablespoon of the olive oil, vinegar, salt and fresh ground black pepper. (Depending on the type and ripeness of the tomatoes, it will become very juicy: you’ll strain out the liquid later.) Allow the tomatoes to sit while you toast the baguette.
  3. Slice the baguette into 1/2-inch slices and brush the tops with the remaining 1 tablespoon olive oil, split between the slices. Place the slices on a baking sheet and toast in the oven for 5 to 10 minutes until crisp, then broil for 1 to 2 minutes until it browns on the edges. You can also make grilled bread on a grill or using a grill pan. Once the bread is toasted or grilled, peel the remaining garlic clove, cut a flat edge and rub it on the top of each toast.
  4. Use a fine mesh strainer to drain the tomatoes of all liquid. Then use a fork or spoon to remove the tomatoes from the bowl and place them onto each piece of bread, leaving any remaining liquid behind in the bowl. Sprinkle sea salt (or more kosher salt) for garnish, which adds the final flavoring. Bruschetta lasts up to 1 hour without getting soggy.

Notes

*You can use any tomato variety. Roma tomatoes are less juicy (which helps reduce sogginess), but have less flavor. Because you’ll strain the mixture before topping the bread, any type of tomato works here.

  • Category: Appetizer
  • Method: No Cook
  • Cuisine: Appetizer
  • Diet: Vegetarian

Keywords: Bruschetta, bruschetta recipe, how to make bruschetta

A Couple Cooks - Recipes worth repeating.


from A Couple Cooks https://ift.tt/eQKAdCM

Mexican Inspired Corn Dip

This Mexican street corn dip recipe is inspired by the irresistible flavors of street corn: lime, chili, cilantro and crumbled cheese!

Mexican Corn Dip

Looking for a fast and easy dip to impress at parties or a simple dinner? Try this Mexican inspired corn dip! This recipes celebrates the flavors of elote (Mexican street corn), riffing on them to make a tasty dip for eating with crunchy tortilla chips. The pops of sweet corn against the tangy lime, zingy green chiles and salty crumbled cheese is absolutely irresistible! It’s quick to put together with canned corn, though any type of cooked corn works too (especially grilled!). Serve it as a party dip or a simple side for tacos and you won’t want the bowl to end.

Ingredients in Mexican street corn dip

This Mexican corn dip is inspired by the flavors of Mexican street corn, aka elote or equites: corn that’s slathered in a creamy sauce made with lime and chili powder, coated with crumbly Cotija cheese and fresh cilantro. (It’s up there as one of our top favorite dishes!) Elote is grilled corn on the cob, and esquites is corn kernels served in a cup with a spoon. This dip recipe is not authentic to Mexican cuisine, but it celebrates the flavors of these traditional dishes in a quick dip you can eat with tortilla chips. Here’s what you’ll need:

  • Mayonnaise
  • Greek yogurt or sour cream
  • Lime juice
  • Chili powder, garlic powder, cumin, and salt
  • Canned corn (or cooked corn)
  • Green onion
  • Red pepper
  • Cilantro
  • Canned green chiles
  • Cotija cheese or feta cheese
Mexican Street Corn Dip

For the corn: use canned or cooked

This Mexican corn dip uses canned corn, which has great flavor (we recommend it versus frozen, which can taste rather bland). But if you have fresh corn on the cob on hand and want to cook it, even better! Here are a few easy methods for cooking corn:

You can also microwave corn on the cob, but you can only cook up to 4 cobs at once. This recipe requires about 5 cobs, so it’s a less efficient method. We recommend microwaving when you want to cook 1 or 2 cobs.

Mexican Corn Dip

Cotija cheese vs feta cheese

You might wonder: why is feta cheese in a Mexican recipe when it’s Greek in origin? Well, it’s a substitute for Mexican Cotija! Cotija cheese is a Mexican cow’s milk cheese: it’s white with a dry texture and salty flavor. You can buy it fresh or aged, but it’s usually easiest to find fresh at the grocery. 

Can’t find Cotija? You can substitute feta cheese: it has a similar texture and salty flavor to Cotija. Queso fresco is another similar Mexican cheese, but the flavor is very mild and not nearly as salty as Cotija. We wouldn’t recommend using it here.

Ways to serve Mexican corn dip

This Mexican corn dip is very versatile: you can even serve it as a side instead of a dip! Here are a few ways to serve this recipe once you’ve mixed up the ingredients:

Mexican Corn Dip Recipe

Leftover storage

This Mexican corn dip stores well: keep it for up to 3 days refrigerated. (You likely can store even longer, but it does become slightly watery over time.) Make sure to bring it to room temperature prior to serving.

More dip recipes

Love to dip? Here are a few favorite dip recipes you’ll love:

This Mexican corn dip recipe is…

Vegetarian and gluten-free.

Print
Mexican Corn Dip

Mexican-Inspired Corn Dip


  • Author: Sonja Overhiser
  • Prep Time: 10 minutes
  • Cook Time: 0 minutes
  • Total Time: 10 minutes
  • Yield: 8

Description

This Mexican street corn dip recipe is inspired by the irresistible flavors of street corn: lime, chili, cilantro and crumbled cheese!


Ingredients

  • ¼ cup mayonnaise
  • ¼ cup Greek yogurt or sour cream
  • 2 tablespoons lime juice
  • ½ teaspoon chili powder
  • ¼ teaspoon each garlic powder and cumin
  • ½ teaspoon kosher salt, plus more to taste
  • 3 cans corn kernels, drained (or 4 ½ cups cooked corn or grilled corn*)
  • 2 green onions, sliced
  • 1/2 red pepper, finely diced
  • 3 tablespoons cilantro, finely chopped
  • 7 ounce can diced green chiles
  • 1 cup crumbled Cotija cheese or feta cheese

Instructions

  1. In a medium bowl, mix together the mayonnaise, Greek yogurt, lime juice, chili powder, garlic powder, cumin, and kosher salt.
  2. Prepare the corn, green onions, red pepper and cilantro as noted above. Mix together the drained corn, chopped vegetables, green chiles, cheese, and dressing. If desired, top with a sprinkle more cheese crumbles. Serve immediately or refrigerate for up to 3 days. Bring to room temperature before serving.

Notes

*This should require about 5 cobs corn, depending on their size.

  • Category: Dip
  • Method: No Cook
  • Cuisine: Mexican Inspired
  • Diet: Vegetarian

Keywords: Mexican corn dip

A Couple Cooks - Recipes worth repeating.


from A Couple Cooks https://ift.tt/nrVesz7

The Best of 2024

Farewell, 2024 (or as I like to call it, 2020 version 4.0). Hard to believe another year has come and gone, and yet here we are again lookin...