Easy Lemon Orzo

Here’s how to cook orzo as a simple side dish! This rice-shaped pasta comes together in minutes, flavored simply with butter and lemon.

Lemon Butter Orzo

Here’s a clutch pantry staple recipe to accessorize with quick weeknight meals: orzo! This rice-shaped pasta is ultra fast to cook, making it ideal for nights where you need something on the table fast. This orzo recipe is incredibly simple but comes out comforting and nostalgic, pairing the tender grains with butter and a hint of lemon. It’s so tasty, you’ll quickly add it to your regular rotation…then wonder how you lived so long without it!

What is orzo?

Orzo is a small pasta that’s shaped like grains of rice. Known as risoni in Italy, it can be served in various ways: as a side dish, pilaf, as part of an orzo salad, or in soups. There are two main ways to cook orzo: boiled in a large amount of water like pasta, or cooked like rice where it simmers and absorbs all the liquid.

There are several sizes of orzo available in stores: we prefer the medium sized grains that are about the size of grains of rice. You can also find different colors of orzo, like tricolor orzo that’s colored naturally with sundried tomatoes and spinach.

Orzo

How to cook orzo

There are two methods for cooking orzo: the pasta method (cooking in a large pot of boiling water and draining) and the rice method (simmering with less water until it’s all absorbed). The best way to avoid sticky orzo is the pasta method: it makes deliciously tender, well-separated grains. The rice method comes out creamier, but you run the risk of it coming out sticky or waterlogged. Here’s how to cook orzo:

  • Bring a pot of water to a boil. Estimate about 8 cups water per 1 cup orzo.
  • Add the orzo, bring back to a boil, and cook for 8 minutes. Taste a grain. If it’s mostly tender with a small amount of “chew” in the middle, it’s done. If not, cook 1 to 2 more minutes: just take care not to overcook it.
  • Drain and season. Drain the water from the pot, then return the orzo back to the pot. Season with salt, butter and lemon juice. Instant side dish!
Orzo recipe

Flavor variations

This simple orzo recipe with butter, salt and a squeeze of lemon is so simple yet satisfying! The buttery flavor almost reminds us of an elevated version of boxed max and cheese (without the cheese!). There are loads of ways to step up this simple dish: here are a few ideas:

  • Chopped herbs. A bit of chopped parsley looks lovely, or add chopped thyme or chives.
  • Parmesan cheese. Swirl in a bit of grated Parmesan to take it to new heights.
  • Feta cheese. A sprinkle of feta cheese adds a nice salty counterpoint.
  • Garlic. Saute a minced garlic clove in a bit of butter or olive oil, then mix it into the cooked orzo with the salt.
  • Spinach. Saute baby spinach (with or without garlic), then add the cooked orzo and salt. Feta cheese would be another nice addition!
Orzo

More orzo recipes

There are lots of ways to use orzo! Here are some ideas, from this website and others:

Let us know what you think of the simple side dish recipe below, and any other ways you love to serve orzo.

More basic side dishes

This orzo recipe has saved us on many a weeknight. (In fact, as I’m writing this Alex is just bringing me a dish of this exact recipe!) Here are a few more simple side dishes perfect for rounding out a meal:

This orzo recipe is…

Vegetarian. For vegan, use olive oil or plant-based butter.

Print
Lemon Butter Orzo

Easy Orzo Recipe


  • Author: Sonja Overhiser
  • Prep Time: 2 minutes
  • Cook Time: 8 minutes
  • Total Time: 10 minutes
  • Yield: 4 ½ cup servings

Description

Here’s how to cook orzo as a simple side dish! This rice-shaped pasta comes together in minutes, flavored simply with butter and lemon.


Ingredients

  • 1 cup orzo
  • ½ teaspoon kosher salt
  • 1 tablespoon butter (or olive oil)
  • 2 tablespoons fresh lemon juice (½ lemon)
  • Chopped fresh parsley or feta cheese crumbles, for garnish (optional)

Instructions

  1. Fill a medium pot with 8 cups water and bring it to a boil. Once boiling, add the orzo and stir.
  2. Bring the pot back to a boil, then boil for about 8 minutes until the orzo is tender. (Taste test a grain to assess doneness.) Drain into a strainer, then return the orzo to the pot.
  3. Stir in the kosher salt, butter (or olive oil), and lemon juice. Taste and if desired, add more lemon to taste. Add optional chopped parsley or feta cheese to garnish. Serve immediately; leftovers store refrigerated for up to 5 days.
  • Category: Side dish
  • Method: Boiled
  • Cuisine: Mediterranean
  • Diet: Vegan

Keywords: Orzo, orzo recipe, what is orzo

A Couple Cooks - Recipes worth repeating.


from A Couple Cooks https://ift.tt/N2YBxlj

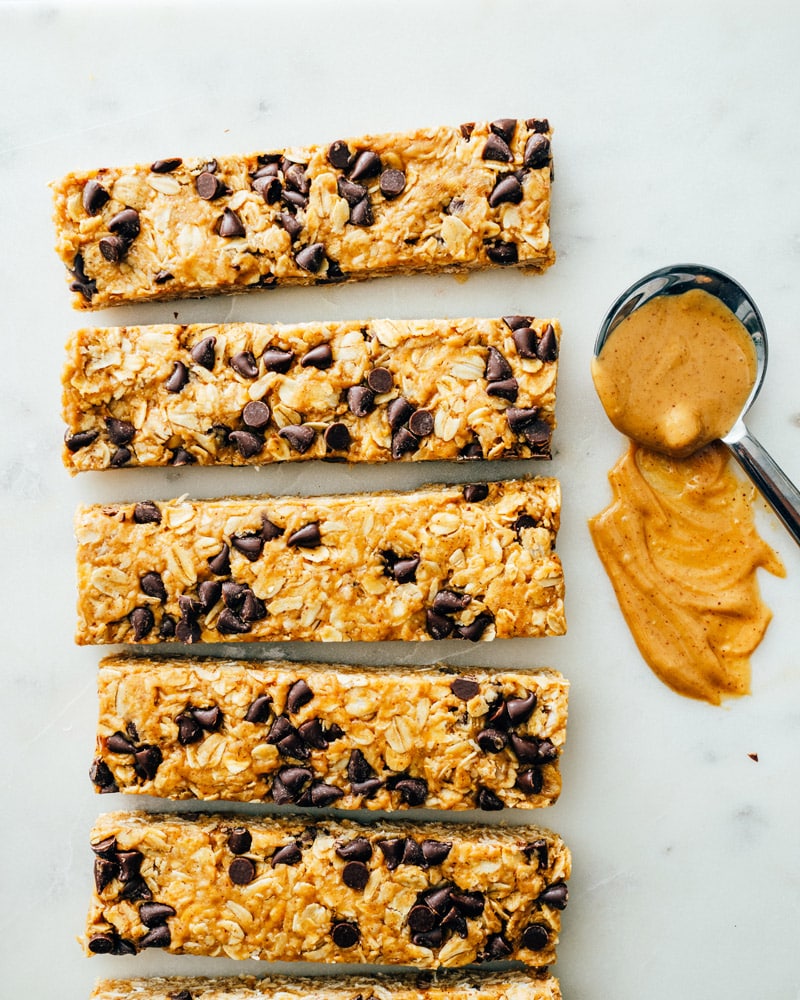
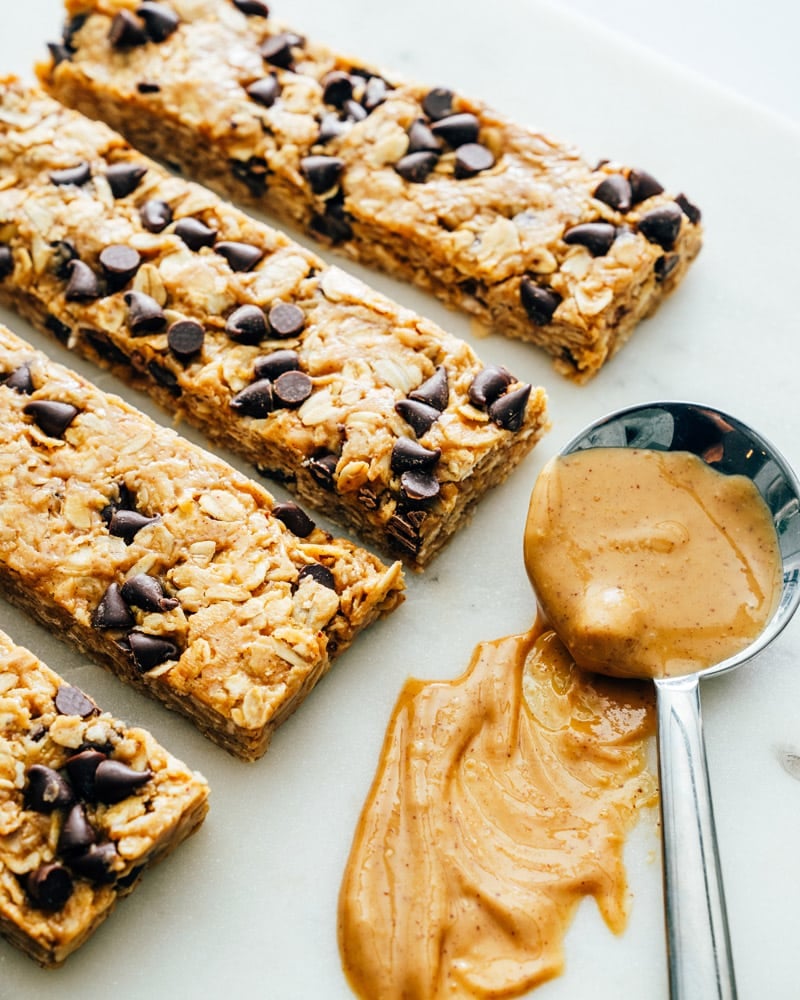
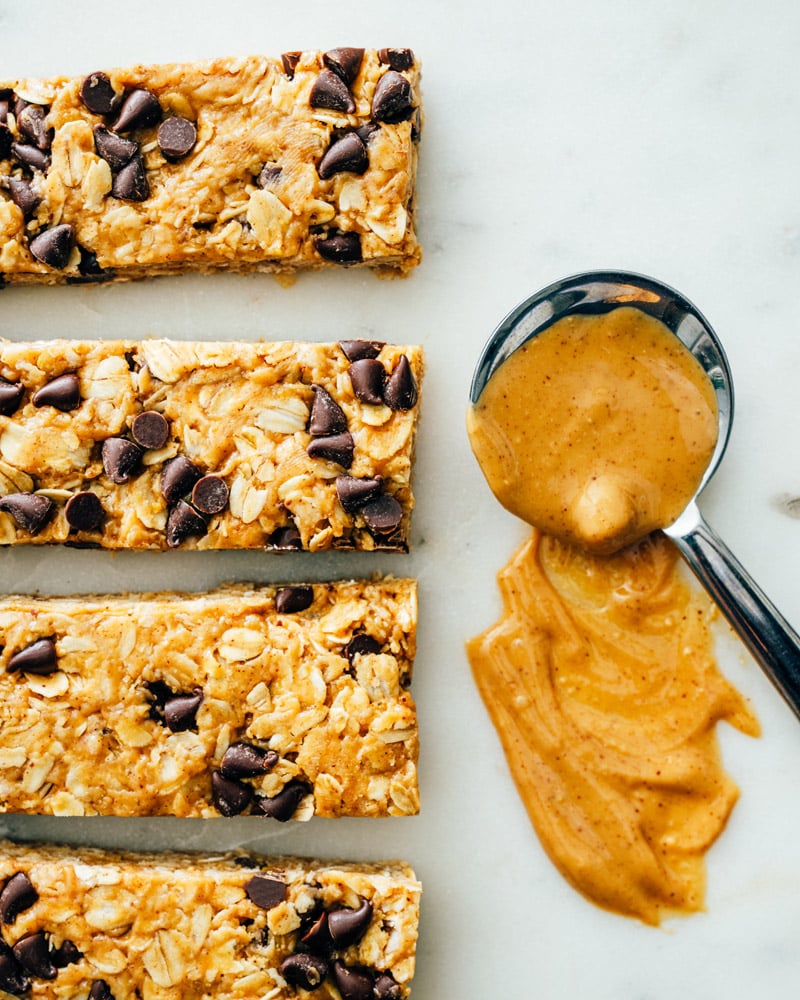
Peanut Butter Granola Bars

These peanut butter granola bars have the best nutty sweet flavor! They’re the perfect homemade snack for PB lovers.

Peanut Butter Granola Bars

Love peanut butter? Here’s the ultimate snack for PB lovers: Peanut Butter Granola Bars! Storebought granola bars are convenient, yes. But they taste sugary sweet and one note, with a a slightly artificial aftertaste. The flavor difference versus a homemade granola bar? It’s transcendental: honey sweet, nutty, nuanced with a hint cinnamon and a pop of rich chocolate. We think you’ll agree: these are amazing. Make up a batch and eat off of them for treats and healthy snacks all week long.

What you need for peanut butter granola bars

You do not, in fact, need granola in order to make granola bars. (Who knew!) No, these bars are no bake bars using oats and peanut butter. Here are the ingredients you’ll need:

  • Creamy peanut butter: no sugar added is best here. A very creamy brand is best (some brands can be drier than others). Make sure to stir your PB well before making the bars.
  • Honey: want vegan granola bars? Use agave syrup here.
  • Old Fashioned rolled oats
  • Cinnamon
  • Salt
  • Mini chocolate chips: make sure they’re mini! Standard chocolate chips don’t work well because they’re too large to integrate into the texture of the bar.
Peanut Butter Granola Bars

Toast the oats for maximum flavor

These peanut butter granola bars are no bake: but they do involve a quick 10-minute toast in the oven for the oats. It might be tempting to skip this step (and you can if you’re in a rush). But here’s why it’s ideal for this recipe:

  • Toasting the oats adds major nutty, irresistible flavor. It’s absolutely worth the extra minutes for the payoff in flavor.
  • You’ll need just 10 minutes at 350 degrees. It’s quick and simple, and easiest in the oven because it lets you place all the oats in a single layer in a pan.

Chill a few hours for best results

Once you mix together the dough for this peanut butter granola bars recipe, you’ll freeze it for 10 minutes to solidly. Then, you can cut it into bars. Right away, the texture will be very chewy. If you can, refrigerate the bars for 2 hours before eating! This helps the texture to firm up. Technically you can eat them right away, but chilling them makes them more solid.

Peanut Butter Granola Bars

Storage info for peanut butter granola bars

These homemade peanut butter granola bars are different from the store-bought variety: so they’re not shelf-stable! Store homemade granola bars refrigerated for up to 3 weeks in a sealed container. You can still include them in lunch boxes that aren’t refrigerated during the day: they’ll be a bit softer but will still hold together.

Want to transport them individually wrapped? You can wrap in parchment paper and secure with tape, or use the storage container of your choice.

More peanut butter recipes

And that’s it! These peanut butter granola bars are the ideal healthy snack or treat to whip up and keep in your fridge for munching all week. Want more ways to use PB? Here are some of our favorite peanut butter recipes for using up a jar:

This peanut butter granola bars recipe is…

Vegetarian, dairy-free, plant-based and gluten-free. For vegan, use agave syrup.

Print
Peanut Butter Granola Bars

Peanut Butter Granola Bars


  • Author: Sonja Overhiser
  • Prep Time: 15 minutes
  • Cook Time: 10 minutes
  • Total Time: 25 minutes
  • Yield: 14 to 20

Ingredients

  • 1 cup creamy peanut butter (no sugar added)
  • ½ cup honey (or ½ cup agave syrup for vegan)
  • 3 ½ cups Old Fashioned rolled oats
  • ½ teaspoon kosher salt
  • ½ teaspoon cinnamon
  • ½ cup mini chocolate chips, divided

Instructions

  1. Toast the oats: Preheat the oven to 350 degrees Fahrenheit. Place the oats in a single layer on a baking sheet and toast them for 10 minutes until lightly golden. (This step adds incredible toasty flavor to the oats: don’t skip it!)
  2. Mix the ingredients: Transfer the oats to a large bowl and mix in the peanut butter, honey, oats, salt and cinnamon in a bowl. Stir in ¼ cup of the chocolate chips.
  3. Form into bars: Add a sheet of parchment paper to a 9″ x 9″ pan, letting the edges drape over the sides. Place the mixture into the pan and press it into an even layer. Add the remaining ¼ cup chocolate chips to the top of the bars. Use a small glass to roll over the top to make them as smooth as possible.
  4. Freeze and cut the bars: Freeze the bars for 10 minutes. Then remove the pan from the freezer and use the parchment to lift the bars out of the pan. Use a sharp knife to cut them into 14 bar sized shapes (that are 4 ½ by 1 ¼ inches), or the size of your choice. Store in the refrigerator for up to 3 weeks. The texture becomes solid after refrigerating for 2 hours, so if you have time do that before tasting the first bar. 
  • Category: Snack
  • Method: No Cook
  • Cuisine: Snack
  • Diet: Vegetarian

Keywords: Peanut butter granola bars

A Couple Cooks - Recipes worth repeating.


from A Couple Cooks https://ift.tt/NxcjT1V

Strawberry Bread

This strawberry bread recipe is moist and sweet, starring everyone’s favorite berry! Drizzle with lemon icing for a festive treat.

Strawberry Bread

Here’s a festive treat that’s nearly impossible for anyone to resist: Strawberry Bread! This sweet quick bread is sweet and moist, studded with ripe red berries and scented with vanilla. Each bite will have you coming back for more! It’s fantastic as is, but drizzle it with a quick lemon icing to finish with a pop of zingy sweet. Needless to say, this one disappears very quickly in our house! It’s great for spring or summer parties, brunch, or a fun weekend baking project.

Ingredients in strawberry bread

This strawberry bread recipe is a standard quick bread: a bread that’s made without yeast. It’s similar to a banana bread or pumpkin bread, but it’s simply made with flour, sugar and baking powder as the leavener. Add to that chopped ripe strawberries, and you’ve got one killer bread. Here’s what you’ll need:

  • All-purpose flour
  • Sugar
  • Baking powder and salt
  • Eggs
  • Milk
  • Vegetable oil
  • Lemon juice
  • Vanilla extract
  • Strawberries
Strawberry Bread

What people are saying

We asked a few people from our A Couple Cooks Instagram community to recipe test this strawberry bread for us before publishing it here. Not surprisingly, it got rave reviews! Here’s what our testers had to say:

  • “This strawberry bread is sooooo delicious. I love how flavorful and moist it is. I added the icing and it’s a must, in my opinion!” -Brooke
  • “It was so yummy!! My whole family loved it. My mom even took it into her office and everyone loved it there too! We thought it was really moist and yummy with the strawberries.” – Allie
Strawberry Bread

Tips for making strawberry bread

This strawberry bread recipe is quick and simple: but there are a few things to note before we get started. Here are a few tips:

  • Toss the chopped strawberries with flour so they don’t sink. Coating them in a bit of flour before folding into the batter makes sure they don’t sink to the bottom of the pan. Save out a bit for topping the bread to get a nice look to the top.
  • Don’t overmix the batter. Resist the urge to overmix, which can cause holes in the bread! Mix just until the streaks of dry ingredients are incorporated.
  • The bake time depends on your oven and size of your pan. Using an 8-inch pan will make a taller bread, but it will take slightly longer to bake. It should take about 70 minutes in a 9-inch pan and 75 minutes in an 8-inch pan, but this varies.

Add lemon glaze!

The best part of this strawberry bread recipe, in our opinion, is the lemon glaze! It takes just 2 minutes to whisk together powdered sugar and lemon juice. But it adds a world of difference: it gives a layer of zingy sweetness to each bite. Go to Lemon Glaze.

Lemon Glaze

Strawberry bread storage

How to store this homemade strawberry bread once you’ve baked up a loaf?

  • Strawberry bread lasts 3 to 4 days at room temperature wrapped in aluminum foil.
  • Store refrigerated for 10 days, making sure to bring the slice to room temperature before enjoying.
  • Freeze un-iced bread for up to 3 months. Slice it into pieces and wrap it in plastic wrap then a freezer-safe bag or container.

More strawberry recipes

Looking for more to do with this popular berry? Here are some of our top strawberry recipes:

Print
Strawberry Bread

Strawberry Bread


  • Author: Sonja Overhiser
  • Prep Time: 20 minutes
  • Cook Time: 1 hour 10 minutes
  • Total Time: 1 hour 30 minutes
  • Yield: 12 slices

Description

This strawberry bread recipe is moist and sweet, starring everyone’s favorite berry! Drizzle with lemon icing for a festive treat.


Ingredients

For the strawberry bread

  • 2 cups plus 1 tablespoon all-purpose flour, divided
  • 1 cup granulated sugar
  • 1 teaspoon baking powder
  • ½ teaspoon kosher salt
  • 2 eggs
  • ½ cup milk
  • ½ cup vegetable oil
  • 1 tablespoon lemon juice
  • 2 teaspoons vanilla extract
  • 1 ½ cups diced ripe strawberries (about 12 ounces)

For the lemon glaze

  • ½ cup powdered sugar
  • 1 tablespoon lemon juice

Instructions

  1. Preheat the oven to 350 degrees Fahrenheit. Grease an 8-inch or 9-inch loaf pan.
  2. In a medium bowl, mix the 2 cups flour, granulated sugar, baking powder, and kosher salt.
  3. In a separate bowl, whisk the eggs, milk, vegetable oil, lemon juice, and vanilla extract.
  4. Dice the strawberries into small pieces, then mix them with the remaining 1 tablespoon flour. Save out ¼ cup for topping the bread.
  5. Gradually add the dry ingredients into the wet ingredients, stirring with a spatula just enough until it comes together and there are no streaks of flour (try not to overmix). Fold in the strawberries, mixing until combined. Pour the batter into the prepared loaf pan, and top with the reserved strawberries.
  6. Bake 70 to 75 minutes, until the top springs back when touched and a toothpick inserted has only a few clinging crumbs. The exact timing will depend on your oven and the size of the pan.
  7. Cool the bread in the pan for 30 minutes. Then run a knife around the edge and invert the loaf onto a cooling rack. Allow to cool fully to room temperature (about 30 minutes to 1 hour). If desired, mix the powdered sugar and lemon juice in a small bowl until it comes together into a smooth icing. Use a fork to drizzle the top of the bread with the icing.
  8. Storage info: The bread lasts 3 to 4 days at room temperature wrapped in aluminum foil or refrigerated for 10 days (bring to room temperature before enjoying). You can also freeze un-iced bread for up to 3 months (slice it into pieces and wrap it in plastic wrap then a freezer-safe bag or container).
  • Category: Bread
  • Method: Baked
  • Cuisine: Bread
  • Diet: Vegetarian

Keywords: Strawberry bread, strawberry bread recipe

A Couple Cooks - Recipes worth repeating.


from A Couple Cooks https://ift.tt/bFqEk6w

Flourless Almond Cake

This naturally gluten-free almond cake is made with little more than almond flour, eggs, sugar and butter, with a splash of Grand Marnier to...