Seasoned Fries

These seasoned fries taste even better than a restaurant! Bake them until crispy with this magic seasoning blend and prepare to be amazed.

Seasoned fries

Did you know you can make the best fries of your life…homemade? Yes, we’re pretty confident that these seasoned fries will blow you away! Alex and I have been perfecting the art of homemade French fries for years. We’ve picked up some tips to to getting the very best fries possible in a home kitchen. Here’s the thing: they do take a bit of time! But if you have to work for your treat food, it makes it that much more special: right? These are baked in an oven until crispy and coated in the perfect seasoning blend. In fact, we think they’re the best seasoned fries you’ll have. Ready to become a French fries expert?

Ingredients for seasoned fries

First up: let’s talk French fry seasoning. We’ve tinkered with a whole lot of seasoning blends, and come up with this one. It brings out the best savory, salty flavor in your fries. Here’s what you’ll need:

  • Smoked paprika: This is the Spanish version of paprika that’s made with smoked peppers. It infuses a hint of smokiness into each bite. (There are lots of smoked paprika recipes to use up a jar.)
  • Old Bay: Old Bay is a seasoning blend from the American Northeast: it’s often used to season seafood and potatoes. It brings a savory, irresistible flavor to each bit. Look for Old Bay in the spices aisle in the grocery or buy it online. You can also make homemade Old Bay seasoning.
  • Garlic powder
  • Black pepper
  • Salt
Seasoned fries

How to cut seasoned fries: by hand

Once you’ve compiled your spices, you’ve got to cut the fries! You can cut seasoned fries two ways: by hand or with a French fry cutter. We make fries so often that we got a special cutter (below). But you can easily cut them by hand! Here’s our fast and easy method (or watch this video):

  • Slice off the ends of each potato, then slice off part of the side to make a base.
  • Place the potato half cut side down and cut off a 3/8-inch slice, then lay the slice on its side and cut it into several long 3/8-inch wide strips.
  • Repeat until all potatoes have been cut into fries!

Or, use a French fry cutter!

Here’s an option only if you think you’ll make fries a lot: a French fry cutter! Typically Alex and I don’t recommend one-use gadgets. But this one is so slick, we couldn’t resist. A French fry cutter cuts fries from a potato in 1 second! (Really.) It’s easy to use and pumps them out in a jiffy. The only downside: finding storage space for a one-use gadget. Here’s a link to the French fry cutter we use.

Seasoned fries with aioli
Fries are perfect with Pesto Aioli

Secret to the best seasoned fries: a 10-minute soak!

Here’s what you need to do to make the very best seasoned fries: soak them in cold water for 10 minutes. Now, some recipes call for soaking fries for up to 1 hour or more, or even boiling them first. But after lots of tests, we found you only need 10 minutes in cold water! Here’s why:

  • It makes the outside crispy and inside tender. There’s a notable difference when you soak before you bake.
  • You can soak while your oven preheats! Here’s the thing: you don’t lose any time because you can do it while the oven is preheating. Ideally you can cut, soak and season the fries before the oven is ready to go.

Bake them in the oven until perfectly crispy!

Here’s another nice thing about these seasoned fries: they’re baked, not fried! That makes them a healthy seasoned fries option (more on that, below). You’ll cook at high temperature (425 degrees) to get just the right golden exterior. There are only a few tricks to getting them perfectly crisp. Here’s what to know:

  • Space out the oven racks. Make sure your oven racks are evenly spaced for the most even cooking. You’ll also want to reverse the trays in the oven after you pull them out to flip.
  • Spread the fries in an even layer. Having air between each fry is very important to getting them crispy. If you overcrowd the tray, you’ll get soggy fries.
  • Bake 20 minutes, then flip and bake 10 minutes. Flip each fry individually to make sure it crisps up on both sides. This bake time is perfect for the 3/8-inch cut fry, but you may need to adjust based on how even you cut them and your specific oven.
Best seasoned fries

Are these healthy seasoned fries?

Well, we think so! These fries aren’t fried, so there’s less oil in the process. Here’s why we think these can be deemed a healthy version of seasoned fries:

  • You’ll just use potatoes, minimal olive oil and a bit of salt. These are all healthy, whole food ingredients. They’re basically roasted potatoes!
  • The serving size is moderate. The serving size is much less than a restaurant would serve, so that helps to keep the calories down.

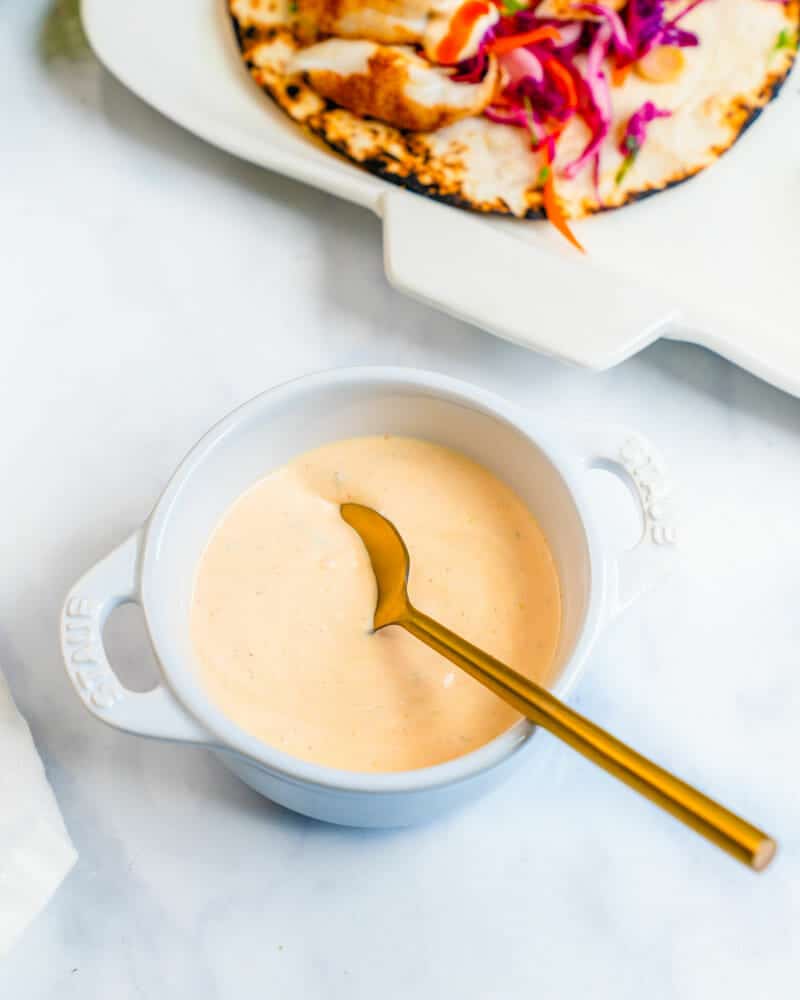
Dipping sauces for seasoned fries

Once your fries are done: let’s get to the dipping! There are so many great sauces to use for dipping these tasty fries. Here are some great options:

Seasoned fries

This seasoned fries recipe is…

Vegetarian, vegan, plant-based, dairy-free, and gluten-free.

Print
Seasoned fries

Perfect Seasoned Fries


1 Star2 Stars3 Stars4 Stars5 Stars (5 votes, average: 5.00 out of 5)

  • Author: Sonja Overhiser
  • Prep Time: 15 minutes
  • Cook Time: 30 minutes
  • Total Time: 45 minutes
  • Yield: 3 to 4
  • Diet: Vegan

Description

These seasoned fries taste even better than a restaurant! Bake them until crispy with this magic seasoning blend and prepare to be amazed.


Ingredients

  • 2 large russet potatoes (1 1/2  to 1 3/4 pounds)*
  • 2 tablespoons olive oil
  • 1/2 teaspoon smoked paprika
  • 1/2 teaspoon garlic powder
  • 1/2 teaspoon Old Bay seasoning (purchased or homemade)
  • 1/4 teaspoon ground black pepper
  • 1/2 teaspoon kosher salt

Instructions

  1. Preheat the oven to 425 degrees Fahrenheit. Evenly space the oven racks to ensure even cooking.
  2. Meanwhile, cut the potatoes into fries: (Watch this video or use a fry cutter.) Wash the potatoes, leaving the skins on. Slice off the ends of each potato, then slice off part of the side to make a base. Place the potato half cut side down and cut off a 3/8-inch slice, then lay the slice on its side and cut it into several long strips. Repeat until all potatoes have been cut into fries. The pieces can be uneven, but aim for as uniform of thickness as possible. See the video for full instructions!
  3. Soak in cold water (10 minutes): Place the cut fries into a medium bowl and rinse with cold water until water is clear. Then fill the bowl with cold water and allow to rest for 10 minutes (while the oven preheats). Then drain the potatoes and dry them thoroughly with a clean dish towel.
  4. Season the fries: Add the fries to a dry bowl and toss them with the olive oil, smoked paprika, garlic powder, Old Bay, black pepper, and kosher salt. Line two baking sheets with parchment paper. Spread the fries in straight lines on the paper, placing them as far apart as possible.
  5. Bake: Bake the fries for 20 minutes. Take them out of the oven and carefully flip each fry. Return to oven (reversing the pans on top and bottom racks). Bake additional 8 to 10 minutes until they are crisp and golden brown, watching carefully as the bake time depends on the fry thickness and your oven. (If the majority of the fries seem soft, continue to bake a few more minutes.)
  6. Taste and add a few more pinches salt if desired. Serve immediately for the best texture and flavor.

Notes

*This makes a good amount of fries, but much less than a restaurant portion (that’s as intended!). The largest quantity of fries that fits on two baking sheets is 2 pounds, you can increase to that much if desired (adjust seasonings accordingly).

  • Category: Side Dish
  • Method: Baked
  • Cuisine: American

Keywords: Seasoned fries

A Couple Cooks - Healthy, Whole Food, & Vegetarian Recipes


from A Couple Cooks https://ift.tt/2X80nwL

Fish Tacos

Here’s how to make the tastiest fish tacos around! Bake the fish with a dry rub of spices, then top it with tangy slaw and creamy sauce.

Fish tacos

Tacos are always a win over here, so might we introduce you to our new favorite? These baked fish tacos! We eat a mostly plant-based diet, with room for seafood occasionally (basically the Mediterranean diet). And my, are tacos the best treat! You’ll bake the white fish until it’s flaky with a dry rub of spices: no breading or frying necessary. Then top it with a quick and simple tangy slaw, and a creamy fish taco sauce. They’re delicious, easy to make and a total crowd pleaser that works for weeknights or dinner parties. Here’s what you need to know!

What fish to use for fish tacos

You can use any type of white fish for these healthy fish tacos! Here are some of the types of fish that are easiest to find and result in the best tacos:

  • Tilapia: has a great mild flavor and buttery texture
  • Cod: the flavor here is even milder! Cod is a very neutral-flavored fish and a great choice (it’s surprisingly tasty: also try grilled cod or pan fried cod)
  • Mahi mahi: if you can’t find the first two, mahi mahi also works: it has a richer, meatier flavor

Other great choices? Snapper, grouper or halibut. Above all, try to find wild caught fish if you can. It’s more sustainable and higher quality than farmed fish.

Fish taco seasoning

Ingredients in fish taco seasoning

What makes the flavor in these easy fish tacos? The dry rub for the fish taco seasoning! You can make up a big batch of this seasoning in advance and keep it around for taco time (it keeps for about 1 year). Or just mix up what you need day of, which is what we normally do.

Here’s the cool thing: you’ll use it as a dry rub on the fish. There’s no breading and no oil! Just pat the spices on and bake for about 10 minutes at 400 degrees Fahrenheit! The spices form a beautiful crust that’s full of zesty flavor. Here’s what’s in fish taco seasoning:

  • Chili powder
  • Cumin
  • Smoked paprika
  • Garlic powder
  • Onion powder

Smoked paprika is a Spanish version of paprika that infuses a hint of smokiness into each bite. If you can’t find it, use sweet paprika. If you buy a jar, use it up with these Best Smoked Paprika Recipes.

Fish taco seasoning

How to make the quickest taco slaw: tips!

One thing that’s essential for fish tacos: a slaw that’s actually fast to make. Many taco slaw recipes take longer than expected: they require lots of ingredients for the dressing or chopping lots of veggies. Not this one! We’ve pared it down to the essentials so that it takes only about 5 minutes to put together. Here are some tips:

  • Red cabbage, carrot, and green onion are all you need. This makes the quickest and easiest slaw: only a few veggies to slice.
  • Add lime and salt and you’re done! You don’t need to make a fancy dressing: tangy lime juice does the trick! Celery salt adds a nice nuance to the overall flavor. If you don’t have it, just use kosher salt!
  • Serve with a slotted spoon. This slaw picks up moisture as it sits. Serving it right away avoids this. If you let it sit for any amount of time, serve with a slotted spoon to avoid a watery taco.
Fish taco slaw

5 fish taco sauce ideas

Once you’ve made your baked fish and quick slaw, all you need is the sauce! There are lots of ideas of great sauces to use. Here are our favorite sauces for these quick fish tacos:

  1. Fish Taco Sauce This sauce makes fish tacos taste incredible! Lime, garlic and hot sauce are the ideal compliment for flaky fish.
  2. Cilantro Lime Crema You’ll want to bathe in this zesty cilantro lime crema! It’s made with sour cream, lime, cilantro and a few spices.
  3. Spicy Mayo Make the Mexican-style spin on this spicy mayo: it’s just 2 ingredients so you can whip it up in a flash. *Dairy free option
  4. Chipotle Sauce This easy sauce is zesty, smoky and creamy: perfect for tacos and burritos! *Dairy free option
  5. Shrimp Taco Sauce This one works on fish tacos too! It’s like a creamy ranch made with cilantro: quick and easy!
Fish taco sauce

Sides to serve with fish tacos!

Once you’ve made these epic fish tacos, you’ll need something to serve with them! For weeknight meals, we opt for fast and easy side dishes like canned refried beans. But for a dinner party, we’ll make more side dishes to complete the meal. Here are a few ideas of sides to go with tacos:

This fish tacos recipe is…

Gluten-free and pescatarian.

Print
Fish tacos

Epic Fish Tacos


1 Star2 Stars3 Stars4 Stars5 Stars (5 votes, average: 5.00 out of 5)

  • Author: Sonja Overhiser
  • Prep Time: 15 minutes
  • Cook Time: 10 minutes
  • Total Time: 25 minutes
  • Yield: 3 to 4 (8 tacos)
  • Diet: Gluten Free

Description

Here’s how to make the tastiest fish tacos around! Bake the fish with a dry rub of spices, then top it with tangy slaw and creamy sauce.


Ingredients

For the fish

  • 1 pound tilapia or cod* (wild caught preferable)
  • 1 tablespoon chili powder
  • 1 teaspoon each cumin and smoked paprika (or standard paprika)
  • 1/2 teaspoon each garlic powder and onion powder
  • 1 teaspoon kosher salt, for seasoning

For the tacos


Instructions

  1. Preheat the oven to 400 degrees Fahrenheit. Thaw the fish, if necessary.
  2. Make the fish: In a small bowl, mix together the dry rub: chili powder, cumin, smoked paprika, garlic powder, and onion powder. Pat the fish dry, then sprinkle it with 1 teaspoon kosher salt and pat it in. Add the seasoning and pat it to cover the fish. Place the fish on a parchment lined baking sheet. Bake for 10 minutes, until tender. Then broil for 2 minutes until the top is lightly browned.
  3. Make the slaw: Meanwhile, thinly slice the cabbage. Shred or grate the carrot (we used a handheld julienne peeler). Thinly slice the green onion. Place the cabbage, carrots and green onion in a bowl. Stir in the lime juice, salt and celery salt. Serve immediately with a slotted spoon. The slaw picks up moisture as it sits; if you plan to let it sit, make sure to serve with the slotted spoon to strain out the moisture.
  4. Make the sauce: Make the Fish Taco Sauce.
  5. Warm the tortillas: If desired, char the tortillas by placing them on an open gas flame on medium for a few seconds per side, flipping with tongs, until they are slightly blackened and warm. Or warm them according to How to Warm Tortillas.
  6. Assemble the tacos by topping the tortillas with fish, slaw, and sauce. Top with chopped cilantro and a spritz of lime. 

Notes

*If you’re serving 4 hungry eaters, you may want to increase the fish to 1.5 pounds and up the spice quantities accordingly. The slaw and sauce should work for 12 tacos. Or, make sure to serve with a filling side dish like refried beans (purchased or homemade).

  • Category: Main Dish
  • Method: Baked
  • Cuisine: Mexican

Keywords: Fish tacos, fish taco sauce, fish taco slaw

More tacos recipes

Tacos are one of the meals we eat the most around here! Here are a few more tacos recipes we have on regular rotation:

  • Crispy Avocado Tacos Destined to be your new favorite! With crunchy breading, they’ve got the vibe of a fish taco but are totally plant based.
  • Quick Shrimp Tacos A fast dinner recipe for weeknights or entertaining. They taste stunning drizzled in a creamy cilantro sauce!
  • Best Jackfruit Tacos In just 20 minutes jackfruit turns into a plant based version of pulled pork carnitas. These tacos will amaze you!

A Couple Cooks - Healthy, Whole Food, & Vegetarian Recipes


from A Couple Cooks https://ift.tt/2DdhaaG

Easy Cannellini Beans

Make cannellini beans into a tasty side dish with this easy recipe! It’s packed with Mediterranean flavor and plant-based protein.

Cannellini Beans

Here’s an easy recipe that all cooks should know: 5 minute cannellini beans! It’s a lifesaver for weeknight cooking, or the perfect solution for adding plant-based protein to a meal. You’ll be amazed at the flavor you can coax out of one can of beans in just a few minutes. Throw it together in a skillet with a few spices and it tastes like it’s been simmering all day. Here’s how to make a can of beans into a legit delicious healthy side dish (or dinner).

Ingredients for these easy cannellini beans

The magic of this cannelini beans recipe comes from infusing flavor into a can of beans. Of course, you can cook your own on the stovetop. (Follow the instructions in White Beans on Toast.) But this recipe is designed to be a quick and simple fix for weeknights: where you barely have to think. Here’s what you need for this recipe:

  • 1 can cannellini beans
  • Olive oil
  • Herbes de Provence or Italian seasoning (see below)
  • Chives
  • Salt & pepper
Cannellini Beans

Two great seasoning blends (purchased or homemade)

There are two different seasoning blends that perfectly compliment the buttery, creamy flavor of cannellini beans. One is used in French cuisine, and one in Italian. Both are easy to find at most grocery stores.

  • Herbes de Provence: This blend is a group of herbs that grow in the Provence region in France, like savory, marjoram, rosemary, lavender, and thyme. It adds a herby flavor with a subtle floral nuance that’s incredibly unique. If you can’t find it, use Italian seasoning or try homemade herbes de Provence.
  • Italian Seasoning: Italian seasoning has a similar vibe but it’s made with common Italian herbs. It’s a blend of oregano, basil, thyme, sage and rosemary. It’s easy to find at grocery stores, but you can also make homemade Italian seasoning.
How to make Cannellini Beans

How to make 5-minute cannellini beans

There’s really no technique required to this cannellini beans recipe: it’s all about the flavorings! Here’s what you’ll do:

  • Drain and rinse the canned beans. This is standard for using canned beans in recipes.
  • Heat the olive oil in a skillet.
  • Add the beans and seasonings, and cook about 2 minutes until heated. Fresh chives add big fresh flavor to this recipe and a beautiful bright green color. If you don’t have them on hand, use a pinch of onion powder.

Take one taste and you’ll be amazed by the amount of flavor that can be coaxed out of a simple can of beans and 5 minutes. Take this concept and use it when you’re hangry and need a healthy, protein packed snack or side dish.

Ways to serve this cannellini beans recipe

Another thing we love about this cannellini beans recipe is that it’s incredibly versatile. It works as a side dish, hearty snack or even a healthy plant-based dinner. Here are a few ways to serve it:

Easy cannellini beans recipe

What are cannellini beans, anyway?

Cannellini beans are an Italian white bean that’s oval shaped, with a creamy texture and mild flavor. They’re one of the easiest white beans to find canned at the grocery, along with Great Northern beans. What’s the difference between cannellini and Great Northern beans? Cannellini are larger, with a creamier color; Great Northern are smaller and whiter.

Not sure how to say cannellini? Say Can-a-leen-ee.

Why to eat more beans

Beans are one of the best foods you can eat: especially if you eat a vegetarian or vegan diet! They’re full of plant-based protein, very shelf stable, and easy to make in delicious recipes. And…there are lots more reasons! Here’s why to eat more beans (per the bean cookbook Cool Beans that we reviewed here):

  • They’re the cheapest source of protein in the world. They’re the only food that’s both categorized as a protein and vegetable by the USDA.
  • They’ve may help you live longer: the list of health benefits if beans is long: they’re nutrient-dense, rich in cancer fighting antioxidants and hearty-healthy fiber. Guess the common element in Blue Zone diet countries where people live the longest in the world? They all eat 1 cup of beans per day.
  • They’re planet-friendly. Beans may be key to feeding the Earth’s growing population: they take less of a toll on the climate than animal proteins.
Cannellini Beans

This recipe is…

Vegetarian, vegan, plant-based, dairy-free and gluten-free.

Print
Cannellini Beans

Easy Cannellini Beans


1 Star2 Stars3 Stars4 Stars5 Stars (5 votes, average: 5.00 out of 5)

  • Author: Sonja Overhiser
  • Prep Time: 3 minutes
  • Cook Time: 2 minutes
  • Total Time: 5 minutes
  • Yield: 3 to 4 as a side
  • Diet: Vegan

Description

Make cannellini beans into a tasty side dish with this easy recipe! It’s packed with Mediterranean flavor and plant-based protein.


Ingredients


Instructions

  1. Drain and rinse the beans.
  2. Heat the olive oil over medium-low heat in a small skillet. Add the beans, Herbes de Provence or Italian seasoning, chives or onion powder, salt, and fresh ground pepper. Heat until just warm, about 2 minutes. 

Notes


  • Category: Side Dish
  • Method: Stovetop
  • Cuisine: Italian

Keywords: Cannellini beans, Cannellini beans recipe

More bean recipes

Beans are one of our favorite ingredients to use in recipes! Here are a few more ways to use beans in your home cooking:

  • Spanish Rice and Beans Brings big flavor to humble ingredients! It’s a tasty vegan and vegetarian main dish or easy side dish.
  • Homemade Refried Beans The texture and flavor are WAY better than canned: plus they’re healthier too (and plant based).
  • Black Beans and Rice This classic Latin-style side dish is perfect with tacos or as a lunch idea.

A Couple Cooks - Healthy, Whole Food, & Vegetarian Recipes


from A Couple Cooks https://ift.tt/2WY2bIz

Triple Lemon Layer Cake

Lemon lovers: this one’s for you! Layers of light and buttery lemon cake (the reverse-cream method produces a particularly cotton-soft textu...