Coconut Shrimp Curry

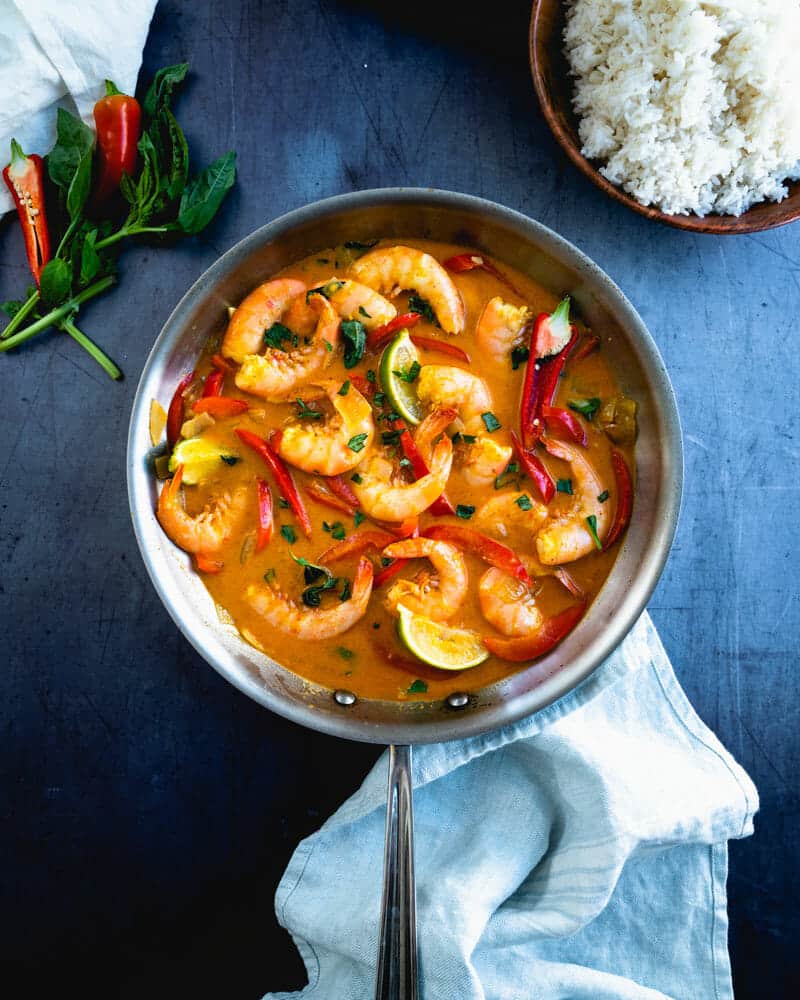
This easy shrimp curry tastes better than a restaurant in under 30 minutes! It’s a Thai red curry flavored with coconut milk and curry paste.

Shrimp curry

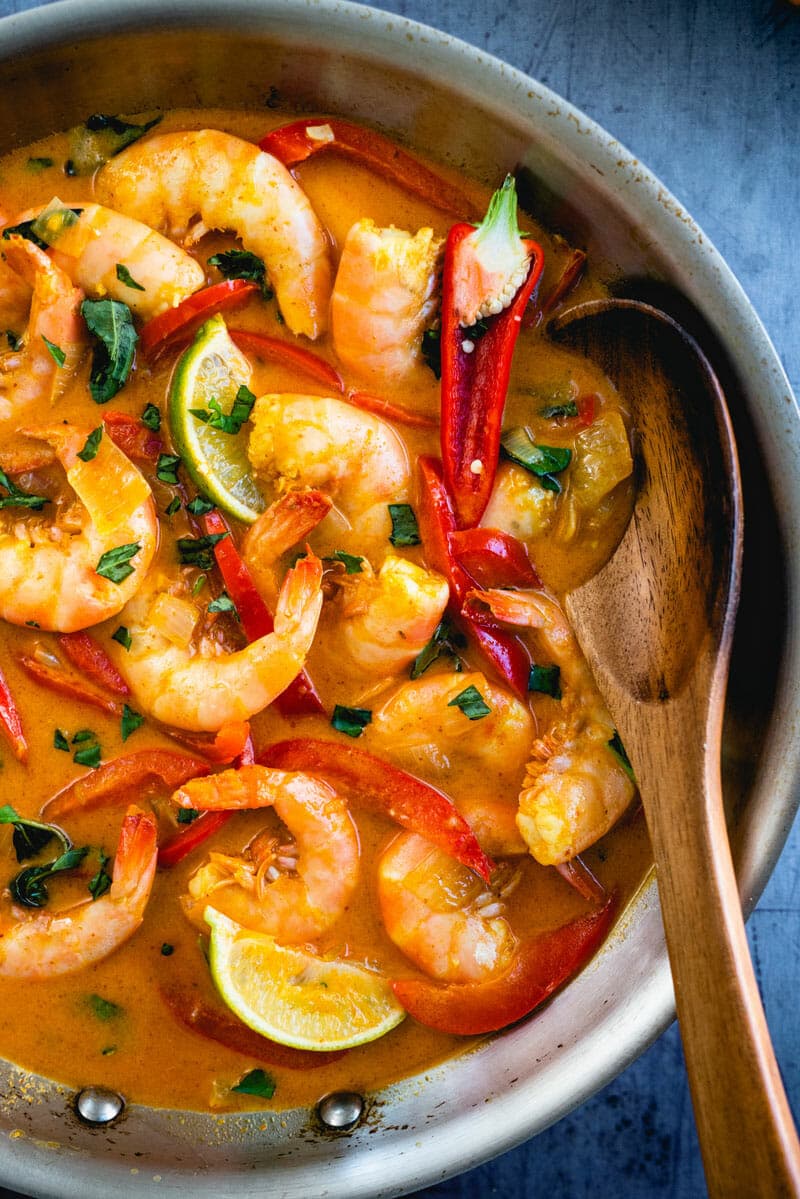
This one left us speechless. Really! Because this shrimp curry tastes better than a restaurant, but it’s a quick and easy dinner you can make at home. There is so much flavor going on here: rich coconut milk, aromatic curry paste, tangy lime and peppery basil surrounding tender, juicy shrimp. Serve it over jasmine rice and your friends and family will be singing your praises. This one is a keeper and even better: it’s a healthy dinner in less than 30 minutes. There are a few secrets to making this Thai red curry: here’s what to do!

Keys to making shrimp curry

It’s so easy to make a shrimp curry! To make it taste like a Thai red curry you’d get at a restaurant, here are some tips on the most important ingredients in this easy dinner recipe:

  • Thai red curry paste: It’s a paste made of chiles and aromatics like garlic, ginger, and lemongrass and absolutely essential to the flavor! It’s not too spicy and only adds a gentle heat. See below for more.
  • Large shrimp: Using shell on shrimp is nice because they come out even more flavorful and juicier; or use tail on shrimp if desired.
  • Full fat coconut milk: Use only full fat coconut milk here: it’s gets that essential creaminess to the broth.
  • Fish sauce: It might sound odd if you’ve never cooked Southeast Asian style cuisine, but it’s absolutely essential to adding that authentic flavor in Thai and Cambodian food.
  • Basil or Thai basil: If you can find it, Thai basil is most authentic and has a subtle licorice flavor. If not, whatever fresh basil you can find works!
Shrimp curry

What is Thai red curry?

Alex and I spent time in Cambodia together years ago, and the flavors of this shrimp curry instantly brought us back to Southeast Asia! Cambodian cuisine features curries very similar to Thai red curry.

What is it? Thai red curry is a Thai dish with a sauce made with red curry paste and coconut milk. It can be made with different proteins like chicken, beef, shrimp, or tofu. Then what’s red curry paste? If it’s not part of your cooking repertoire, you’ve got to add it: stat.

Thai red curry with shrimp

The secret: red curry paste

Red curry paste is a jarred paste that makes it easy to make a Thai red curry. It has all the flavors you’d find in the broth, without needing to buy them separately: chili peppers, garlic, lemongrass, ginger, kaffir lime leaves, cumin, coriander, and more. Alex and I use it in all sorts of dishes and it has the best flavor. We highly recommend adding it to your fridge! A few notes on red curry paste:

Do I really need fish sauce?

To many home cooks in North America, fish sauce might sound odd or scary. But here’s the thing: it’s the secret to many Southeast Asian recipes! When Alex and I visited Cambodia, they put fish sauce in just about everything. Why? It adds an incredible depth and savory umami flavor to everything from broths and salads.

Fish sauce is made from fermented fish. Yep, not the biggest selling point! But you can think of it more like a Southeast Asian-style soy sauce. When you add it to the broth in this shrimp curry, it adds a noticeable authentic Thai flavor. Don’t leave it out!
Shrimp curry

Use shell on shrimp for big flavor.

The best shrimp for shrimp curry is shell on or tail on shrimp: mostly because it looks the prettiest! Shell on shrimp has the best flavor: both because it gets the juiciest when cooked in the shell, and because the shell adds a little flavor to the broth. But if the thought of peeling shrimp isn’t desirable (we get it!), tail on shrimp is great too. (Want more shrimp recipes? Here are 10 Healthy Shrimp Recipes.)

Best rice for shrimp curry? Jasmine.

The perfect pair for this shrimp curry is rice: but not just any rice. Jasmine rice! Jasmine rice is also called Thai fragrant rice: because of its beautiful popcorn-like nutty flavor. When Alex and I used it for this shrimp curry, it was the finishing touch that transported us back to Southeast Asia. Try our jasmine rice recipes: How to Cook Jasmine Rice and Instant Pot Jasmine Rice.

If you can’t find jasmine rice, basmati rice works too! Or any type of medium or long grain rice. You can use brown rice too (it has more nutrients), but here we wanted to be ultra-authentic and served it with sticky white rice.

Thai Shrimp Curry

More curry recipes

Love curry? We do too. Once you’ve made this shrimp curry, here are a few more to try! There are lots of types of curry from all over the world: most of the recipes on this site are Indian or Thai-style curries:

  • Easy Chickpea Curry One of our top recipes, this 20-minute chickpea curry is Indian style (made with curry powder, not paste).
  • Vegetable Curry This vegetable curry is the best way to eat your veggies! Cauliflower, bell pepper and chickpeas swim in a flavor-packed broth.
  • Coconut Lentil Curry This fast and easy dinner idea that’s healthy and full of flavor. It has similar flavors to this shrimp curry!

This shrimp curry recipe is…

Pescatarian, gluten-free and dairy-free.

Print
Shrimp curry

Coconut Shrimp Curry


1 Star2 Stars3 Stars4 Stars5 Stars (5 votes, average: 5.00 out of 5)

  • Author: Sonja Overhiser
  • Prep Time: 10 minutes
  • Cook Time: 15 minutes
  • Total Time: 25 minutes
  • Yield: 4
  • Diet: Gluten Free

Description

This easy shrimp curry tastes better than a restaurant in under 30 minutes! It’s a Thai red curry flavored with coconut milk and curry paste.


Ingredients

  • Jasmine rice (or basmati rice), for serving
  • 1 yellow onion
  • 2 garlic cloves
  • 1 red bell pepper
  • 2 tablespoons olive oil or coconut oil
  • 3 tablespoons Thai red curry paste
  • 15-ounce can full fat coconut milk
  • 1 teaspoon fish sauce
  • 1/4 teaspoon ground turmeric
  • Zest of 1 lime (plus lime wedges to garnish)
  • 1/2 cup water
  • 1 teaspoon kosher salt
  • 1 pound large shrimp, shell on or tail on (wild caught if possible)
  • 5 leaves fresh basil or Thai basil, plus more for garnish

Instructions

  1. Start the jasmine rice (or basmati rice).
  2. Mince the onion. Mince the garlic. Cut the pepper into thin strips.
  3. In a large skillet, pot or Dutch oven, heat the oil over medium heat. Add the onion and saute for 5 minutes, until translucent. Add the garlic & red pepper and saute for 1 minute. Stir in the curry paste and saute for 1 minute.
  4. Add coconut milk, fish sauce, turmeric, lime zest, water, and kosher salt and bring to a simmer. Once simmering, add the shrimp and cook about 4 to 5 minutes until the shrimp is tender and opaque, depending on the size of the shrimp. Stir in 5 large leaves basil.
  5. To serve, spoon the shrimp and sauce over rice. Garnish with additional chopped basil and lime wedges.

  • Category: Main Dish
  • Method: Stovetop
  • Cuisine: Thai

Keywords: Shrimp curry, Thai red curry, Thai shrimp curry, Coconut curry

A Couple Cooks - Healthy, Whole Food, & Vegetarian Recipes


from A Couple Cooks https://ift.tt/3dH7uTD

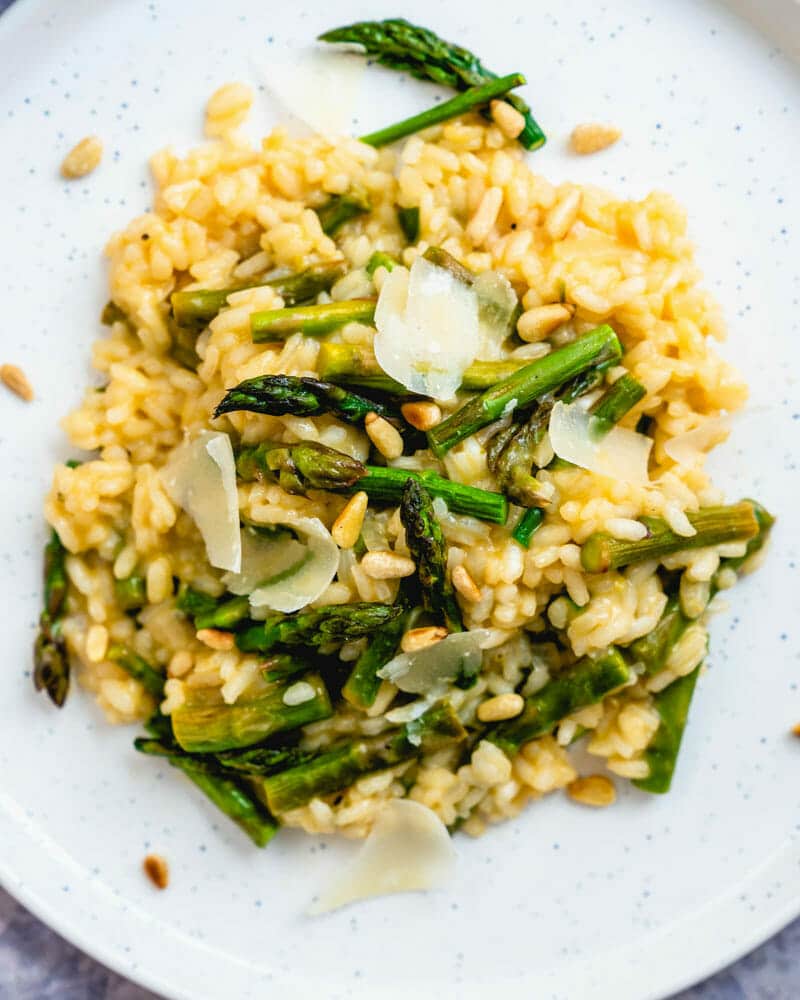
Asparagus Risotto

This flavor-packed asparagus risotto pairs creamy arborio rice with Parmesan and lemony roasted asparagus. A true crowd pleaser!

Asparagus risotto

Creamy, savory, crunchy, and zingy: this asparagus risotto is truly sublime. Otherwise known as, the best way to usher in spring! Alex and I are craving fresh flavors over here, and this fancy yet simple dinner is the perfect antidote. Roast up some asparagus with lemon at the same time that you’re stirring up a creamy risotto on the stovetop. Then throw the tender bright green asparagus into the risotto, right along with the lemon. You’ll wish the pot would never end (we certainly did!).

What’s in asparagus risotto?

You’ll need a handful of simple ingredients for this asparagus risotto. The flavors are crisp and pure. Here’s what you’ll need:

  • White arborio rice: a short-grain Italian rice used for making risotto
  • Asparagus
  • Broth and dry white wine: wine is essential to the nuanced flavor!
  • Lemon: fresh lemon pairs perfectly with asparagus
  • Parmesan cheese: brings just the right savory notes
  • Olive oil, butter, onion, garlic powder: For flavoring
  • Toasted pine nuts: step it up with this Italian-style garnish (here’s how to toast them)
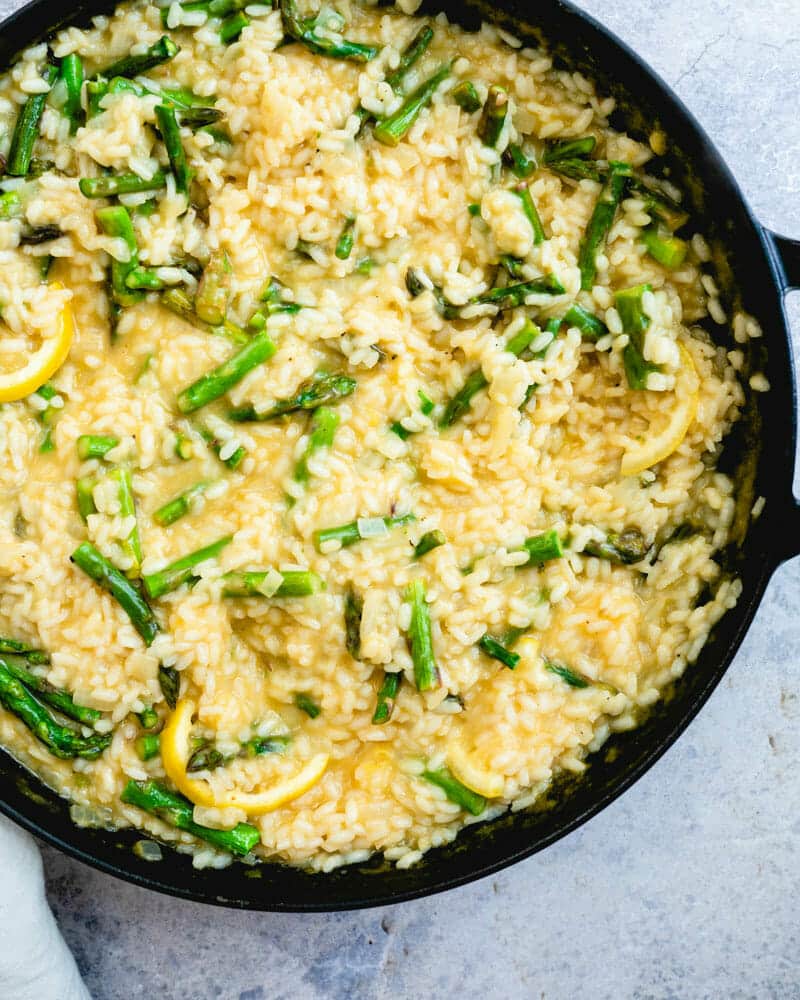
Asparagus risotto

The keys to making risotto

Making risotto is actually quite simple! It’s just a matter of slow cooking short grain rice with broth until it becomes extraordinarily creamy. When Alex and I first started cooking, I remember thinking that risotto was something that came out of a box marked “risotto”. Turns out, it’s just a special way to cook arborio rice.

  • Use arborio rice. Make sure to find short-grain white arborio rice for this recipe. You should be able to find it at most grocery stores. This variety of rice becomes plump
  • Heat the broth first. Start with warm broth (this recipe uses some water too, so you don’t have to buy more than 1 quart). This helps it to cook right into the warm rice without lowering the temperature of the food.
  • Add warm broth 2 ladles at a time and stir until integrated. That’s all you have to do! Once the broth cooks into the rice, add another two ladles.
  • Cook until creamy & al dente, then add Parm. Keep cooking this way until the rice is creamy but still a bit al dente (with a little bite in the center). It should take about 12 minutes. Then add the Parmesan cheese and stir vigorously for 2 minutes.
Asparagus risotto

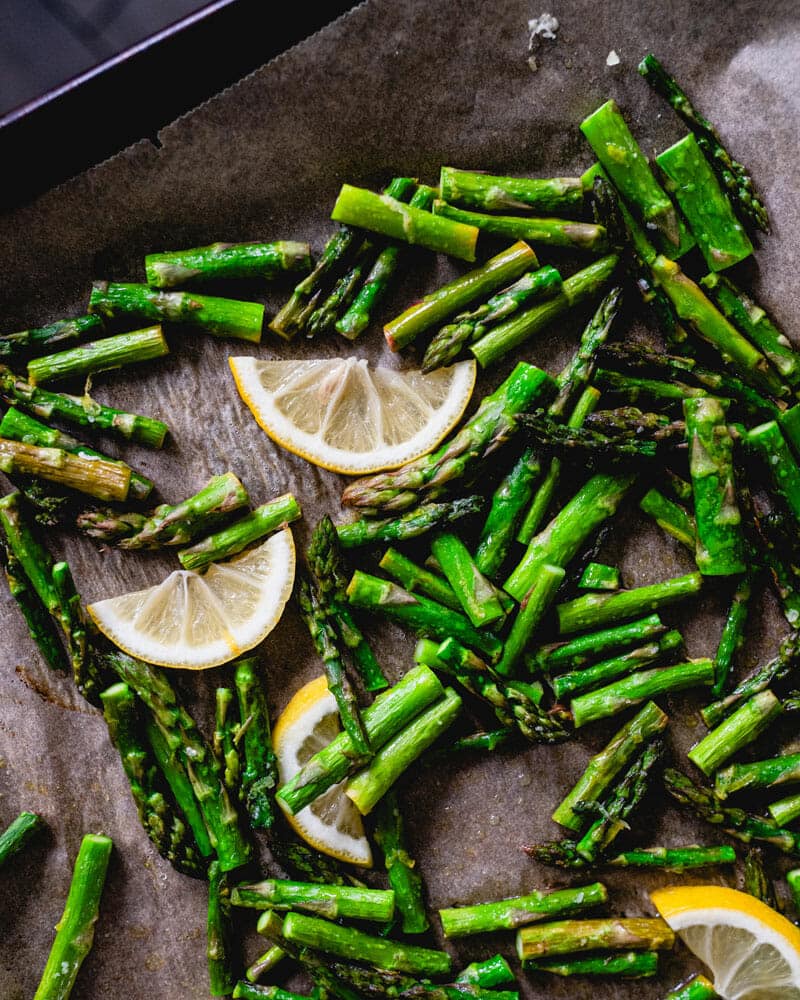
How to cook the asparagus: roast it!

While that risotto is bubbling, you’ll roast up a pan of asparagus until it’s tender. We love that this veggie adds fiber to the risotto, making it more filling and nutritious! How to cook asparagus? Use the concept from our Roasted Asparagus. It’s so easy: just about 10 minutes in a very hot oven makes it perfectly tender. Here are some tips on the asparagus side of this risotto:

  • Prep the pan and have it ready to go while making the risotto. You’ll prep everything and get your pan of asparagus ready, then start the risotto. Because…
  • Time it so the asparagus finishes just as the risotto does. When the asparagus comes out of the oven, it’s perfectly bright green and tender. You’ll want to catch it just at that point so it’s at its brightest color when you serve. Overcooking the asparagus makes it turn a drab green color.
  • Leftovers lose the color in the asparagus: but still taste good! The asparagus will fade to a yellow green color in leftovers. But they still taste wonderful: they’re just not showy for serving to guests.
Roasted asparagus

Why to make this asparagus risotto

This risotto is the absolute perfect spring recipe, filled with bright green fresh and tangy flavors! Of course, you can also serve it any season you can find good asparagus. A few recipe testers tried this recipe for us: here’s what they had to say!

  • “We made the asparagus risotto tonight and it was SO SO SO good! I was surprised at how much lemon flavor it had from roasting the lemons with the asparagus. We had to keep ourselves from eating the whole thing in one dinner!” -Connie
  • “It was so delicious. It was creamy and tangy and the asparagus was perfect!” -Karen
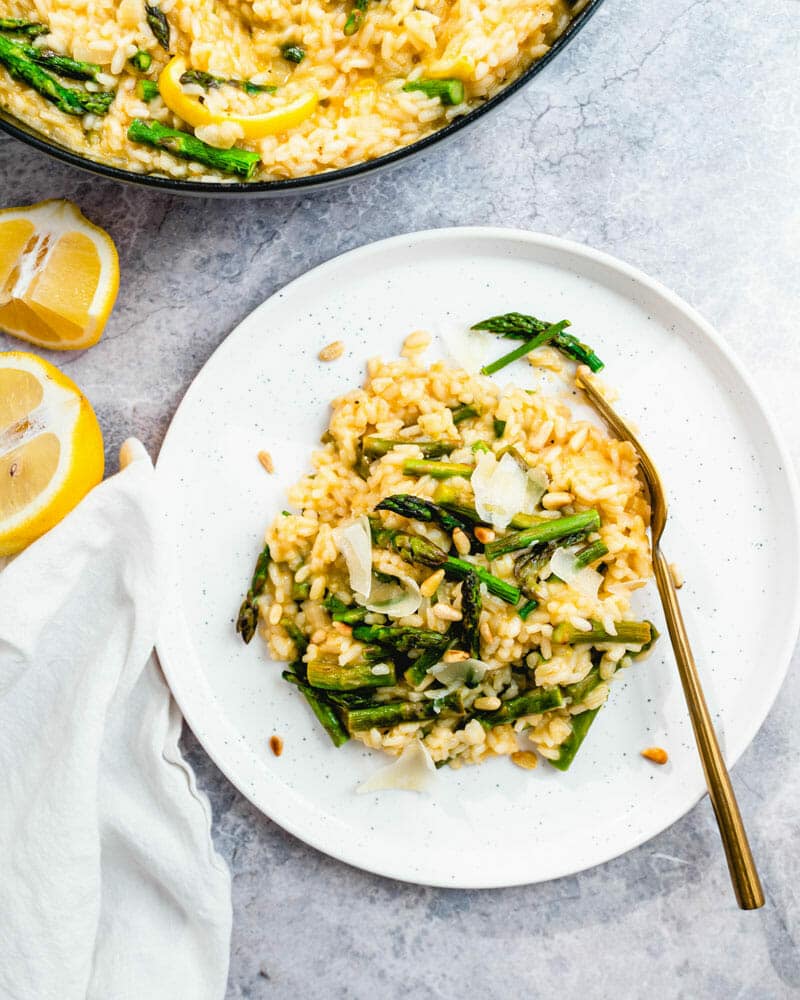
Best Asparagus risotto

What to serve with risotto

Sometimes it’s hard to decide how to make risotto into a full meal (Alex and I have been there)! Accessorizing with a salad makes for a healthy vegetarian dinner. Of course, it want to add crunchy, savory garlic bread we won’t judge! Here are a few ideas for what to serve with risotto:

  • Easy Arugula Salad Here’s the simplest salad you’ll ever make! This easy arugula salad is fool-proof: you don’t even need to make dressing.
  • Classic Garlic Bread It’s crunchy on top, chewy on the inside, and full of flavor: the perfect side to go with pasta or tomato soup.
  • Fennel Orange Salad A fancy and refreshing side dish! It pairs juicy orange and the subtle licorice essence of fennel with a citrus vinaigrette.

PS if you love risotto, make sure to try our Butternut Squash Risotto, Mushroom Risotto, Roasted Cauliflower Risotto and Parmesan Risotto.

This asparagus risotto recipe is…

Vegetarian and gluten-free.

Print
Asparagus risotto

Best Asparagus Risotto


1 Star2 Stars3 Stars4 Stars5 Stars (5 votes, average: 5.00 out of 5)

  • Author: Sonja Overhiser
  • Prep Time: 20 minutes
  • Cook Time: 15 minutes
  • Total Time: 35 minutes
  • Yield: 3 to 4
  • Diet: Vegetarian

Description

This flavor-packed asparagus risotto pairs creamy arborio rice with Parmesan and lemony roasted asparagus. A true crowd pleaser!


Ingredients

  • 1 quart vegetable broth
  • 1 quart water
  • 1 1/2 teaspoons kosher salt, divided
  • 1 pound asparagus
  • 3 tablespoons extra-virgin olive oil, divided
  • 1 lemon (Zest from half, plus 4 slices from the other half)
  • 2 tablespoons salted butter
  • 1/2 yellow onion
  • 1/4 teaspoon garlic powder
  • 2 cups white arborio rice
  • 1 cup dry white wine, such as Pinot Grigio or Chardonnay
  • 1 cup shredded Parmesan cheese
  • Freshly ground black pepper
  • Optional garnish: Toasted pine nuts

Instructions

  1. Preheat the oven to 425 degrees Fahrenheit.
  2. Heat the broth: Combine the broth, water, and 1 teaspoon kosher salt in a saucepan and place it over low heat. (You’ll use this warmed broth to stir into the risotto).
  3. Cut the vegetables: Mince the onion, then place it in a bowl and reserve. Cut off the tough bottom ends of the asparagus and then cut them into two-inch pieces.
  4. Prep the asparagus: Add the asparagus stalks to a parchment-lined baking sheet. Drizzle them with 1 tablespoon olive oil, then sprinkle on 1/2 teaspoon kosher salt and a few grinds of black pepper. Add the zest of 1/2 lemon and mix with your hands. Thinly slice 2 lemon wheels from the lemon, then cut each in half and add them right on the tray.
  5. Start the risotto: Heat 2 tablespoons olive oil and the 2 tablespoons butter in a large skillet over medium heat. Add the minced onion and cook for 4 to 5 minutes until tender. Add the garlic powder and rice and cook, stirring occasionally, about 2 minutes until the rice starts to turn light brown. Stir in the wine and cook until the liquid is fully absorbed.
  6. Roast the asparagus: Place the tray with the asparagus in the oven and 10 to 15 minutes, until bright green and tender when pierced by a fork at the thickest part. The timing will depend on the thickness of the asparagus spears. (You’ll remove it from the oven while you’re cooking the risotto in the next step.)
  7. Meanwhile, cook the risotto: Add two ladles of the hot broth to the risotto. Cook, stirring occasionally until the liquid is fully absorbed, then add two more ladles of both. Cook in this same manner for about 12 minutes, adding two ladles and stirring. After the 12 minutes, taste a grain of rice. If it’s creamy but still al dente in the center, you’re ready for the final step! If not, continue to cook and add broth for a few minutes more.
  8. Finish the risotto: When the rice is al dente, reduce the heat to low. Add two more ladles of broth, the Parmesan cheese and a few grinds of black pepper. Stir vigorously for 1 to 2 minutes until you’ve got a thick and creamy risotto. Then stir in the asparagus and roasted lemon wedges and serve immediately. Stores refrigerated in a sealed container for 3 days, though the color of the asparagus will fade (reheat before serving).

  • Category: Main Dish
  • Method: Stovetop
  • Cuisine: Italian

Keywords: Asparagus risotto

More asparagus recipes

Want more ways to use this healthy green stalk? Here are some asparagus recipes to add to your repertoire:

  • Asparagus Salad with Feta Bursting with flavor and totally versatile! It highlights sauteed asparagus with lemon, radishes, feta, and a Dijon dressing.
  • Shaved Asparagus Salad Ever tried asparagus raw? It tastes mild and sweet! Eat it as shaved asparagus salad, which pairs the ribbons with a tangy lemon vinaigrette and Parmesan.
  • Easy Baked Asparagus An easy side dish that’s a hit with everyone. The green stalks are roasted until tender, spritzed with lemon & topped with Parmesan.

A Couple Cooks - Healthy, Whole Food, & Vegetarian Recipes


from A Couple Cooks https://ift.tt/2vYtsR0

Whipped Almond Dip with Pickled Beets & Sourdough

Believe it or not, this creamy whipped almond dip is entirely vegan, and made with ingredients you already have in your pantry!

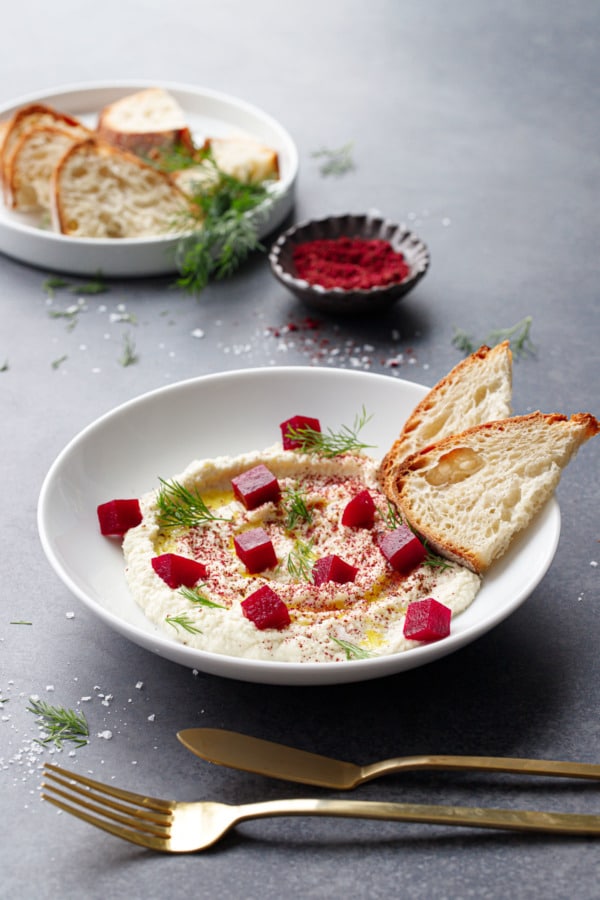
A perfect starter or light lunch, we served this whipped almond dip with pickled beets and slices of fresh sourdough bread (but feel free to treat it like you would hummus, paired with fresh vegetables, soft pita, or even crispy chickpeas).

White bowl with whipped almond dip, topped with pickled beets and two slices of fresh sourdough.

This recipe was inspired by a dish we had in Sydney, Australia this past fall. On our last night there, we randomly found ourselves in an adorable restaurant down the street from our apartment called Dead Ringer.

One dish on the menu that immediately grabbed our attention was an appetizer of creamed almonds with beets and housemade sourdough. I’m a sucker for anything with beets, and so we ordered it not really knowing what exactly ‘creamed almonds’ would be.

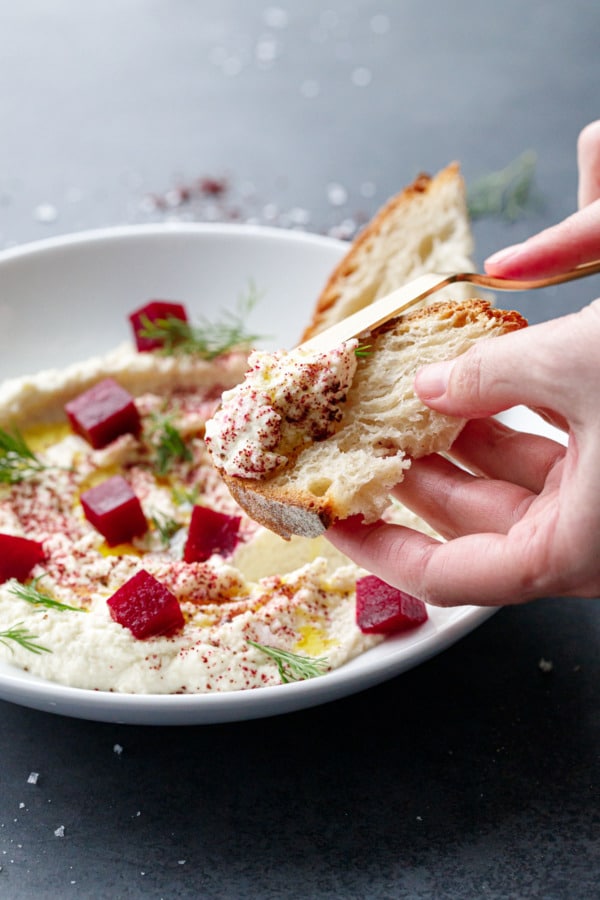
Spreading whipped almond dip on a slice of fresh sourdough bread

Turns out creamed almonds are downright magical. Somehow, without any cream or dairy whatsoever, the almonds whip up into a creamy, fluffy dip with a texture falling somewhere in between hummus and whipped ricotta. With little more than a splash of lemon juice, a glug of olive oil and a garlic clove, it’s surprising just how flavorful this dip is.

In an effort to recreate the original as closely as possible, we topped ours with a drizzle of olive oil, pickled beets, fresh dill and and homemade sourdough.

The pretty pink powder is actually a mix of beet powder and sumac, which gives the dip a tart lemony twist (the beet powder is mainly for looks, so feel free to leave it out, though I’d argue the sumac is not optional since it adds so much flavor).

We realized after the fact that we forgot the black sesame seeds, which would have added another level of visual interest. Next time! (because we will certainly be making this again!)

(more…)


from Love and Olive Oil https://ift.tt/2RbuyR1

Virgin Margarita

This virgin margarita tastes just as good as the real thing! This mocktail is tangy and lightly sweet, with a secret ingredient that takes it over the top.

Margarita mocktail

Craving a margarita but can’t drink? Or serving a crowd and need a non-alcoholic option? Enter this virgin margarita! It’s tangy and refreshing, punctuated by that classic salt rim. Even better, it’s got a surprise that brings a bit of “funk” to the flavor that’s reminiscent of tequila. With a focus on tart flavors and balanced with just enough sweet, it’s truly the mocktail version of our Classic Margarita! (Side benefit: it’s lower calorie too!) Here are all our secrets.

What’s in this virgin margarita?

Here’s how to make everyone’s favorite cocktail into a margarita mocktail! The margarita is a classic alcoholic drink on the list of International Bartender Association’s IBA official cocktails. This means that there’s an “official” definition of the margarita: tequila, Cointreau, and lime juice. But how to make that taste as intriguing…with no alcohol at all? (A zero-proof margarita, if you will?) Here’s what we used did:

  • Lime juice: Always.
  • Lemon juice: Using lemon as well as lime brings nuance to the citrus.
  • Tonic water: Bubbles add a sparkle!
  • Maple syrup or simple syrup: Just a drizzle balances the tartness.
  • Pickle juice: Yes, pickle juice adds that tequila “funk”! Keep reading for why…
Virgin margarita

The secret? Pickle juice.

The secret to making this virgin margarita taste over the top delicious? Pickle juice. Adding intrigue to the flavor of a mocktail is essential to making them more than just fruit juice. It’s customary to experiment with all sorts of things, including non-alcoholic spirits. But we didn’t want to add a special ingredient you’d have to purchase specially.

That’s where pickle juice comes in! It brings a briny funk to this virgin margarita that makes you feel like there’s a little alcohol in it. But it’s not so much that it’s noticeable! It’s also totally optional, so you don’t have to do it if it weirds you out. But after multiple taste tests, pickle juice in a virgin margarita was the clear winner!

Less sugar than the standard virgin margarita!

We love our cocktails crisp and tart around here. So just like our Classic Margarita, there’s barely any added sugar in this margarita. This stands out from the standard margarita mocktail, which is usually so sickly sweet it’s barely a margarita at all! This shouldn’t taste like sweet syrupy juice: it should be crisp and tart. The sugar comes from two sources:

  • Only 1/4 teaspoon maple syrup or simple syrup (use whichever you’d like: maple syrup is a great natural sweetener with no refined sugar)
  • A hint of sugar in the tonic water
Virgin margarita

What is tonic water? Can I use sparkling water?

Tonic water is a carbonated water that also contains quinine and is lightly sweetened. It was originally was used against malaria, but these days the quinine levels are much lower. Quinine adds a slightly bitter flavor, but its not as detectable with today’s lower levels. Even so, if you taste tonic water there’s something about the nuance of bitter and sweet which is hard to replace.

True cocktails and mocktails use tonic water, so we’d recommend finding some if you can! Sparkling water adds only bubbles, but doesn’t have the nuance in flavor. We buy a brand that comes in small cans, which is nice since you’ll only use a little in this virgin margarita.

Virgin margarita

More margarita variations

If you also drink alcohol (or have friends who do), we’ve got lots more variations on this classic drink! Here are some of our favorites:

Margarita mocktail

When to serve a virgin margarita

Anytime works for a virgin margarita! This one is perfect as a:

  • Zero proof margarita for guests who don’t drink alcohol
  • Mocktail for pregnant women
  • Baby shower drink (make one for mom, then classic margaritas for guests)
Print
Virgin margarita

Virgin Margarita


1 Star2 Stars3 Stars4 Stars5 Stars (1 votes, average: 5.00 out of 5)

  • Author: Sonja Overhiser
  • Prep Time: 5 minutes
  • Cook Time: 0 minutes
  • Total Time: 5 minutes
  • Yield: 1 drink
  • Diet: Vegan

Description

This virgin margarita tastes just as good as the real thing! This mocktail is tangy and lightly sweet, with a secret ingredient that takes it over the top.


Ingredients

  • 1 ounce (2 tablespoons) fresh lime juice
  • 1/2 ounce (1 tablespoon) fresh lemon juice
  • 1/4 teaspoon maple syrup or simple syrup
  • 1/8 teaspoon pickle juice (optional but recommended!)
  • 3 ounces tonic water
  • For the garnish: Lime wheel

Instructions

  1. Cut a notch in a lime wedge, then run the lime around the rim of a glass. Dip the edge of the rim into a plate of flaky sea salt (or for a festive look, use Margarita Salt).
  2. In the serving glass, stir together the lime juice, lemon juice, maple syrup, and pickle juice (adds just the right funky flavor to mimic tequila). Add the tonic water and ice. Garnish with a lime wheel and serve.

  • Category: Mocktail
  • Method: Stirred
  • Cuisine: Mexican

Keywords: Virgin Margarita, Margarita Mocktail, Zero Proof Margarita

A Couple Cooks - Healthy, Whole Food, & Vegetarian Recipes


from A Couple Cooks https://ift.tt/2xxbzJG

Chewy Chocolate Molasses Cookies

Chewy, chocolatey and perfectly spiced, these chocolate molasses cookies are the perfect addition to your holiday cookie boxes. With a deep ...